Meta Description: 8 Fast Budget DIY Home Upgrades You Can Finish in a Weekend — transform your space without breaking the bank using simple tools and creative ideas.
8 Home Upgrades You Can DIY Over a Weekend (and on the Cheap)
You don’t need to do a full renovation for your home to look and feel brand new.
Sometimes all you need is one free Saturday and a trip to the hardware store. Whether you own your first house or are renting and want to shake things up, weekend DIY projects can be a game changer. They are quick, inexpensive, and surprisingly satisfying.
The best part? You don’t have to be a contractor nor own pricey tools.
In this guide, we take you through 8 speedy DIY home upgrades on a budget that you can actually complete over the weekend. Each is geared toward making your home pop without emptying your wallet. We’re talking real upgrades — not just moving around furniture.
Let’s get into it.
The Value of Weekend DIY Projects
Before we get to the list, let’s discuss why this method is so sensible.
Home improvement expenses have soared over the past few years. You will pay hundreds of dollars even for a small job if you hire a contractor. But much of what professionals charge for is labor — and labor you can do yourself.
Weekend projects are low-risk. If something doesn’t quite work out, you haven’t destroyed the entirety of your home. You can attempt, modify, and complete in two days or under.
Also, DIY improvements can add real value to your home. Before you do renovations that could affect resale — or the pleasure of your daily life — here are some small changes to consider in kitchens, baths, and curb appeal.
What You’ll Need Before You Start
Many of these projects require a few basic supplies. Getting them on hand before the weekend saves you extra trips to the store.
| Supply | Estimated Cost |
|---|---|
| Painter’s tape | $4–$8 |
| Paint roller + tray | $8–$15 |
| Caulk gun + caulk | $10–$20 |
| Sandpaper (various grits) | $5–$10 |
| Screwdriver set | $10–$20 |
| Drill (basic) | $30–$60 |
| Putty knife | $4–$8 |
| Cleaning supplies | $5–$15 |
You likely have several of these already. Total startup cost for a beginner toolkit? Around $40–$80 if you know where to shop.
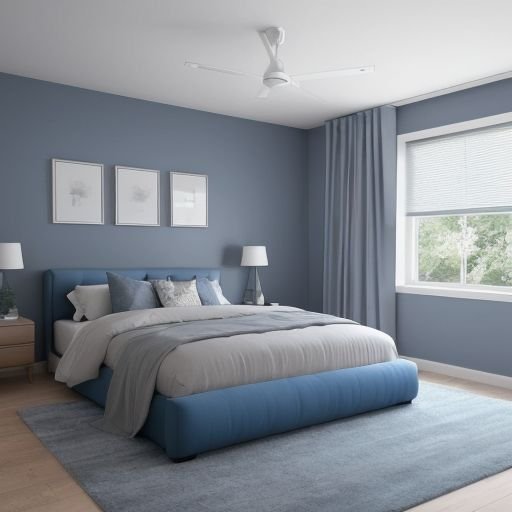
Upgrade #1: Paint a Wall an Accent Color
Time Needed: 4–6 hours | Cost Range: $25–$60
There’s nothing that transforms a room more quickly than paint.
An accent wall is one wall painted in a bright or contrasting colour. It adds visual interest, creates depth, and makes any room feel like it had a designer who planned things out. The best part is you only need one can of paint.
How to Pick the Right Wall
Pick the wall that you are most drawn to when you enter the room. Usually, this is the wall behind a sofa, bed, or fireplace.
Avoid walls with too many windows or outlets — it just makes the job messier.
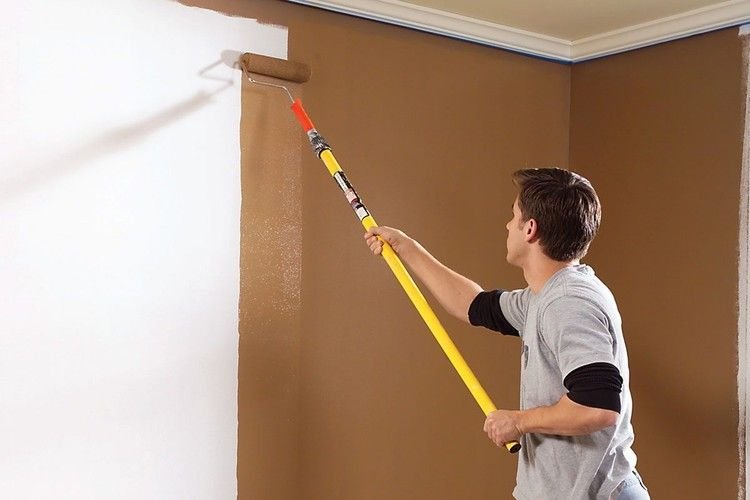
Step-by-Step Process
- Push furniture away from the wall
- Use a damp cloth to clean the wall
- Apply painter’s tape along edges, trim, and ceiling
- If changing to a darker colour, apply one coat of primer
- Roll on two coats of paint, allowing it to dry between coats
- Remove tape before the final coat completely dries (this prevents peeling)
Color Tips That Actually Work
- Navy blue + white trim — classically clean
- Terracotta + neutral tones — warm and cozy
- Sage green — trendy and calming
- Charcoal gray — sophisticated and contemporary
Don’t be afraid of color. One wall is a promise, not a panic.
Upgrade #2: Swap Out Kitchen or Bathroom Cabinet Hardware
Time: 1–3 hours | Cost: $20–$80
Those brass cabinet knobs from 1997 are quietly aging your entire kitchen.
Swapping hardware is one of the cheapest, quickest, and most dramatic upgrades on this list. New handles and knobs can also add some custom character to builder-grade kitchen cabinets.
What to Look For
Visit your local hardware store or browse online for:
- Brushed nickel — sleek, contemporary, complements nearly everything
- Matte black — bold and trendy
- Antique brass — warm, timeless aesthetic
- Satin gold — chic without being overly ostentatious
Before you purchase, measure the distance between those two screw holes on your current hardware. Standard sizes are 3 inches (76mm) or 3.75 inches (96mm).
The Install Process
Most knobs and pulls include screws. You just:
- Unscrew the old hardware
- Hold new hardware in place
- Tighten it from the inside of the cabinet door
That’s it. No special tools required other than a screwdriver.
Do 10–15 cabinets in a row, and the entire kitchen changes in an afternoon.
Upgrade #3: Apply Peel-and-Stick Backsplash Tiles
Time: 3–5 hours | Cost: $30–$100
Grout, tile saws, and professional installation used to be required for backsplash tiles. Not anymore.
Peel-and-stick backsplash tiles have totally changed the game. They look nice, go up quickly, and can usually be taken down without damage.
Where They Work Best
- Behind the kitchen sink or stove
- Behind a bathroom vanity
- On a laundry room wall
How to Install Them
- Wash the wall well — grease and dust inhibit adhesion
- Measure and mark where your tile layout will start (center it)
- Peel the backing and press firmly onto the wall
- Smooth out air bubbles with a credit card or squeegee
- Use scissors or a utility knife to cut tiles around outlets or edges
The end result resembles a genuine tile backsplash but at a fraction of the cost.
Best Brands to Check Out
| Brand | Style Options | Price Per Sheet |
|---|---|---|
| Smart Tiles | Mosaic, subway, stone | $8–$15 |
| Art3d | Geometric, marble | $6–$12 |
| Aspect | Metal, glass | $10–$18 |
Upgrade #4: Update Bathroom Grout and Caulk
Time: 2–4 hours + drying time | Cost: $15–$35
This one isn’t glamorous. But it’s also one of the most transformative upgrades on this list.
Dirty, stained, or cracked grout gives an entire bathroom a dirty appearance — even if it’s clean. New grout and caulk can make a five-year-old bathroom look newly renovated.
Signs You Need This Upgrade
- The grout lines appear more gray or black than white
- The caulk around the tub is peeling or has mold spots
- Tiles feel a bit loose around the floor
How to Regrout Without Removing Old Grout
You don’t always need to remove the old grout. For surface staining, start with a grout pen. It’s literally a marker that colors in discolored grout lines. Cost: around $8–$12.
For deeper issues:
- Use a grout saw to scrape out old, crumbling grout
- Make sure the area is clean and fully dry
- Prepare new grout (pre-mixed tubs are your best bet)
- Using a grout float, pack the grooves with grout
- Dab off excess with a damp sponge
- Allow 24–48 hours of curing before exposing it to water
Replacing Caulk Around the Tub
- Scrape away old caulk with a putty knife or utility knife
- Wipe the surface clean and allow to fully dry
- Place painter’s tape on either side of the seam
- Fill with new caulk in a clean, steady line
- Smooth it with a wet finger
- Remove tape and let it cure
Just this step alone can make a bathroom look brand new.
Upgrade #5: Add Crown Molding or Trim
Time: 3–6 hours | Cost: $30–$80
Crown molding was once a task for carpenters. Today, there’s foam or PVC peel-and-stick molding that looks shockingly realistic.
It provides architectural detail to otherwise plain rooms and makes ceilings feel higher. It’s the sort of upgrade that visitors notice without knowing exactly why the room feels more polished.
For more budget-friendly renovation ideas like these, Frugal Home Renovator is a fantastic resource worth bookmarking.
Types of Trim You Can DIY
- Crown molding — where the wall meets the ceiling
- Baseboard trim — junction between the wall and floor
- Chair rail — horizontal trim at the middle of a wall
- Picture frame molding — square frames on walls for a timeless touch
Installing Peel-and-Stick Foam Molding
- Measure your walls and cut pieces to size with a hand saw or miter box
- Clean the wall and ceiling surface
- Peel the backing and press down firmly
- Secure with nail gun or finish nails (optional)
- Caulk and sand seams smooth
- Paint over it — foam takes paint perfectly
When painted, it is very difficult to distinguish between foam and natural wood molding.
Upgrade #6: Change Your Lighting Fixtures
Time: 1–3 hours per fixture | Cost: $20–$150
Lighting is one of the most underrated upgrades for the home.
The wrong light fixture can cheapen the look of a room and flatten its dimension. The right one brings warmth, height, and personality. And swapping out a fixture is easier for most people than they think.
Where to Focus First
- Dining room — a pendant or chandelier makes a stunning visual statement
- Bathroom — vanity lighting makes a huge difference
- Entryway — a statement piece makes an impact right away
- Kitchen — under-cabinet lighting adds a functional yet stylish touch
How to Replace a Light Fixture (Safely)
Always switch off the power at the breaker before doing anything.
- Switch off the circuit breaker for that room
- Remove the old fixture and take a photo of the wiring before disconnecting
- Attach the wires of the new fixture: black to black, white to white, ground to ground
- Secure the fixture to the mounting bracket
- Restore power and test
If you’re not comfortable with wiring, this is one project where calling an electrician for a quick consult makes sense. But most standard fixture changes are DIY-friendly.
According to the U.S. Consumer Product Safety Commission, improper electrical work is one of the leading causes of house fires — so always turn off the breaker and double-check your connections before restoring power.
The Dimmer Switch Bonus Upgrade
While you’re at it, consider swapping out a regular switch for a dimmer switch. Cost: $10–$25. It brings instant atmosphere to any space.
Upgrade #7: Build a Floating Shelf (or Five)
Time: 2–4 hours | Cost: $15–$60 per shelf
Floating shelves are having a moment right now — and with good reason.
They provide storage, display space, and style without occupying floor area. A trio of floating shelves above a desk, couch, or toilet can completely change the look of a wall.
What You’ll Need
- Brackets for floating shelves (hidden or visible)
- A shelf board (store-bought or cut from a 1×8 or 1×10 board)
- A level
- Drill and wall anchors or studs
The Installation Process
- Use a stud finder to locate your wall studs (or do the knock test)
- Using a pencil and level, mark where your brackets are going to be placed
- Drill holes and insert wall anchors if you can’t find studs
- Screw brackets into the wall
- Attach the shelf board to the brackets
- Check level and adjust if needed
Pro tip: If possible, always mount into studs. For heavier items, use toggle bolts if you can’t hit a stud.
Shelf Styling Ideas
| Room | What to Display |
|---|---|
| Living room | Books, plants, candles |
| Kitchen | Spices, mugs, small baskets |
| Bathroom | Towels, soaps, greenery |
| Bedroom | Framed photos, lamps |
| Home office | Binders, succulents, awards |
Upgrade #8: Boost Your Curb Appeal in One Day
Time: Full day | Cost: $30–$150
First impressions matter. And your front door, porch, and landscaping are what anyone sees first.
The good news? Curb appeal upgrades are some of the quickest, least expensive, and most rewarding projects on this list.
Paint Your Front Door
This one change can instantly elevate the look of your property.
Bold front door colors that actually look good:
- Deep red
- Navy blue
- Forest green
- Bright yellow
- Classic black
Exterior paint designed for doors should be used. It’s sturdier and stands up to the weather. One quart is generally sufficient for two coats.
Add House Numbers
Old or faded house numbers look sloppy. New metal numbers cost $3–$8 each and take 20 minutes to install.
Update Your Mailbox
A rusty or ordinary mailbox can be easy to overlook — but guests pay attention. A clean, new mailbox costs $20–$50 and makes your entryway feel complete.
Plant Some Greenery
You don’t have to be a landscape architect. Try:
- Two matching potted plants flanking the front door
- A simple window box with flowers
- A freshly mulched layer in garden beds
Just fresh mulch alone can make landscaping look 10 times better. You can get a bag for around $4–$6 at any home improvement store.
Clean Your Driveway and Walkway
Rent a pressure washer for around $40–$60 for the day. Remove years of grime from your driveway, walkway, and porch. The transformation is genuinely shocking.
The Weekend Schedule: How to Pack It All In
You don’t have to do all 8 projects in one weekend. But if you want to, here’s a sample plan:
| Time | Saturday | Sunday |
|---|---|---|
| Morning | Paint accent wall | Pressure wash exterior |
| Midday | Swap cabinet hardware | Plant greenery + update mailbox |
| Afternoon | Install backsplash tile | Floating shelves |
| Evening | Grout/caulk bathroom | Lighting fixture swap |
Select 2–3 projects for a relaxed weekend, or go all-in if you’re feeling ambitious.
How Much Will You Really Save?
Here’s a rough breakdown of DIY versus hiring a pro for each project:
| Project | Professional Cost | DIY Cost | You Save |
|---|---|---|---|
| Accent wall painting | $200–$400 | $25–$60 | $150–$350 |
| Cabinet hardware | $100–$200 (labor) | $20–$80 | $80–$180 |
| Peel-and-stick backsplash | $300–$600 | $30–$100 | $250–$500 |
| Grout and caulk refresh | $150–$300 | $15–$35 | $130–$265 |
| Crown molding install | $400–$800 | $30–$80 | $350–$720 |
| Light fixture swap | $100–$250 | $20–$150 | $80–$230 |
| Floating shelves | $100–$300 | $15–$60 | $85–$240 |
| Curb appeal bundle | $500–$1,500 | $30–$150 | $400–$1,200 |
Total potential savings: $1,500–$3,700+
That’s actual money — all for a few weekends of your time.
Common Questions About Affordable DIY Home Improvements
Q: Do I need any prior experience to do these projects?
No. All 8 upgrades here are easy to execute and affordable. The most technical of those is replacing a light fixture, and even that can be picked up in minutes with a video tutorial.
Q: Will these upgrades increase the value of my home?
Yes, particularly curb appeal enhancements, fresh coats of paint, and updated kitchens and bathrooms. These are places buyers always notice first.
Q: Can renters do any of these projects?
Several of them — yes. A peel-and-stick backsplash, floating shelves (with proper patching when you move out), new cabinet hardware, and curb appeal updates are all potential improvements for renters. Always check your lease first.
Q: What’s the single most effective project you could do?
Paint an accent wall or freshen up the grout and caulk in the bathroom. Both are inexpensive, swift, and give the most striking visual change for the smallest amount of work.
Q: How do I tell if a wall can support floating shelves?
Use a stud finder to find wall studs. Shelves mounted into studs can hold 50+ pounds. If you’re using only drywall anchors, keep shelves lightweight — below 20 pounds.
Q: What if I make a mistake?
Most DIY blunders are reversible. Paint over it, caulk it, fill it with putty, or start again. On these projects, the worst-case scenario is usually a few more dollars and a couple of hours.
Wrapping It Up
There’s no need for a grand budget or oodles of time to turn your home into an entirely different place.
These 8 speedy budget DIY home upgrades are made for real people with real weekends — not bottomless wallets or contractor-caliber skills. All of them are accessible, inexpensive, and actually work.
Begin with whichever project excites you most. Finish one, and you’ll want to do another.
Soon enough, your home will feel fresh, customized, and exactly to your liking — all without shelling out a fortune or waiting months for someone to show up with tools.
Grab your tools. This weekend is the perfect time to start.