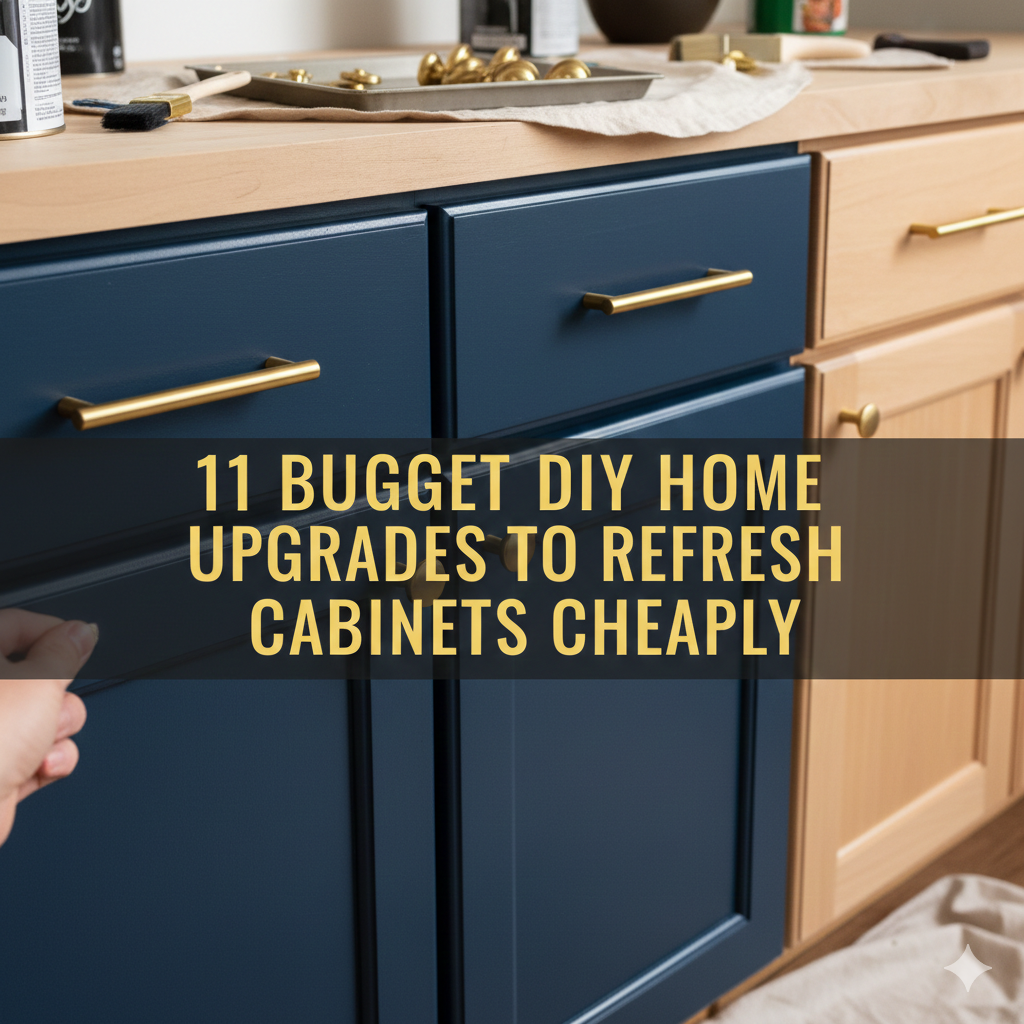
That Saves You Thousands — 11 Budget DIY Home Upgrades
Meta Description: These cheap DIY home improvements take little-to-no knowledge but will significantly boost your space. Here are 11 home projects that will both save you thousands of dollars and add value to your property.
Your home may be your largest investment. But maintaining its appearance and function doesn’t have to clean you out.
For most homeowners, upgrades require a contractor and a hefty check. That’s not always true. With the right tools, a little patience, and a few weekend days, you can complete projects that would otherwise cost thousands if a contractor did them.
In this guide, we walk you through 11 real budget DIY home upgrades that truly deliver. No fluff. No overly complicated instructions. Good, productive projects that save money and deliver real value.
Let’s get into it.
Why It’s Worth It to DIY Home Upgrades
First, a reality check on the numbers before we get into the list.
| Project | Pro Cost | DIY Cost | Savings |
|---|---|---|---|
| Painting interior rooms | $1,500–$3,000 | $200–$400 | Up to $2,600 |
| Installing a backsplash | $800–$1,500 | $150–$300 | Up to $1,200 |
| Replacing cabinet hardware | $300–$600 | $50–$120 | Up to $480 |
| Weatherstripping doors | $200–$400 | $30–$60 | Up to $370 |
The numbers speak for themselves. Even taking on just three or four of these projects yourself can save you more than $5,000.
1. Repainting: The Least Expensive Room Makeover
Nothing changes a room quicker than paint on the walls. It may be the most cost-effective budget DIY home improvement around.
A gallon of decent paint costs around $30–$50. One gallon approximately covers 400 square feet. A complete revamp for most average-sized rooms? Usually two gallons max.
Picking the Right Colors
Use light neutrals for living areas — soft whites, warm grays, and greige tones. These colors give the illusion of larger rooms and cater to future buyers if you ever put your home on the market.
For accent walls, go bold. Rich navy, forest green, or terracotta lend personality without overpowering a room.
The Right Way to Prep
Most DIY paint jobs look bad because of poor prep, not poor painting. Here’s what to do:
- Fill nail holes with spackle
- Sand rough spots smooth
- Tape edges along trim and ceilings
- When painting bare or dark walls, use a primer
Take your time prepping. The painting itself goes fast. The quality lives in the prep.
Tools You Actually Need
- 3/8-inch nap roller for smooth walls
- Angled brush to cut in corners
- Painter’s tape
- Drop cloth
Cost of tools and paint for one room: $80–$120.
2. Swap Out Cabinet Hardware For An Under-$100 Kitchen Upgrade
Your kitchen cabinets may be great — it’s just the knobs and pulls that are giving them a dated look.
Replacing hardware is one of the simplest budget DIY home upgrades there is. It’s doable in under two hours and only requires a screwdriver.
What Styles Work Best
Brushed nickel and matte black are popular right now, but they will also remain in style longer than faddish finishes like brass or chrome. Black cup pulls on lower cabinets work beautifully for a farmhouse look.
Step-by-Step Swap
- Unscrew old knobs or pulls with a screwdriver
- Match the hole spacing on your new hardware (most standard pulls are 3 inches or 3.75 inches on center)
- Screw in your new hardware
- Done
Use a small drill to make new holes if hole spacing isn’t correct. Fill in old ones with wood filler and touch up with matching paint.
Cost: $40–$100 for an entire kitchen set of hardware.
3. Weatherstripping: The Upgrade That Puts Money Back in Your Pocket Each Month
This one doesn’t look exciting. But this may be the smartest project on this whole list.
Drafty doors and windows let in lots of air. The Department of Energy estimates that air leaks can represent 25–30% of heating and cooling expense in an average home. Repairing those leaks is a real money-maker.
Where to Check First
Feel along the edges of exterior doors. Feel any air movement? That’s money leaving your house.
Move on to your windows, especially older single-pane ones. On a cold day, hold a candle near the frame. If the flame stutters, you have a leak.
How to Install Weatherstripping
- For door bottoms, use a door sweep — it screws to the inside bottom of the door.
- For door sides, use foam tape or V-strip (tension seal). Peel and stick to the door frame where the door meets the stop.
- V-strip works for windows too. Slide it into the channel where the window goes up and down.
Materials cost: $10–$30 per door. You can almost pay that back in one month’s utility bill in most climates.
4. Peel-and-Stick Backsplash: A Kitchen Update Without a Tile Saw
The traditional kind requires mortar and grout as well as a tile saw and pro-level skill. Peel-and-stick types don’t need any of that.
Modern peel-and-stick tiles are surprisingly realistic looking. These range from subway tile patterns and hexagon designs to marble-look finishes. The difference is hard to see from a few feet away.
What You Need
- Peel-and-stick tile panels ($5–$10 per square foot)
- Measuring tape
- Pencil
- Utility knife or scissors
Installation in Four Steps
- Make your wall surface spotless — no grease, no residue
- Cut your tiles to fit your backsplash area
- Remove the backing and press firmly against the wall
- Roll or use a credit card to push out air bubbles
Cost for a typical kitchen backsplash: $100–$250. A pro tile job for that area? Often $800–$1,500.
5. Ceiling Fan Installation: Comfort + Lower Energy Bills
Ceiling fans help keep your air conditioning system from working so hard. In summer, the wind-chill effect allows you to turn up the thermostat by around 4°F without feeling any warmer. That’s real savings on electricity.
Where a light fixture already exists, installing a ceiling fan is entirely doable as a DIY project. You don’t need to hire an electrician for this.
Before You Start
Shut off the power at the breaker. Always. No exceptions.
Determine whether your current ceiling box is rated for fans. Fans are heavy and they vibrate — a basic light box isn’t built for sustaining that weight. Fan-rated boxes are rated for 35+ pounds and clearly labeled.
Basic Installation Steps
- Remove the old light fixture
- Attach the ceiling fan mounting bracket to the box
- Put the fan motor on the bracket
- Join the wires: black to black, white to white, green or bare copper to ground
- Attach the blades
- If it comes with a light kit, install that
- Restore power and test
A good ceiling fan costs $50–$150. Professional installation adds $100–$200. DIY it and keep that difference in your pocket.
6. Landscaping and Curb Appeal: First Impressions = Real Money
Curb appeal isn’t just about looks. According to studies by the National Association of Realtors, landscaping improvements can yield a return on investment of 100% or more when selling a home.
And if you aren’t selling, an attractive front yard is just nicer to come home to every day.
High-Impact, Low-Cost Curb Appeal Moves
Mulch your beds. A nice layer of dark mulch (2–3 inches deep) makes each plant look purposeful and cared for. A bag runs $4–$6. A complete front bed redo with mulch could be $40–$80.
Edge your lawn. Edges along walkways and garden beds look clean, neat, and professional. About $20–$30 for a manual edger. No gas, no electricity needed.
Plant seasonal flowers. Marigolds, petunias, and impatiens are $2–$4 per plant and bloom for months. A few flats of color by your entrance instantly transform the look.
Paint your front door. A freshly painted front door in an eye-catching color — deep red, navy, black — can increase perceived home value. Price: one quart of exterior paint ($15–$25).
Quick ROI Snapshot
| Landscaping Task | Cost | Estimated Value Added |
|---|---|---|
| Mulching beds | $50–$80 | $200–$400 |
| Seasonal flowers | $30–$60 | $150–$300 |
| Front door paint | $20–$35 | $500–$1,500 |
| Lawn edging (tool) | $20 | $100–$300 |
7. Caulking: The 30-Minute Fix That Saves You Thousands
Old, cracked caulk around tubs, showers, sinks, and windows isn’t just unsightly. It provides little crevices for water to creep in. Water damage behind walls or underneath floors can run $5,000–$20,000 to fix.
Recaulking takes 30 minutes and costs about $5–$10 per tube.
How to Recaulk Like a Pro
- Use a utility knife or caulk-removal tool to remove all of the old caulk
- Clean the surface with rubbing alcohol, then wait for it to dry
- Apply painter’s tape on both sides of the gap for clean lines
- Cut the tip of the caulk tube at a 45-degree angle
- Squeeze a smooth, steady bead of caulk
- Use a wet finger to smooth out the bead in one motion
- Peel tape while the caulk is still wet
- Allow to cure for 24 hours, then avoid contact with water
Use 100% silicone caulk in wet areas (showers, tubs). Use paintable latex caulk around trim and baseboards.
8. Lighting Upgrades: Change Fixtures Without Rewiring Anything
Even nice rooms look cheap with old builder-grade light fixtures. Replacing them is an easy budget DIY home upgrade that packs a big visual punch.
It’s the same procedure as swapping out a ceiling fan — kill the power, take out the old fixture, match the wires, and attach the new one.
Where to Focus
Kitchen: Swap out a tired fluorescent fixture for a new flush-mount or semi-flush fixture. Cost: $40–$120.
Bathroom: Replace the bar light above the mirror. Warm LED bulbs create a spa-like feel in bathrooms. Cost: $30–$100.
Dining room: The right statement pendant or chandelier can change the whole vibe of the area. You can find gorgeous ones on Amazon or at thrift stores for $50–$200.
Switch to LED Bulbs Everywhere
While you’re at it, replace all the incandescent bulbs in your home with LED ones. LEDs consume approximately 75% less energy and last 25 times longer. A whole-house switch saves $200–$300 annually on electricity.
9. Interior Door Hardware: Little Detail, Big Impact
Walk around your house and look at all the interior door knobs. Are they tarnished? Wobbly? A style from 1994?
Replacing interior door knobs and hinges is a quick, inexpensive update that most people overlook.
A set of interior door knobs costs $15–$30 each. Matching hinges cost $3–$8 each. For an entire house, the price would be around $150–$300 — a small sum compared to what you’d pay a designer for the same visual improvement.
Pro Tip on Hinges
Old bronze hinges with new chrome knobs do not look good together. Choose a metal finish and stick to it. Matte black is very forgiving and matches with nearly every kind of interior style.
To paint hinges rather than replace them (an even cheaper option), take them out, scuff with sandpaper, and spray with a metal spray paint in your finish of choice. Price: $8 for a can that covers 20+ hinges.
10. Smart Thermostat Installation: A Gadget That Pays for Itself
A smart thermostat (like the Google Nest or Ecobee) learns your schedule and automatically adjusts temperatures. The EPA estimates smart thermostats save consumers an average of $50–$100 a year on energy costs.
Most units pay for themselves in one or two years, then continue saving money indefinitely.
Installing Is Easier Than You Think
Compatible wiring is already common in most homes. The process:
- Turn off the power to your HVAC system
- Label each wire on your old thermostat (take a photo first)
- Remove the old thermostat
- Mount the new thermostat base
- Attach wires to their respective terminals
- Snap in the new display
- Follow the app setup
Many smart thermostats come with color-coded instructions. For a first-timer, setup takes 30–45 minutes.
Cost: $100–$200 for the unit. Professional installation: $100–$150 extra. Do it yourself and save that.
11. Grout Cleaning and Recoloring: Restore Your Old Tile to New
Dirty grout gives even the best tile a worn-out, grimy appearance. Homeowners often assume that re-tiling is necessary. It’s not.
Grout cleaning and recoloring is a seriously underused budget DIY home upgrade. For more creative ways to stretch your renovation dollars, check out Frugal Home Renovator — a great resource packed with budget-friendly project ideas and tips.
Step One: Deep Clean First
Combine baking soda with hydrogen peroxide to create a paste. Apply to grout lines and scrub with a stiff brush. Let sit for 10 minutes. Rinse.
For really tough stains, an oxygenated cleaner (such as OxiClean) dissolved in hot water can be very effective.
Step Two: Recolor if Needed
Grout paint pens and grout colorants can be found at hardware stores for $8–$20. They seal and recolor the grout in one step.
Pick a shade one step darker than you want — it dries lighter.
This process can transform a bathroom from dingy to newly renovated. Cost: $10–$30. Professional re-tiling over the same area: $800–$2,500.
Which Project Should You Tackle First?
If you’re starting from scratch and have a limited budget, prioritize based on return and impact:
| Priority | Project | Why First |
|---|---|---|
| 1 | Weatherstripping & caulking | Prevent damage, save monthly |
| 2 | LED bulb swap | Instant energy savings |
| 3 | Smart thermostat | Pays back quickly |
| 4 | Paint | Biggest visual impact |
| 5 | Landscaping & curb appeal | Better value if selling |
| 6 | Lighting fixtures | Huge visual effect, great cost ratio |
| 7 | Cabinet hardware | Quick wins in kitchen/bath |
| 8 | Ceiling fan | Comfort and energy savings |
| 9 | Peel-and-stick backsplash | Kitchen refresh |
| 10 | Grout recolor | Bathroom revival |
| 11 | Interior door hardware | Finishing touch |
Budget DIY Home Upgrades: FAQs
Q: Do I need experience to do these projects? No. All the projects on this list are beginner to intermediate rated. All of them are doable if you follow instructions and work carefully.
Q: What equipment do I need to get started? Most of these projects just need a basic toolkit: screwdrivers (flat and Phillips), a hammer, a utility knife, a drill, measuring tape, and painter’s tape. Total investment for a starter kit: $50–$100.
Q: Can I actually expect my DIY upgrades to increase the value of my home? Yes — especially for things like paint, landscaping, kitchen updates, and lighting. Each of them is among the best-documented high-ROI improvements, according to real estate studies.
Q: How can I tell when to call a pro instead? If a project touches your main electrical panel, gas lines, structural walls, or plumbing behind walls — call a pro. The projects in this guide stay safely in DIY territory.
Q: How much time does each project take? Most take one to four hours. Painting an entire room takes a weekend. It takes 20 minutes to weatherstrip a door. Consolidate your weekends and knock the list down over a couple of months.
Q: What is the best project to start with as a total beginner? Start with LED bulbs. It’s the simplest, cheapest, and most gratifying upgrade on this list. Then move to weatherstripping and caulking.
Wrapping It All Up
Making budget DIY home upgrades is one of the smartest financial decisions you can make as a homeowner. You’re not only saving money on labor costs — you’re acquiring skills, improving your home, and adding real value to your property.
The 11 projects in this guide run from dead simple (bulb swaps, hardware replacement) to a little more involved (ceiling fans, smart thermostats). None require professional experience. And all of them are truly worth your time.
Start small. Finish one project. Feel that satisfaction. Then move to the next.
A year’s worth of weekends, and you could realistically save $5,000–$10,000 over hiring out the same work — and have a dramatically better home to show for it.
Choose your first project this weekend. Your future self will appreciate you for it.