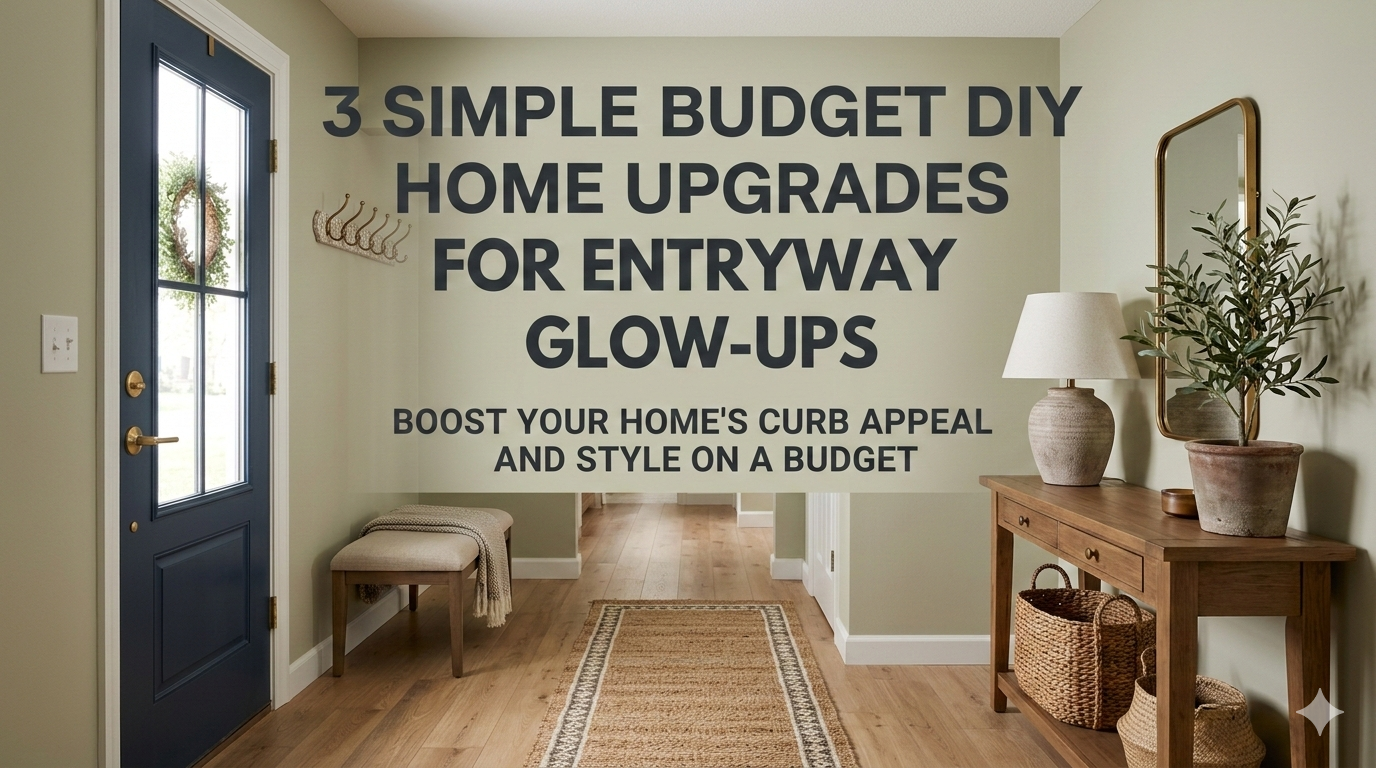
Meta Description: 3 Easy Budget DIY Home Upgrades for Entryway Glow-Ups that Won’t Break the Bank — make your front entry into a beautiful first impression with these simple, affordable ideas.
Mind-Blowing DIY Home Renovations In Entryway Glow-Ups
The entryway is the first thing people see when they enter your home. It sets the mood. It tells a story. And honestly? Most entryways are completely ignored.
And the good news is, you don’t need a designer or a contractor or a fat wallet for an amazing entryway. With some imagination, a bit of weekend time and a budget that won’t make you weep, you can pull off a major glow-up.
This guide walks you through 3 easy budget DIY home upgrades for entryway glow-ups that are beginner-friendly, wallet-friendly, and super impressive. These upgrades work directly regardless of whether your entryway is small or has a bit more space to grapple with.
Let’s get into it.
Why Your Entryway Gets Less Love Than It Deserves
Think about it. The entryway is the first room you enter and the last one you exit. Every single day. Guests perceive it the instant they cross into your door. Delivery people glance at it. All your mood lifts — or drops, really — every time you come in.
Environmental psychology research has shown that first impressions are formed in just seconds after entering a space. Your entryway is doing a lot of emotional heavy lifting without the credit.
The issue is, most people tend to expend energy on living rooms, kitchens, and bedrooms. The entry hall becomes a dumping ground for shoes, bags, mail and miscellaneous stuff with no placement elsewhere.
But that doesn’t have to break the bank to fix. Some of the most beautiful entryway makeovers happen for under $100 and on a free Saturday afternoon.
What Makes a Great Entryway?
Before you pick up that paintbrush and shopping cart, let’s discuss what it is that actually feels good about an entryway.
Every great entryway has three main things:
Function — It has to work. Storage for shoes, hooks for bags, a place to drop keys. It’s always going to feel chaotic if you can’t find a flow with it.
Light — Entrances tend to be dark and narrow. Good lighting changes everything. It allows the space to feel open, warm, and welcoming.
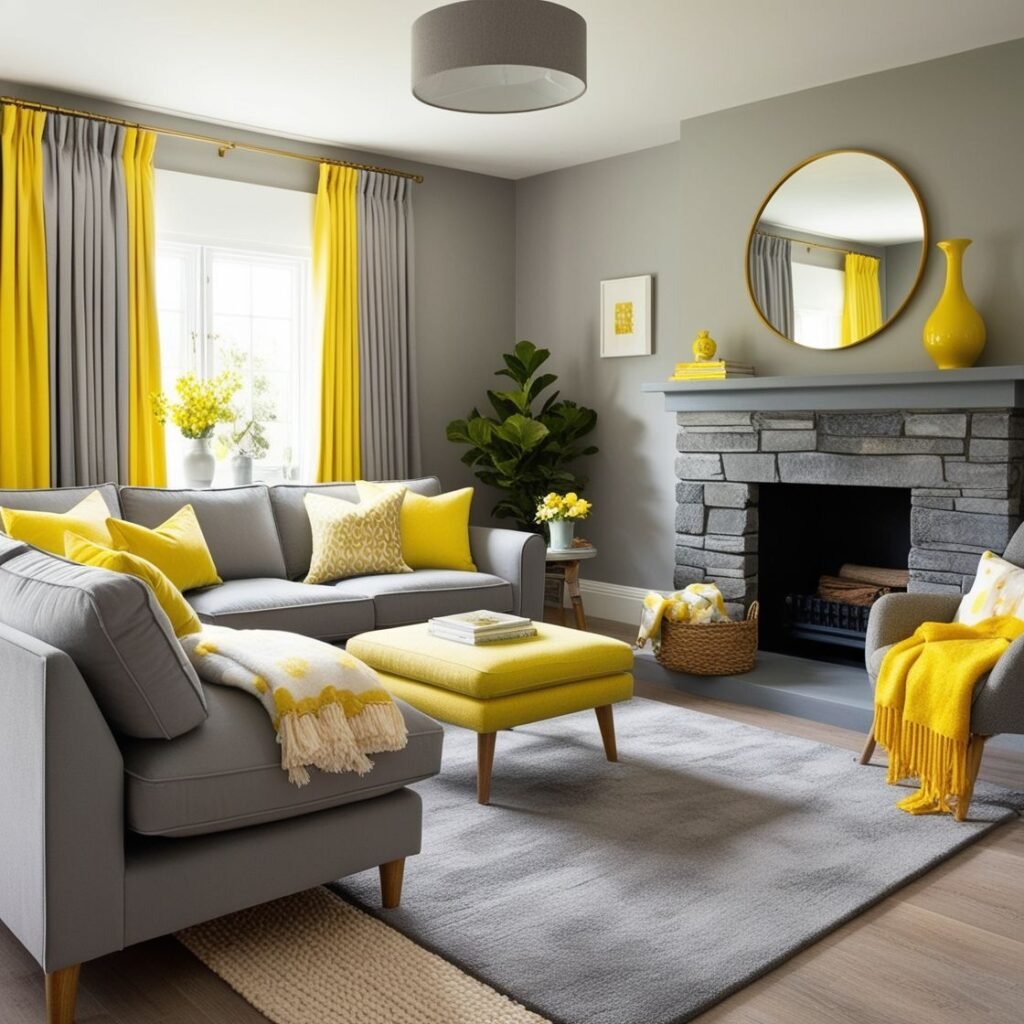
Personality — This is the section that everyone ignores. Your entryway should be a reflection of you. A plant, a mirror, a few pops of color — something that says “a real human lives here and they have taste.”
All upgrades in this guide are built around these three elements. Each one hits all three.
Upgrade #1 — The Accent Wall That Changes Everything
Why One Wall of Color Works So Well
You don’t need to paint your entire entryway for a dramatic statement. A single statement wall changes up the feel of the room entirely.
This is likely the highest-impact, lowest-cost upgrade on this whole list. For about $10 to $20 per quart of paint. That’s it.
The secret is picking the right wall — generally the one that faces your front door. That’s the first wall that your eye goes to. Make it count.
How to Pick the Right Color
Choosing color can be daunting, but it need not be. Here’s a simple framework:
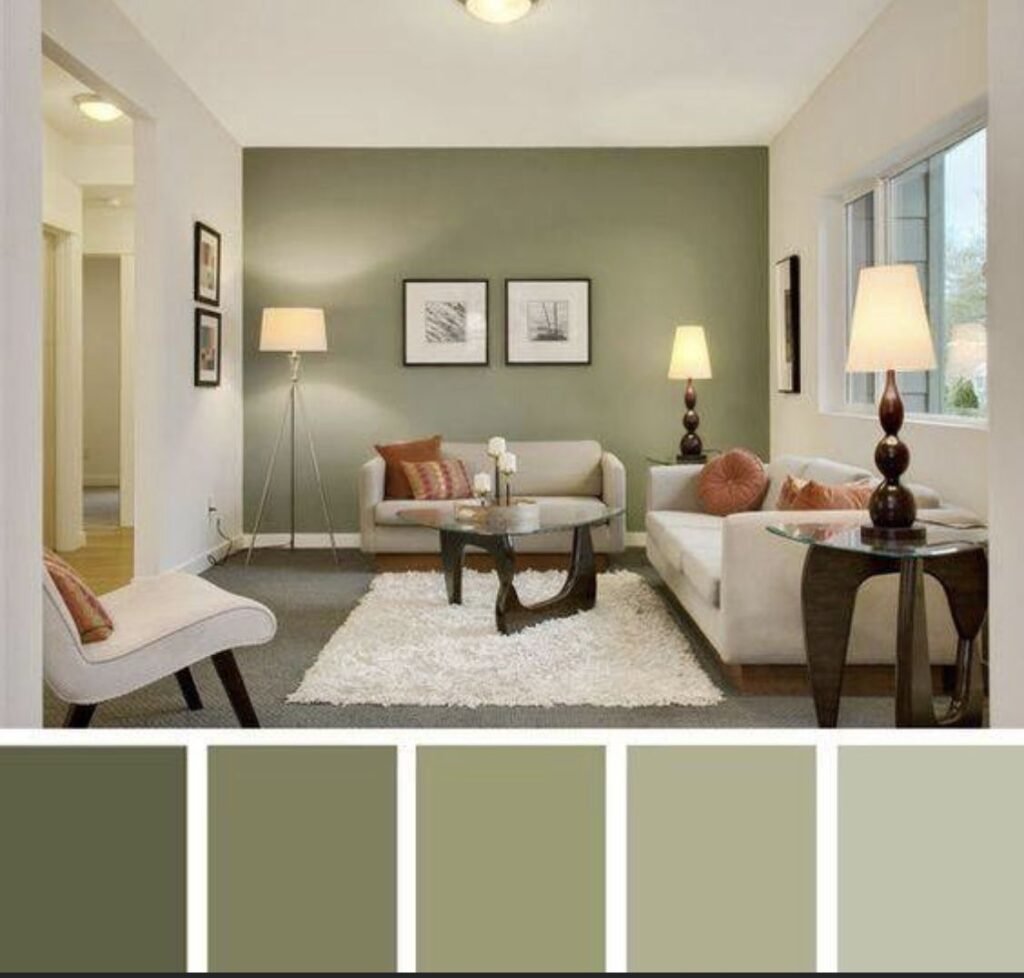
Small entryway? Choose a deep, sultry color such as forest green, navy blue or charcoal. It sounds counterintuitive, but darker colors make small spaces feel more intentional and cozy instead of cramped.
Medium or large entryway? You have more flexibility. Warm terracottas, dusty pinks and sage greens to warm whites all work well.
Renting and can’t paint? Peel-and-stick wallpaper is your best friend. It’s beautiful, available in hundreds of patterns and colors, and removes easily. You can find decent ones on Amazon or at HomeGoods for $20–$40 a roll.
Step-by-Step: Painting Your Accent Wall
Here’s how to make this work even if you’ve never painted a wall in your life.
What you need:
- 1 quart of paint in the color of your choice
- Painter’s tape (the blue kind)
- Mini roller and an edge brush
- A drop cloth or old sheet
Steps:
- Wipe down your wall with a damp cloth. Remove dust, scuffs, and grease.
- Apply painter’s tape along the borders — ceiling edge, baseboards, and where the wall meets adjacent walls.
- To start, use your brush to cut in around the edges. This involves painting a 2-inch border around all taped off areas.
- Use a W or M pattern when you roll the rest of the wall for even coverage.
- Allow to dry completely (approximately 2 hours), then apply a second coat.
- Remove tape while paint is still slightly wet for clean lines.
Total cost: $15–$35 | Time: 3–4 hours including drying
What to Hang on Your New Accent Wall
When that wall is painted, you have a canvas. Here are three things that look amazing on a bold accent wall:
A large round mirror brings depth and bounces light throughout the room. A simple wooden shelf holding a plant and a candle brings warmth. A gallery of framed photos or prints in complementary frames provides personality.
You don’t need all three. Even one of these additions could take your wall from “nice” to “wow.”
Upgrade #2 — The DIY Entryway Organizer That Really Works
The Clutter Problem Is Real
Here’s the truth about entryways — clutter is their worst enemy. It doesn’t matter how pretty your walls are or how nice the lighting is. If there are shoes stacked everywhere, bags on the floor and keys buried somewhere in the mayhem, nothing feels good about that entire space.
The solution is a working storage system. And it costs much less than you would pay at the furniture store to build one yourself.
The Mudroom-Style Wall Organizer
This is the standout feature of this upgrade. A wall-mounted organizer with hooks, a shelf and, if you wish, a small bench or shoe cubby below.
IKEA has great options that are really budget conscious, but you can totally whip up something completely custom with the cost of some basic supplies from a hardware store. For more inspiration on affordable home upgrades like this, check out Frugal Home Renovator — a fantastic resource for budget-friendly DIY ideas.
Here’s a comparison of the two options:
| Option | Estimated Cost | Skill Level | Time to Complete |
|---|---|---|---|
| IKEA ENHET/HEMNES combo | $60–$90 | Beginner | 2–3 hours |
| Custom pegboard organizer | $25–$45 | Beginner | 2–4 hours |
| DIY pallet shelf + hooks | $10–$20 | Intermediate | 3–5 hours |
| Floating shelf + hook rail | $30–$50 | Beginner | 1–2 hours |
For most folks, the floating shelf with a hook rail below it is the easiest option. It’s clean, modern and surprisingly simple to set up.
How to Build a DIY Floating Shelf + Hook Rail
What you need:
- One wooden shelf (precut from Home Depot or Lowe’s — about $15–$20)
- A hook rail or coat hooks ($10–$20)
- Wall anchors and screws
- A drill or screwdriver
- A level
Steps:
- Decide on your height. For adults, hooks should hang about 60–66 inches from the floor.
- Locate your studs by using a stud finder or the knock test. Use a pencil to lightly mark them.
- Hold your shelf up against the wall at your preferred height, then mark where you’ll be drilling for the bracket holes.
- Pre-drill holes, add wall anchors if necessary and screw in the brackets.
- Set your shelf on top and secure it.
- Attach your hook rail 6–8 inches below the shelf in the same way.
- Put a small basket or tray on the shelf for keys, mail and sunglasses.
Total cost: $30–$50 | Time: 1.5–2 hours
Making It Feel Intentional, Not Slapped Together
This is where the majority of DIY projects fail. They function but they don’t seem refined.
Here’s how to make yours look like it was professionally designed:
Use matching hardware. If your hooks are black metal, then you want shelf brackets that are black metal also. Consistency is everything.
Try a small labeled basket or woven tray on the shelf. Name it something like “Keys + Stuff” or go clean and minimal.
Stick a small plant — even an artificial one — on the shelf. Something trailing, like pothos or a small succulent, provides a visual break and liveliness in the space.
If your shelf came raw or in a hue that clashes with your new accent wall, paint or stain it.
Upgrade #3 — Beautiful Lighting That Makes Your Entryway Feel Expensive
Lighting Is the Most Underrated Fix
You could have the loveliest entryway in existence, but if the lighting is bad it’s a total fail. Poor lighting creates small, tired and uninviting spaces.
Good lighting? It makes even the most modest decor look lavish.
The average entryway has one overhead light — a plain builder-grade fixture that is doing the absolute bare minimum. Here’s how to level up your lighting situation without having to rewire a thing.
Three Budget-Friendly Lighting Upgrades That Actually Work
Option 1 — Replace the overhead fixture
This sounds scary, but is actually one of the less advanced electrical DIYs around. Provided you first cut the power at the breaker, replacing a light fixture is completely beginner-friendly.
Beautiful pendant lights, flush mounts and semi-flush mounts are available on Amazon, Wayfair or at HomeGoods for $30 to $80. Once you have your fixture, the process takes roughly half an hour.
Option 2 — Install a plug-in wall sconce
For those who feel like swapping out fixtures is a bridge too far, plug-in wall sconces are a genius solution. They resemble hardwired sconces but plug into a standard outlet. The cord tucks behind or lies flat on the wall.
Available on Amazon for $20–$60 and installing with only two screws.
Option 3 — Install a smart bulb in your existing fixture
This is the laziest option — and in some cases, the most clever. Swap your existing bulb for a smart one, such as a Philips Hue or any cheap Amazon smart bulb. You can set it to a warm amber tone (around 2700K), which instantly creates a warmer, more welcoming feel in the space.
Cost: as low as $10–$15 per bulb
The Magic Bulb Temperature Secret
Most builder-grade light bulbs are cool white or daylight — they emit a bluish tone that is clinical and harsh. The simple change to warm white (2700K–3000K) makes a huge difference in the feel of a space.
Here’s a quick comparison:
| Bulb Temperature | Color Appearance | Best For |
|---|---|---|
| 2700K | Very warm, golden | Entryways, bedrooms, living rooms |
| 3000K | Warm white | Kitchens, bathrooms |
| 4000K | Neutral white | Offices, garages |
| 5000K–6500K | Cool/daylight | Task lighting, outdoor |
For your entryway, always go 2700K. Always.
Placing a Mirror to Reflect the Light
This tip goes hand-in-hand with any lighting upgrade. An oversized mirror just beyond your light source reflects light around the room, creating an illusion of at least double the size.
Thrift stores are treasure troves of mirrors. A $5 thrift store mirror given a coat of spray paint on the frame can look like a $200 statement piece. Depending on your color scheme, spray paint in gold, black, or white all look amazing.
Putting It All Together — Your Complete Entryway Glow-Up Plan
Here’s a simple comparison of all three upgrades so you can figure out your weekend project:
| Upgrade | What It Does | Estimated Cost | Time Needed |
|---|---|---|---|
| Accent Wall | Adds drama, personality and a focal point | $15–$35 | 3–4 hours |
| DIY Organizer | Adds function, reduces clutter, keeps things tidy | $30–$50 | 2–3 hours |
| Lighting Upgrade | Makes space feel warm, open and luxurious | $20–$80 | 30 min–2 hours |
| Total | Full entryway transformation | $65–$165 | One weekend |
For less than $165 and one good weekend, your entryway transforms from an afterthought to the best room in the house.
Ways To Stretch Your Budget Even Further
You don’t need to buy new all the time. Here are some tips to help stretch every dollar:
Facebook Marketplace and Craigslist are amazing for mirrors, shelves, benches, and hooks at nearly no cost. People are constantly getting rid of perfectly nice furniture.
Thrift stores like Goodwill or Salvation Army often have hooks, frames, baskets and decor items for $1–$5.
Dollar Tree and Five Below have surprisingly nice little decor items — trays, candles, faux plants and small frames that look good grouped together.
Shop your own home. Take a stroll through your house before buying anything. That unused mirror in the guest room? That basket in the closet? Take them to the entryway and see if they fit.
Mistakes to Avoid During Your Entryway Glow-Up
Even simple DIY projects can go awry if you aren’t careful. Here are the most common mistakes people make:
Skipping the painter’s tape. It feels like more work, but if you cut corners here it results in sloppy edges that bring down the whole project to amateur status.
Selecting the wrong size mirror or shelf. A mirror which is too small gets swallowed up on the wall. A shelf that’s too large overpowers the room. Measure twice, buy once.
Ignoring the floor. You could have beautiful walls and lovely lighting, but if there’s a mound of shoes on the floor, it looks chaotic. A simple shoe rack ($20–$30) or a small boot tray will do the trick instantly.
Over-decorating. For entryways, especially small ones, less is more. Pick a handful of pieces you love and allow breathing room around them.
Common Questions About Budget DIY Entryway Upgrades
How much does a full entryway glow-up on a budget cost?
Depending on the upgrades you make, you can easily redo your entryway for as little as $65 and no more than $165. Buying secondhand or thrifting can reduce that number even more.
Can I make these upgrades to my apartment if I rent?
Yes! Peel-and-stick wallpaper substitutes for paint among renters. Command hooks replace drilled hooks. Plug-in sconces replace hardwired fixtures. Each upgrade in this guide has a renter-friendly version.
How long does it take to do all three upgrades?
Realistically, one full weekend. You could work on the wall one day and then move to the organizer and lighting another. Some people complete all three in one long Saturday.
What’s the best bang-for-the-buck upgrade for an entryway?
The accent wall gets you the biggest visual change for the least amount of money — often less than $30. However, if your entryway is darker or has more clutter than usual, lighting and organization may deliver a larger overall improvement for how the space feels to live in.
Do I need any special tools?
You don’t need a drill, but a basic one is helpful. In many cases, you can ditch the screws and replace them with command strips and adhesive hooks. The painted accent wall takes nothing more than a roller, brush and painter’s tape — all items that can be found at any hardware store for less than $15 total.
What colors are popular for entryways right now?
Rich greens such as forest and olive, warm terracotta, navy blue and creamy off-whites are all huge hits. Black is also having a major moment — a black accent wall with gold fixtures looks stunning and very high-end.
How can I make a small entryway feel larger?
Placement of a large mirror creates an illusion of depth. Maintain color palettes in line with the rest of the home so the eye flows through to and from the entryway. Pick vertical storage to draw the eye upward. And try to keep the floor as clear as possible — clutter on the floor makes small spaces feel even smaller.
Your Entryway Isn’t Going to Organize Itself — Get Started This Weekend
Here’s the thing — you’ve likely been walking past your entryway every single time thinking “I really need to do something about this.” And then you don’t. Life gets busy. It doesn’t feel urgent.
But a great entryway isn’t only pretty for guests. It alters your perception every single time you cross the threshold of your own front door. That daily mood boost is worth so much more than the $65–$165 you’ll spend.
These 3 simple budget DIY home upgrades for entryway glow-ups are meant to be achievable for real people with real budgets and real weekends. You don’t need to be crafty. You don’t need power tools. You can do it without spending much money.
You just need to start.
Choose one of the three upgrades — even just the simplest — and tackle it this weekend. Snap a before and after pic. You will be amazed at the change.
Your entryway deserves the glow-up. So do you.