Meta Description: Budget DIY home upgrades for a better patio don’t have to cost a fortune. Discover 6 proven, easy, and affordable ideas to transform your outdoor space today.
6 Proven Budget DIY Home Upgrades for a Better Patio
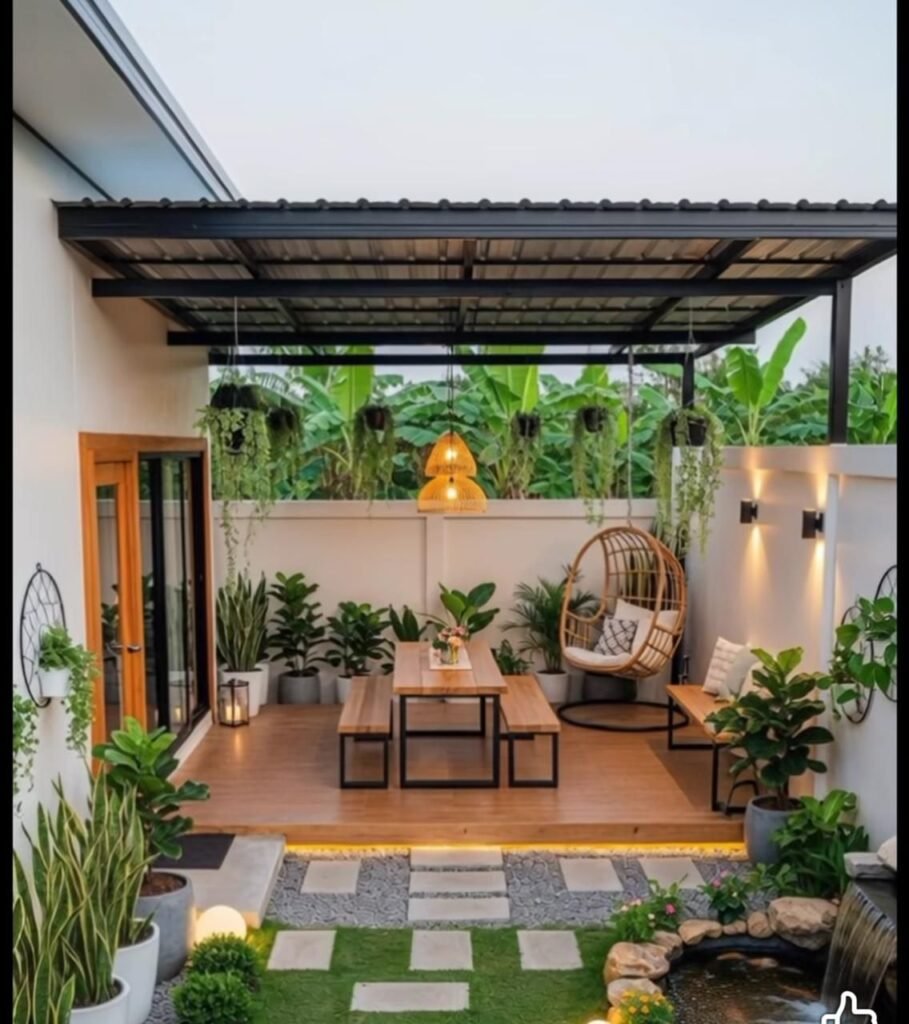
Your patio is more than just a slab of concrete or a wooden deck. It is an outdoor room — a place to relax, host friends, or enjoy a quiet morning coffee. Yet most people do not handle it like that at all.
They devote thousands inside their home and then leave the patio looking dull, worn out, or completely empty. The good news? You don’t need a big budget or a contractor to fix that.
With a little creativity and weekend effort, you can turn your patio into the most-used space in your home. These 6 budget DIY home upgrades for a better patio will help you do exactly that — without draining your wallet.
Let’s get started and get these projects done!
Why Your Patio Needs Attention
Research suggests that a home’s perceived value may go up by as much as 12% when it possesses outdoor living spaces. Buyers love a good patio. But even if you’re not selling, well-designed patios make everyday life more pleasant.
Just think about it. A cozy outdoor area provides you with:
- A place to unwind after work
- Extra space for entertaining guests
- A playground for your children
- A mini private garden of edible plants
Added benefit? Most patio upgrades cost less than $200 per job if you do them yourself. You just need to know where to start. For more money-saving renovation ideas, check out Frugal Home Renovator — a great resource for budget-friendly home improvement projects.
What Makes a Patio Upgrade “Budget-Friendly”?
Before we begin on these projects, a few ground rules should be set up. A true budget DIY upgrade should:
- Cost under $150–$200 per project
- Require basic tools most homeowners already own
- Be completable in a weekend or less
- Make a visible, real difference in how the space looks and feels
All six upgrades in this list check every one of those boxes.
Upgrade #1: Lay Down Outdoor Patio Tiles or Pavers
Do You Want to Transform the Total Appearance?
A patio is stunningly transformed by some really beautiful floors. Old, cracked, stained, or otherwise messed-up concrete looks so ugly. But to replace it entirely? That’s just not any kind of answer. The smarter alternative is to re-cover it.
Outdoor snap-together tiles are a great addition — from wood to stone and composite styles, no glue or grout is required. They click into place like puzzle pieces.
Cost: $1.50–$3.00 per square foot Tools: Tape measure, rubber mallet, utility knife Time: 4–6 hours for a 10×10 patio
How to Do It
- Clean your existing patio slab thoroughly.
- Measure the area and get the number of tiles you’ll need (buy 10% over for cuts).
- Establish a center line, then start tiling in the direction of both diagonals and alternative sides.
- Snap one row of tiles to the next.
- Use a utility knife to cut pieces at the edges.
That’s it. No skills required at all.
Pro Tip
Choose a neutral stone or wood-grain tile — they go with just about any furniture style and won’t look dated in a few years.
| Tile Type | Average Cost/Sq Ft | Durability | Ease of Install |
|---|---|---|---|
| Composite Wood | $2.50 | High | Very Easy |
| Interlocking Stone | $1.75 | Very High | Easy |
| Rubber Deck Tile | $1.50 | Medium | Very Easy |
| Ceramic Patio Tile | $3.00 | High | Moderate |
Upgrade #2: Build a Simple DIY Patio Privacy Screen
Turn Your Open Patio Into Your Own Private Getaway
Are your patio comings and goings happening out in the open for everyone’s eyes to see? If that sounds like your problem, you aren’t alone. Lack of privacy is the main reason that a lot of people won’t use their patios.
A screen wall will handle that — and it doesn’t force privacy to look merely functional. In fact, used with the right materials, this can become a design feature all its own.
Options That Look Like a Million Bucks But Don’t Cost One
Option A: Wooden Pallet Screen Old wooden pallets are usually free or less than $5 each. Sand them, brush on some fresh outdoor paint or wood sealer, and mount them vertically with steel brackets. Place a few potted or climbing plants in between for a natural touch.
Option B: Bamboo Roll Screen Bamboo roll fencing costs between $20–$40 for an 8-foot section. Attach it to old fence posts or a simple wooden frame. It is a natural-looking and instantly private screen.
Option C: Lattice Panel Screen Lattice panels cost $15–$30 from hardware stores. Mount them in a simple 2×4 frame, and you have a lovely privacy screen that also works as a trellis for climbing plants.
Cost estimate: $20–$80 depending on method Tools needed: Drill, screws, level, saw (optional) Time: 3–5 hours
Why This Upgrade Makes All the Difference
Privacy makes folks comfortable. When we’re comfortable outdoors, we use that space — which indeed is enough to make this one of the biggest-impact upgrades on this list.
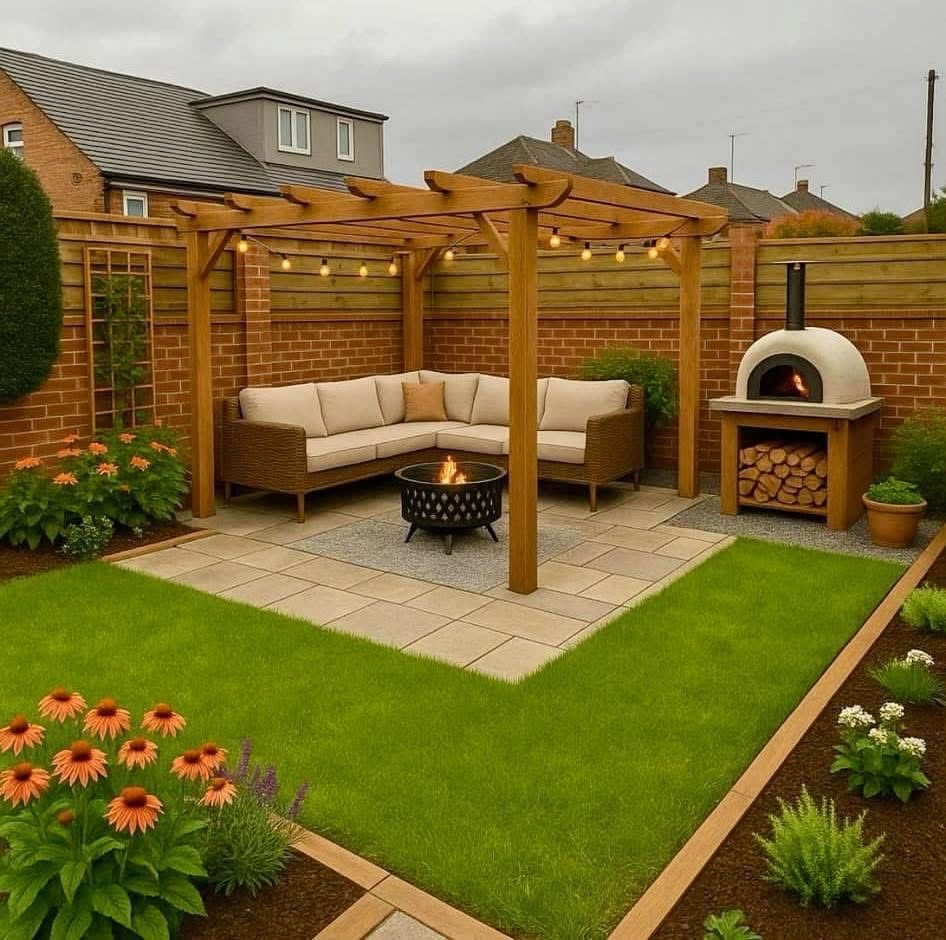
Upgrade #3: Add String Lights for Patio Ambiance
The Least Expensive Way to Turn Your Patio Into a Little Bit of Magic After Dark
Here’s a fact: most people only use their patios when it’s still daylight. Why? Because sundown makes the whole place look somber and a touch short on welcome. String lights completely fix this.
A brightly lit patio feels warm, inviting, and has an ambiance that is almost romantic. It extends your outside life by hours.
How to Hang Them Right
The mistake most folks make is stringing lights too loose, or at a bad height. Here’s a formula that works:
- Hang lights 8–10 feet high.
- Use a “V” or “W” zigzag pattern across your patio.
- Anchor to wooden posts, the wall of the house, or a fence.
- Use outdoor-rated hooks or screw-in cup hooks to hang the string lights and make sure they’re secure.
What Lights Are Right for You?
| Light Type | Cost | Lifespan | Best For |
|---|---|---|---|
| LED String Lights | $15–$30 | 10,000+ hours | General patios |
| Edison Bulb Lights | $20–$40 | 2,000–3,000 hours | Rustic/vintage look |
| Solar String Lights | $10–$25 | Varies | Areas without outlets |
| Globe String Lights | $20–$35 | 5,000+ hours | Modern/sleek look |
Cost estimate: $15–$40 Tools needed: Cup hooks, zip ties, extension cord if needed Time: 1–2 hours
Solar vs. Plug-In: Which Should You Choose?
If your patio is near an outlet, stick to plug-in LED lights. In areas without an electric supply, solar string lights are a good choice — with the one condition that they need good sunlight during the day to work their best at night.
According to the U.S. Department of Energy, LED bulbs use at least 75% less energy than incandescent lighting, making them the smart long-term choice for outdoor spaces.
Upgrade #4: Build a DIY Patio Herb or Vertical Garden
Giving Life to Blank Walls and Idle Corners
A blank wall on your patio is a missed opportunity. An empty corner left standing by itself also has an empty feeling. A vertical garden can take care of both of these problems at once — and give you fresh herbs when and where they are needed.
This upgrade is very popular right now — and why not? A vertical garden is:
- Space-saving to an extreme
- Eye-catching
- Can produce things you may want to grow — be it tomatoes, herbs, or even a few flowers
- Very affordable — a set costs under $50 to make
Two Easy DIY Methods
Method 1: Hanging Pocket Planters Fabric pocket planters will hang from any wall or fence. Fill each one with your choice of plant and some soil. They cost some $15–$25 per panel with 12–20 pockets. Hang them up using sturdy hooks and you’re through.
Method 2: Pallet Garden Wall Find a wooden pallet (for free or cheap), lay it on the ground, line the inside sections with landscape fabric, pour in potting soil, and plant a herb or succulent in each section. Stand it upright and fix it to the wall.
What to Grow for Beginners
- Basil
- Mint
- Cherry tomatoes
- Succulents
- Marigolds (great for keeping pests away)
Cost estimate: $20–$60 Tools needed: Staple gun (for pallet method), hooks, soil, plants Time: 2–4 hours
The Bonus Benefit
A vertical garden also functions as a natural privacy screen. When paired with Upgrade #2, it’s a double win.
Upgrade #5: Build or Refresh a DIY Patio Furniture Set
You Don’t Have to Spend $500 on Outdoor Furniture
Buying new patio furniture is expensive. A simple bistro set can cost $300–$500. A complete sectional? More than $1,000 easy.
But as any smart DIYer knows, you can make surprisingly good furniture for less than $100 using only basic lumber.
The Easiest Patio Furniture to Build
Cinder Block and Wood Bench This is one of the most popular DIY patio projects online — and with good reason. All you need:
- 8–10 cinder blocks (~$1.50 each)
- Two 4×4 wooden posts or thick planks
- Outdoor paint or sealant
Stack the cinder blocks in two rows, lay boards across them, paint everything one color, and presto! You have a modern-looking industrial bench for under $30.
Pallet Sofa Two or three wooden pallets piled up with cushions form a comfortable outdoor sofa of surprising quality. Add outdoor cushions ($20–$40 at discount stores) and you have seating that looks like it came from an outdoor boutique.
Cost estimate: $30–$100 Tools needed: Sandpaper, paint/stain, brush, drill (optional) Time: 4–8 hours including drying time
Refresh Old Furniture Rather Than Build New
Already got patio furniture that looks worn? No need to throw it away. Sand it down and repaint it with outdoor spray paint. A $10 can of Rust-Oleum could completely breathe new life into an old metal or wood piece.
Quick Checklist for a Fast Patio Furniture Makeover
- Sand away all rough or peeling surfaces
- Wipe clean with a damp cloth and let dry
- Apply primer if necessary (especially on metal)
- Spray two light coats of outdoor paint
- Let dry for 24 hours before using
Upgrade #6: Add an Outdoor Rug and Simple Decor Touches
Little Details That Bring Everything Together
Patio design is built on a basic framework, complemented by small details that show everything has been thought through and completed.
Adding an outdoor rug, simple decor, and a little greenery to a patio can transform it from “working” to “wonderful” in almost no time. It also costs virtually nothing.
Why an Outdoor Rug is Essential
An outdoor rug serves several purposes simultaneously:
- It defines the seating area and adds to the sense that the space has been “designed.”
- It provides color and texture.
- It makes the surface more comfortable underfoot.
Look for rugs made of polypropylene — they are weatherproof, fade-resistant, and easy to wash. A 5×7 or 8×10 is a good size for most patios.
Cost estimate: $25–$70 for a quality outdoor rug
Decor Touches That Cost Almost Nothing
Painted Terra Cotta Pots Buy plain terra cotta pots for $2–$5 each, paint them with geometric patterns or solid colors, and group them in threes for a professional look.
DIY Lanterns Take old glass jars or tin cans, punch holes in them, and put LED candles inside. Hang them or line them along the patio edge for a warm glow.
Repurposed Crates as Side Tables Wooden crates from grocery stores make excellent rustic side tables. Sand them, stain them, and done.
Stone or Pebble Border Line the edge of your patio with smooth river stones or pebbles. It costs about $10–$15 for a bag and adds a clean, finished look.
Cost estimate for all decor touches: $20–$50 Time: 1–3 hours
How to Plan Your Patio Upgrade Weekend
Don’t know what to do first? Here is a basic plan:
| Priority | Upgrade | Estimated Cost | Time Needed |
|---|---|---|---|
| 1 | Outdoor Tiles/Pavers | $75–$150 | Saturday AM |
| 2 | String Lights | $15–$40 | Saturday PM |
| 3 | Privacy Screen | $20–$80 | Sunday AM |
| 4 | Vertical Garden | $20–$60 | Sunday PM |
| 5 | Furniture Build/Refresh | $30–$100 | Next Weekend |
| 6 | Rug and Decor | $20–$70 | Anytime |
Total estimated budget: $180–$500 for all six upgrades.
That is a completely transformed patio for less than what most people spend on one piece of retail patio furniture.
Common DIY Patio Mistakes to Avoid
Easy projects can go wrong. Here are the main pitfalls and how to avoid them:
Not protecting against weather. Any wood or fabric used outside needs waterproofing or treatment. Untreated materials warp, rot, and fade rapidly.
Buying cheap lights that don’t last. Go for LED over incandescent always. They last longer, use less energy, and are better in the weather.
Ignoring drainage. If you are adding tiles or pavers, make sure water can still drain away from your house foundation. Leave small gaps between tiles if need be.
Over-cluttering the space. Less is more on a patio. Pick a theme and stick to it. Mixing too many styles makes the space feel chaotic.
Not measuring before you buy. Everything should be measured. Nothing is worse than buying 50 tiles and needing 65.
Frequently Asked Questions
Q: What’s the cheapest upgrade I can make to my patio this weekend? String lights go up the fastest, cost the least, and make the biggest difference in visual impact. You can totally change how your patio feels at night for $15–$30.
Q: Do I need to have any special skills for these DIY patio upgrades? Nope. Every project on this list was chosen because it requires no special skills. If you know how to use a drill and a tape measure, then you can do all of this.
Q: What’s the best way to make my small patio seem larger? Use lighter colors, outdoor-safe mirrors, and furniture appropriate for the scale of the space. Also, an outdoor rug with an outward pattern tricks the eye into seeing more space.
Q: Are snap-together patio tiles weatherproof enough for all seasons? Yes. Most composite and interlocking stone tiles are made for all-season outdoor use. If you’re in a cold climate, look for tiles rated for freeze-thaw cycles.
Q: Can I do these upgrades in an apartment with a small balcony? Certainly. String lights, vertical pocket gardens, small rugs, and lanterns all work well on apartment balconies. Just make sure you check your lease before installing anything permanent.
Q: How can I keep my outdoor rug from getting moldy? Select a polypropylene rug, move it indoors or roll it up during heavy rain or winter weather, and rinse it with a hose periodically. Let it dry fully before laying it back down. One recommendation is to get a plastic outdoor rug, not a natural fiber one.
Q: What’s the best privacy screen for a rental home where walls can’t be drilled into? Freestanding bamboo screens or large potted plants arranged in a row are the best non-permanent options. No drilling, no damage, and you can take them with you when you move. A fast-growing palm tree privacy hedge is an alternative option.
Finishing It Off
A better patio does not mean spending lots of money or hiring a professional designer — all you need is a plan, one free weekend, and a willingness to get mud on your hands.
Do one upgrade at a time. Maybe it’s the string lights tonight, and maybe it’s the tiles next Saturday morning. Each project builds on what went before — and one day you’ll find yourself with a fantastic outdoor space that you can actually use.
Great design isn’t about money at all, as these 6 budget DIY home upgrades for a better patio prove. So choose the one you need to get started on first, grab your tools, and go.
Your patio is waiting for you.