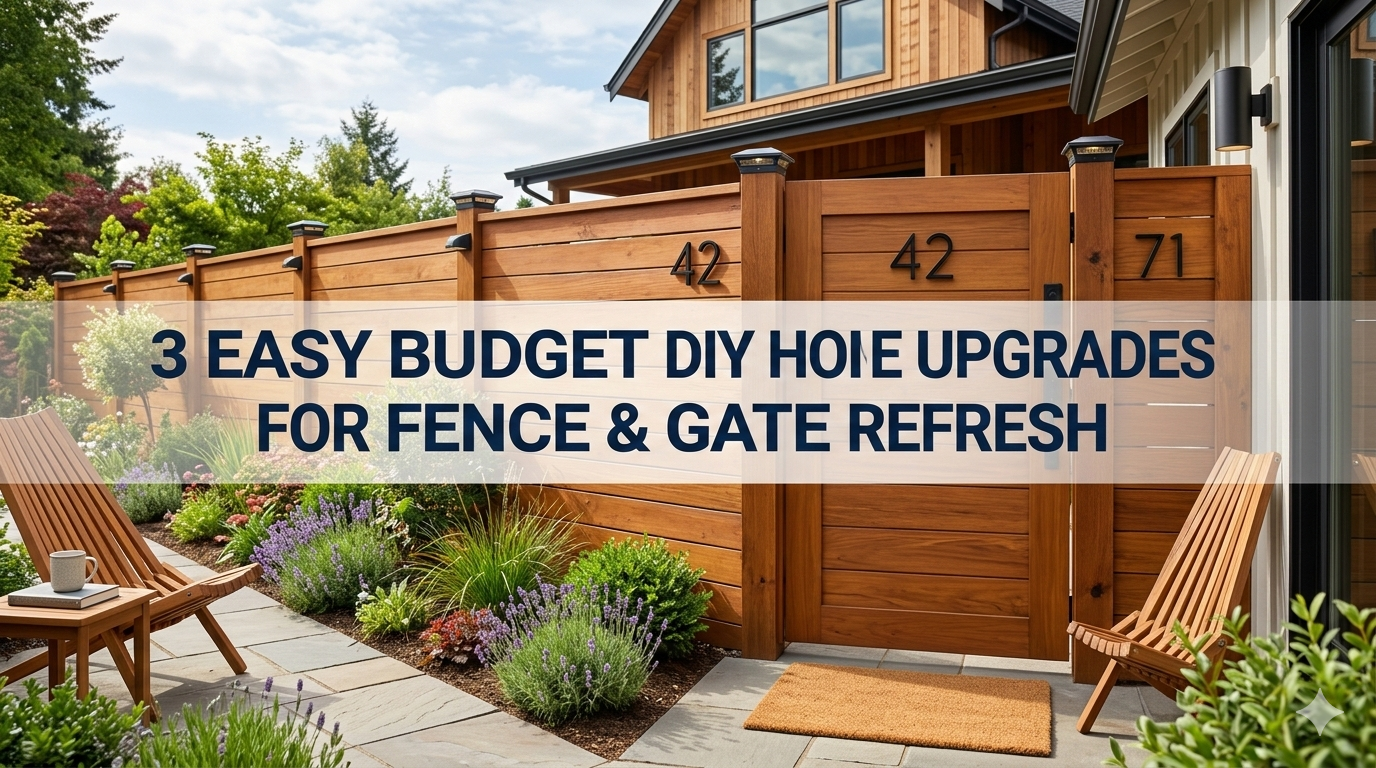
3 Easy Budget DIY Home Upgrades for Fence & Gate Refresh
I still remember the first time I stood in my backyard staring at our sad, weathered fence and the creaky gate that squeaked every time the wind blew. It was one of those sweltering afternoons where everything just looked tired, you know? The wood had turned this dull gray, splinters were popping up like they owned the place, and the gate latch kept slipping so the dog could wander out whenever he felt like it. We were on a tight budget back then, same as a lot of folks these days, and the thought of calling in professionals made my wallet hurt just thinking about it. But here’s the thing I discovered after a few weekends of trial and error: you don’t need a fortune or a construction crew to make your fence and gate look brand new. With just a little elbow grease and some smart, low-cost choices, you can give the whole thing a refresh that boosts your curb appeal, adds a bit of privacy, and even bumps up your home’s value without anyone guessing it was a DIY job.
Over the years I’ve tinkered with fences in three different houses, from humid coastal spots to dry inland yards, and I’ve learned what actually works when money is tight. These three upgrades I’m about to walk you through are the ones that delivered the biggest bang for the buck every single time. We’re talking under a couple hundred bucks total if you shop smart, a weekend or two of your time, and zero fancy tools beyond what most people already have in the garage. The best part? They’re forgiving. Mess up a little here or there and it’s easy to fix. I’ll share the exact steps I use, the mistakes I made so you don’t have to, and some real-world tweaks that make everything last longer. By the end of this, you’ll be itching to grab your toolbox and get started.
Let’s kick things off with the upgrade that makes everything else possible.
The first upgrade: giving your fence and gate a deep clean and protective seal
Nothing, and I mean nothing, makes a bigger immediate difference than starting with a thorough clean. I can’t tell you how many times I’ve seen neighbors spend money on paint or new panels only to have the dirt and mildew show right back through in a few months. Cleaning first is like hitting the reset button. When I did this on my last fence, the wood went from looking like it had been through a sandstorm to something that actually felt smooth and alive again.
You’ll need a few cheap supplies that you can grab from any hardware store or even online for next-day delivery. A good pressure washer is ideal, but if you don’t have one, a regular garden hose with a spray nozzle and a stiff-bristled brush work fine. I bought a $35 electric pressure washer on sale last year and it’s paid for itself ten times over. Grab a bottle of oxygen bleach cleaner (the kind without chlorine, around $10), some rubber gloves, eye protection, and a gallon of exterior wood sealer or stain. Total cost for this whole first upgrade usually lands between $40 and $70 depending on how big your fence is.
Start early in the morning so the sun doesn’t bake everything dry too fast. First thing I do is sweep off loose dirt and leaves with a broom. Then I mix the oxygen bleach according to the bottle (usually one part cleaner to five parts water) and spray it on with the garden sprayer or just pour it from a bucket. Let it sit for fifteen minutes while you enjoy a coffee. This stuff lifts mold and mildew without killing your lawn like straight bleach does. I learned that the hard way on my first try.
Now comes the fun part, or the messy part depending on your mood. If you have the pressure washer, set it to about 1300-1800 PSI so you don’t gouge the wood. Work from the top down in sections about six feet wide. Keep the wand at least a foot away and use even sweeps. The grime just melts off. If you’re doing it by hand, scrub in circles with your brush dipped in the cleaner solution. It takes longer but you get to see every inch up close, which is kind of satisfying in a weird way. Rinse everything thoroughly until the water runs clear.
Let the fence dry completely. This is crucial. I usually wait two full days, especially if the humidity is up. Test it by pressing your hand against the wood; if it feels cool or damp, wait longer. Once it’s bone dry, it’s time for the sealer. I prefer a semi-transparent stain that lets the grain show through because it looks more natural and lasts longer than solid paint in most climates. Stir it really well, then use a two-inch brush for the edges and posts, and a roller for the flat sections. Go with the grain. Two thin coats are way better than one thick one; it soaks in deeper and won’t peel later.
For the gate, do the same process but pay extra attention to the bottom where water pools. I always add a little extra sealer there. While everything dries, take the time to tighten any loose screws in the posts. I use a cordless drill for this and it takes five minutes. The whole cleaning and sealing job usually takes me one full Saturday and part of Sunday. When I step back after the second coat, it looks like I spent a thousand dollars. Neighbors have literally stopped to ask who did the work.
One tip I wish someone had told me earlier: check the weather forecast for at least three dry days after you finish. Rain right after sealing can leave ugly spots. Also, if your fence is older than ten years, inspect for rot while you’re cleaning. Any soft spots bigger than a few inches should be cut out and replaced with matching wood from the lumber yard. It’s cheap insurance.
This upgrade alone can make your fence last five to seven years longer. I’ve tracked it on my own property. The wood stays hydrated, bugs stay away, and the whole yard feels cleaner. And the best part? You can do this even if you’re renting, as long as you get permission. It’s that non-permanent.
Moving on to the second upgrade that takes things up a notch.
The second upgrade: refreshing the gate with simple hardware swaps and a few smart reinforcements
Once your fence is clean and sealed, the gate is the part everyone actually uses every day, so it needs to feel solid and look sharp. My old gate used to stick in the summer humidity and rattle in the wind. After this upgrade, it swings like it’s on butter and stays quiet. The whole thing cost me less than $50 and took about four hours.
Head to the hardware aisle and look for heavy-duty gate hinges. I like the ones with self-closing springs if you have kids or dogs; they’re around $12 a pair. Grab a new latch set (the kind with a handle on both sides) for about $15, some rust-resistant screws, and a small can of metal paint if your old hardware is rusty. If you want to go fancy without spending much, add a $8 gate stop that keeps it from swinging too far and banging into the fence.
First, take the gate off its hinges. Prop it up on a couple of sawhorses or even sturdy buckets so it doesn’t fall over. Remove the old hinges and latch carefully. If the screws are stripped out, which happens a lot on older gates, fill the holes with wood glue and toothpicks, let it dry, then redrill. I learned this trick from an old-timer at the hardware store and it’s saved me so many headaches.
Now install the new hinges. Make sure they’re perfectly vertical; use a small level. I screw the top hinge first, then the bottom, checking alignment as I go. The new latch goes on next. Position it so the gate closes with a satisfying click but doesn’t bind. If your gate is sagging (mine always was), add a turnbuckle tension rod diagonally across the back for about $10. It’s like a brace that pulls everything square. Tighten it until the gate hangs straight. Takes two minutes and makes a world of difference.
While the gate is off, I always give the posts a quick once-over. If they’re wobbly, dig around the base a little and pour in some quick-set concrete from a bag. Mix it right in the hole with water from your hose. It hardens in twenty minutes and stops that annoying lean forever.
For an extra touch that costs almost nothing, I spray the hinges and latch with a quick coat of black or white metal paint to match the house trim. It makes everything look intentional instead of patched together. Rehang the gate, test the swing a few times, and adjust the tension rod if needed. I like to oil the hinges lightly with WD-40 after everything’s in place so they stay silent.
This upgrade isn’t just about looks. A solid gate actually improves security, which matters more than people admit. I sleep better knowing the backyard is properly closed off. And if you have little ones, the self-closing feature is a lifesaver. I’ve seen people spend hundreds on fancy automatic gates, but this simple version does 90 percent of the job for a fraction of the price.
One mistake I made early on was using cheap screws that rusted out in a year. Spend the extra two dollars for stainless or coated ones. They last forever. Also, if your gate is vinyl or metal instead of wood, the same ideas apply; just use the right drill bits and avoid over-tightening.
After this second upgrade, the gate feels like part of a much more expensive setup. Friends come over and comment on how “professional” it looks. Little do they know it was a Saturday morning project with a cold drink in hand.
Now for the third upgrade that adds personality and privacy without any heavy lifting.
The third upgrade: adding budget-friendly decorative accents and privacy touches
This is the fun one where you get to make your fence uniquely yours. After the cleaning and gate work, the structure is solid, so now we dress it up. I’ve done lattice panels, hanging planters, and simple post caps on different properties, and each time the yard feels bigger and more welcoming. Total spend here is usually $60 to $90, and you can finish it in a single afternoon.
My favorite starting point is lattice. Not the heavy store-bought kind that costs a fortune, but the thin, lightweight stuff that comes in 4×8 sheets for about $25. You can cut it to fit between your fence posts with a jigsaw or even a handsaw. Screw it to the top rail using small brackets. It adds instant height and privacy without blocking all the light. I painted mine a soft gray to match the stain on the fence and it looks custom.
If lattice feels too much, try vertical garden pockets. These fabric or plastic planters hang right on the fence with hooks. I found a pack of six for $18 online. Fill them with trailing plants like ivy, petunias, or even herbs if you’re into cooking. In hotter climates, I choose drought-tolerant succulents so I don’t have to water every day. The greenery softens the fence line and makes the whole area feel like a garden instead of just a boundary.
Another cheap trick is post caps. Plain wooden posts look so much better with a little hat on top. You can buy solar-powered ones that light up at night for $8 each, or just plain wood caps for $3. I mix and match. The solar lights give a subtle glow that makes evening barbecues feel magical without running up the electric bill. Install them with a dab of construction adhesive so they stay put through wind and rain.
For the gate specifically, I like to add a small wreath hook and a seasonal wreath or even a simple “welcome” sign. Costs next to nothing and greets guests the second they walk in. If your gate faces the street, consider a narrow planter box at the base. Build it from scrap 2x4s and a few deck boards. Line it with plastic sheeting, fill with soil, and plant flowers that spill over the edge. It draws the eye upward and hides any remaining imperfections.
I always step back after installing these accents and take a photo from the street. The difference is night and day. What used to look like a plain barrier now feels like an extension of the house. And because everything is lightweight and screwed in rather than nailed permanently, you can change it up whenever the mood strikes.
One thing I always tell people: match your accents to your home’s style. If you have a modern house, keep lines clean with white lattice. For a cottage feel, go with overflowing flowers. In windy areas, use extra screws and maybe a bit of wire to secure hanging planters so they don’t become projectiles.
I’ve found that these three upgrades together create a fence and gate that look like they belong to someone who hired a landscaper. Yet the total cost, if you do all of them, rarely tops $200. And the time investment? Maybe ten to twelve hours spread over two weekends. That’s it.
Let me walk you through how I schedule it so it doesn’t feel overwhelming. Friday evening I clean and seal the fence. Saturday morning I tackle the gate hardware. Sunday afternoon is for the decorative touches while everything dries. By Monday the yard looks completely different and I’m sipping coffee on the patio feeling proud.
There are a few extra tips I’ve picked up that apply no matter which upgrade you start with. Always wear gloves and eye protection. Wood splinters and flying debris are no joke. If you have allergies, a dust mask makes the cleaning step way more pleasant. Check local rules about fence height and materials before you add lattice; some neighborhoods are picky. And if you live in an area with termites, mix a little borate powder into your sealer. It’s cheap insurance.
Maintenance is easy once you’re done. Every spring I give the fence a quick rinse with the hose and touch up any worn spots with leftover stain. The gate gets a drop of oil on the hinges twice a year. The plants need watering, but that’s part of the fun. With this routine, everything stays looking fresh for years.
I’ve talked to so many friends who thought a fence refresh had to be expensive. One neighbor replaced his entire fence for eight thousand dollars last year. Mine looks just as good and I spent less than three hundred total across all three upgrades. The money I saved went toward new patio furniture instead. That’s the real win.
If you’re worried about skill level, don’t be. These projects are truly beginner-friendly. I was never handy growing up, but following simple steps and taking my time made it work. YouTube has great videos for visual learners, but honestly the process is straightforward enough that you’ll figure it out as you go. And if something doesn’t turn out perfect the first time, that’s okay. Fences aren’t supposed to be flawless; they’re supposed to feel lived-in and loved.
One more thing before I wrap up. Think about the colors you choose. I’ve found that soft earth tones, grays, and warm browns blend with almost any landscaping and don’t show dirt as fast. Bright white can look stunning but needs more upkeep. Test a small section first so you don’t regret the final look.
These upgrades don’t just improve how your home looks from the street. They make your backyard a place you actually want to spend time in. My morning coffee tastes better when I’m not staring at peeling paint and a wobbly gate. Kids play safer, dogs stay contained, and neighbors compliment the place instead of asking if we’re planning to fix it soon.
If you’re sitting there right now looking out your window at a tired fence, I hope this gives you the nudge to start. Grab a notepad, make your supply list, and pick one sunny weekend. You’ll be amazed at what a little effort and even less money can do. And once you finish, send me a mental high-five because you just did something smart, practical, and genuinely satisfying.
The fence and gate are part of your home’s first impression, after all. Why not make that impression say “welcoming,” “cared for,” and “smart homeowner” instead of “needs work”? These three easy budget DIY upgrades have done exactly that for me and for dozens of people I’ve shared them with. Your turn.