Meta Description: Budget DIY Home Upgrades That Achieve Curb Appeal — discover 7 inspiring, affordable ways to transform your home’s exterior this weekend without hiring a contractor.
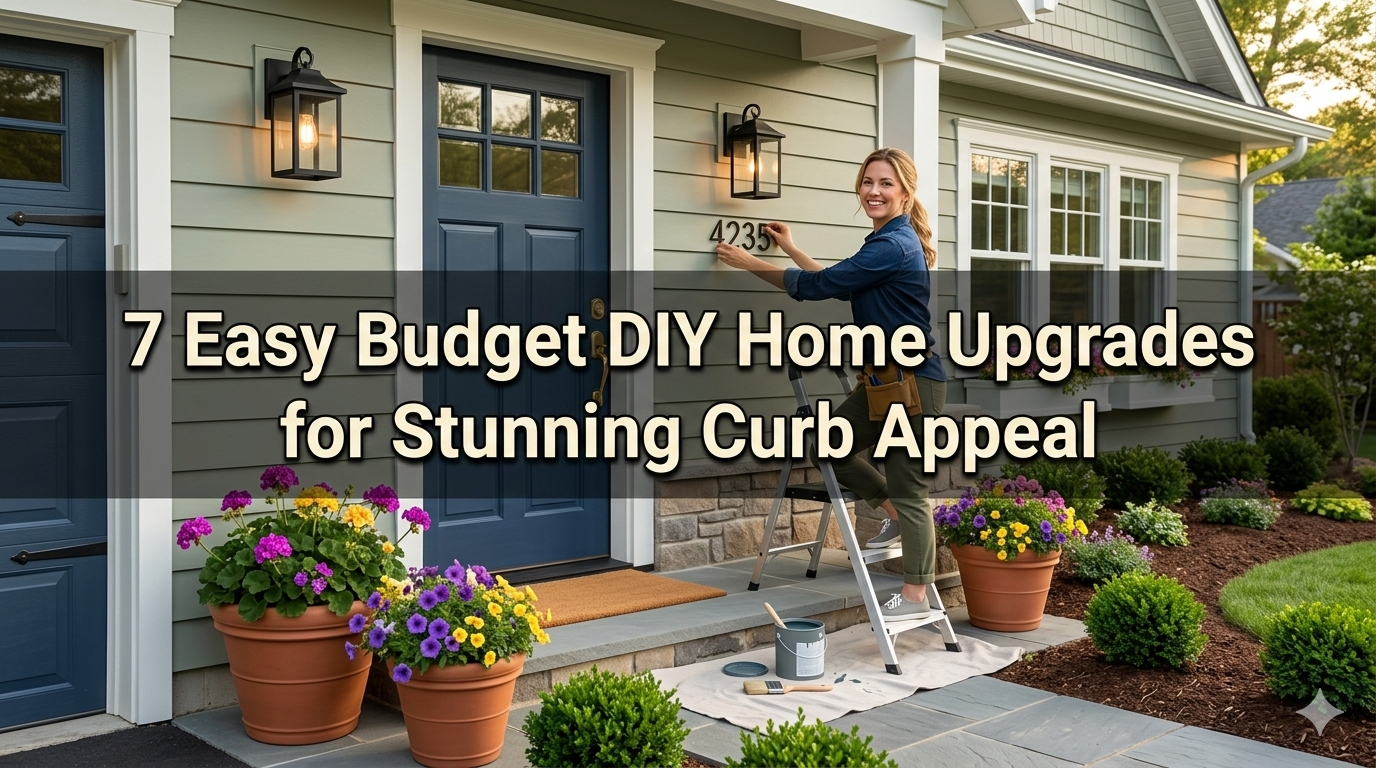
7 Inspiring Budget DIY Home Upgrades For Curb Appeal
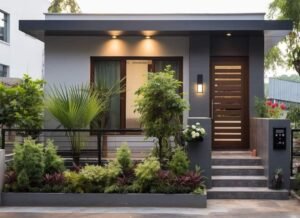
For better or worse, your home’s exterior is the first thing people see. Your neighbors who walk by, potential buyers turning the corner for the first time: that first impression sticks. But one thing’s for sure — you don’t need big budgets and contractors to make your house look absolutely stunning from the street.
With a little time, basic tools, and smart spending, you can completely change the look of your house on the outside. These budget DIY home upgrades are designed to get you the largest visual bang for your buck — and require no experience at all.
Detailed below are seven proven upgrades that will have your neighbors taking a second look.
The Cost Benefit of Curb Appeal
Curb appeal is just a matter of looking sharp. It can increase your home’s value, change your attitude from the moment you turn into the driveway, and affect how safe people think your neighborhood is.
According to real estate experts, good curb appeal can increase the value of a home by up to 7%. That means a $300,000 home could be sold for $21,000 more simply because the outside looks like it has been cared for.
Even if you don’t sell your home after all, having a lovely exterior makes returning home every single day even sweeter.
The best part? Most of these upgrades cost less than $100 and can be done in just one weekend.
Upgrade #1 — Give Your Front Door a Bold, New Look
Make Your Front Door Conspicuous
Your front door sets the tone for your home’s exterior entirely on its own. It captures the eye immediately. A door that’s faded, chipped, or just plain worn is going to telegraph neglect. Conversely, a freshly painted, beautifully styled door speaks of pride and care.
Painting your front door is one of the cheapest and most impactful budget DIY home upgrades you can make. A quart of exterior paint costs around $15–$30 and is more than enough for one door.
How to Give It a Go: Step by Step
Start by cleaning the door thoroughly with a degreaser or soapy water. Let it dry completely. Sand down any chipped areas and apply a primer if you’re making a big color change.
Use a small foam roller for the flat panels and a brush for the edges and details. Usually one coat is enough, but you can add another if needed.
The most popular front door colors homeowners are going for these days:
| Color | Vibe It Creates | Best For |
|---|---|---|
| Deep Navy Blue | Timeless and sophisticated | Traditional houses |
| Forest Green | Earthy and nurturing | Craftsman and cottage styles |
| Matte Black | Emphatic and modern | Contemporary designs |
| Brick Red | Passionate and warm | Farmhouses or colonial styles |
| Bright Yellow | Cheerful and unique | Bungalows or beach homes |
It’s also worth noting that you should replace any old, tarnished hardware at the same time. A new doorknob, knocker, and house numbers together costs as little as $30 — and makes a huge difference.
Upgrade #2 — Plant a Simple, Colorful Garden Bed
A Little Bit of Color Is an Incredible Thing
Nothing brings a closed-in front yard to life like a flower bed located in just the right place. You don’t need to know gardening. You just need a little color, some fresh mulch, and an hour or two of time.
Merely scattering a layer of new mulch in front of your house gives the place a whole new vibe. It makes everything look cleaner, more deliberate, and more finished. One bag of mulch costs about $5–$8, and most small front yards need only three to five bags.
The Simple 3-Layer Garden Formula
Use this strategy and you really can’t go wrong:
Layer 1 — Tall plants in the back. Think ornamental grasses, salvias, or tall coneflowers. These add height and structure.
Layer 2 — Medium plants in the middle. Marigolds, petunias, or black-eyed Susans work perfectly here.
Layer 3 — Low, spreading plants up front. Creeping thyme, alyssum, or lobelia soften the edge and spill over nicely.
Plant in odd numbers — groups of three or five look better than pairs.
Water the plants well after planting. Add 2–3 inches of mulch around your plants, but don’t pile any against the plant stems.
Estimated cost: $40–$80 for plants and mulch Time needed: 2–3 hours
Upgrade #3 — Power Wash Every Surface in Sight
Dirt Is Hiding Your Home’s True Potential
This upgrade sounds almost too simple, but it’s easily one of the most jaw-dropping budget DIY home upgrades you can do. Your siding, driveway, walkways, and porch will have a buildup of accumulated grime, mold, pollen, and dirt that builds up over years. A power wash removes all of it and reveals surfaces that practically look new again.
You can rent a power washer from a hardware store for $40–$60 per day. Or if you choose to buy your own electric model, expect to pay around $100–$150. These generally last quite a while.
The Biggest Impact Power Washes
Driveway and walkways — These are spots where oil stains, algae, and a lifetime’s worth of ground-in dirt collect. A cleaned-up driveway appears as if it were just laid.
Siding — Whether you have vinyl, wood, or brick, a good scrubbing gets rid of the gray film that takes away all the color.
Porch and steps — Especially important for those with concrete or wood.
Fences and retaining walls — Too many people overlook these, but it’s surprising how different a picture they make.
Use lower pressure when washing wood surfaces and higher pressure for concrete. Always spray downward at a slight angle to avoid pushing water under the siding.
Pro tip: Do your wash on a sunny day so everything dries quickly. Stand back and savor the result — it’s genuinely satisfying work.
Upgrade #4 — Refresh Your Mailbox and House Numbers
Small Things Often Make a Big Statement
This is one of those budget DIY home upgrades that people overlook until they do it — and then marvel at the changes wrought.
You don’t want to give off the impression of a rust-covered, leaning mailbox. The same goes for having faded and difficult-to-read house numbers.
A brand-new post mailbox costs anywhere from $25 to $80. Modern house numbers in a clean font with brushed metal finishes cost $15 to $40 for a complete set.
Picking the Right Style
Select the style that fits your house best. Here’s a quick guide:
| Home Style | Mailbox Style | Number Style |
|---|---|---|
| Modern/Contemporary | Sleek black metal wall mount | Large sans-serif brushed nickel |
| Traditional/Colonial | Classic post box with finial | Serif font in oil-rubbed bronze |
| Farmhouse | Wooden post with simple box | Bold black block numbers |
| Cottage/Craftsman | Decorative wall mount with detail | Antique brass or copper |
Installing a post mailbox is a simple afternoon project. Dig a hole, put in concrete mix, let it cure overnight, and attach the box.
For the house numbers, just measure even spacing, use painter’s tape to plan the placement, drill pilot holes, and screw them in. Done.
Upgrade #5 — Add Outdoor Lighting That Actually Looks Good
Highlight Your Home’s Best Features With Light
Outdoor lighting does double duty: it improves safety and greatly enhances the way your home looks after dark. Many people never stop to consider how their home appears at night, but neighbors and visitors often pass by in the evening.
Solar-powered path lights are the easiest entry point. A set of eight can cost as little as $20–$40. Stick them along the walkway leading to your front door and you instantly create an inviting, warm path.
For more ideas on affordable outdoor and interior improvements, check out Frugal Home Renovator — a great resource for budget-conscious homeowners looking to get the most out of every dollar they spend on their home.
The Three Types of Outdoor Lighting Worth Your Budget
Pathway lights — Guide people from the street or driveway to your front door. Soft, warm light works best. Stick with a uniform style so the line looks intentional.
Porch sconces — If your current porch lights are dated or broken, replacing them is straightforward. Turn off the breaker, swap out the fixture, and turn it back on. New sconces cost $25–$80 and can look like a $500 upgrade.
Accent/uplighting — These are small spotlights you place in the ground, aimed upward at a tree or architectural feature. They add drama and depth to the front of your home at night. Solar versions make this super easy with no wiring required.
Cost summary of outdoor lighting upgrades:
| Lighting Type | Average Cost | DIY Difficulty |
|---|---|---|
| Solar path lights (set of 8) | $20–$40 | Very easy |
| Porch sconce replacement | $25–$80 | Easy |
| Solar uplights (set of 4) | $30–$60 | Very easy |
| Wired path lighting | $80–$200 | Moderate |
Upgrade #6 — Refresh or Replace Your Shutters
Shutters Are Like Eyebrows for Your Home
This analogy sounds silly, but shutters really are like eyebrows for your house. They frame your windows the way eyebrows frame your eyes. When they’re clean, the right color, and correctly positioned, everything looks put together. When they’ve faded, broken off, or don’t match one another — the entire home looks tired and shabby.
If your shutters are in decent shape, a fresh coat of exterior paint can completely revive them. Remove them from the house if possible — it makes painting easier and cleaner. Use spray paint designed for shutters (around $8–$12 per can) or brush on exterior paint.
According to HGTV’s exterior painting guide, choosing the right shutter color relative to your home’s overall palette is one of the easiest ways to create a polished, cohesive look without spending much at all.
When to Replace Instead of Paint
If the shutters are cracked, warped, or have major chunks missing, replacement is the better move. Vinyl shutters are surprisingly affordable — a pair runs $30–$60 depending on size, and they’re easy to install with basic screws and wall anchors.
Color pairing ideas for shutters:
- White house + black shutters = clean and classic
- Gray house + navy shutters = sophisticated and modern
- Tan/beige house + forest green shutters = natural and warm
- Red brick house + white shutters = timeless and crisp
- Yellow house + dark brown shutters = charming and grounded
Make sure your shutter color connects with your door color for a cohesive look. They don’t have to match exactly, but they should be in the same family or complement each other.
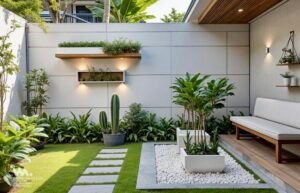
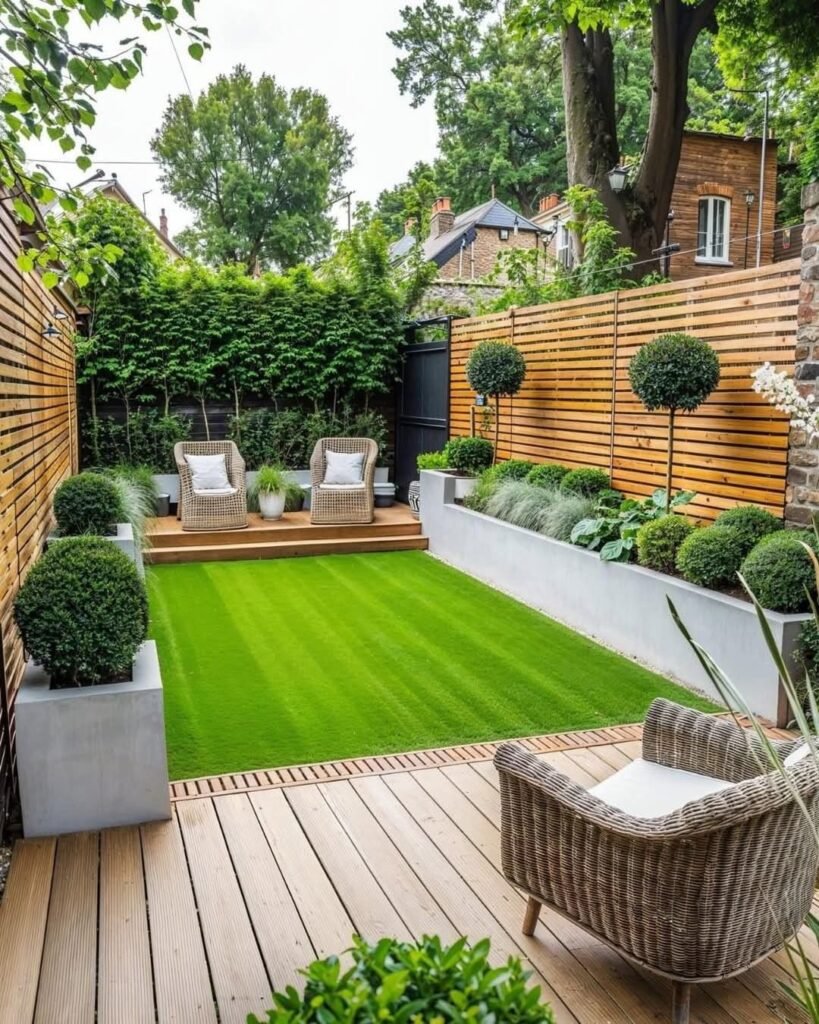
Upgrade #7 — Create a Welcoming Front Porch Moment
Turn Your Porch Into a Place People Notice
Even a tiny porch can become a statement. A few thoughtful additions turn a blank concrete slab into a spot that feels warm, intentional, and inviting. This is one of the most fun budget DIY home upgrades because you get to show a little personality.
Start with a new outdoor rug. A good-looking outdoor rug runs $25–$60 and instantly anchors the space. Go for a pattern or a bold color that ties into your door and shutters.
The Porch Upgrade Checklist
Seating — Even a single rocking chair or a small bench changes how the porch feels. Check Facebook Marketplace or thrift stores for deals. Sand and repaint for a fresh look.
Potted plants — Pairing two matching planters to frame the front door is a timeless look. For a formal feel, use tall upright plants like ornamental grasses or dwarf boxwoods. Or if you want to soften the lines to something more casual, try cascading flowers such as petunias or ferns.
A seasonal wreath — A simple wreath on the door adds texture and warmth. Make your own with a grapevine ring and some dried flowers from the craft store for under $20.
A clean, updated doormat — Swap out the old mat for something new. Find something that fits your style — funny, classic, or minimalist. It’s a tiny change that costs $15–$30, but people always notice it.
| Item | Estimated Cost |
|---|---|
| Outdoor rug | $25–$60 |
| Potted plants + pots | $30–$70 |
| Seasonal wreath | $15–$40 |
| Doormat | $15–$30 |
| Thrifted seating (refinished) | $0–$50 |
| Total | $85–$250 |
Your Full Budget DIY Home Upgrades Cost Breakdown
Here’s a bird’s-eye view of all of the above:
| Upgrade | Estimated Cost | Time Needed |
|---|---|---|
| Front door repaint + hardware | $50–$80 | 3–4 hours |
| Garden bed with mulch | $40–$80 | 2–3 hours |
| Power washing | $40–$60 (rental) | 2–4 hours |
| Mailbox + house numbers | $40–$100 | 2–3 hours |
| Outdoor lighting | $50–$120 | 1–3 hours |
| Shutter refresh or replace | $30–$120 | 2–4 hours |
| Porch staging | $85–$250 | 2–4 hours |
| Grand Total | $335–$810 | 14–25 hours |
For less than $1,000 — and often much less when you start with what you already have — you can pull off a transformation that looks like it came from the hands of a professional landscaper or designer. Most of these budget DIY home upgrades can be done one at a time, on weekends spread out over several months.
5 Tips to Get the Most Out of Every Upgrade
Before you grab your paintbrush and power washer, keep these tips in mind:
1. Work with a color palette. Choose two or three of your favorite colors before you even start. Your door, shutters, planters, and other decorative accents should all feel connected and harmonious.
2. Clean before you upgrade. Power wash first, before installing anything new. Just going over everything once with soap and water will be surprising. Your other improvements will also look twice as good because they start off so much cleaner.
3. Shop secondhand smartly. Country auctions, Facebook Marketplace, and thrift store bargains are rich sources for garden furniture, planters, and outdoor décor. A $5 chair, sanded down and brightened with paint, looks as good as new.
4. Do the easy stuff first. Change the doormat, fix up new house numbers, and hang a wreath. These small wins build momentum and train your eye to recognize what else should be addressed.
5. Photograph before and after. Seriously — take a photograph of what your house looks like before you start. You’ll be amazed at the difference. And the change is tremendously encouraging to keep going.
FAQs — Budget DIY Home Upgrades for Curb Appeal
Q: How much should I realistically spend on upgrades to improve my property’s curb appeal? You can make a big difference for as little as $100–$200, focusing on high-impact changes like painting the front door, adding new hardware, and laying down mulch. A complete transformation typically costs $300–$800 for most homes.
Q: What is the single highest-impact improvement I can make? Many real estate experts consider painting your front door the one investment that gives you the greatest return. It’s simple, quick, and dramatically changes the facade of your whole house.
Q: Do I need special skills to make these changes to my home? No. Every upgrade on this list is beginner-friendly. The most technical task is replacing outdoor porch sconces, which requires turning off the breaker and swapping the fixture. Most people can do it after watching a single short instructional video.
Q: How long will these DIY upgrades last? A freshly painted front door in high-quality exterior paint will stay beautiful for 4–6 years. New shutters and hardware, with basic care, will last at least 10 years. Garden plantings depend upon the type of plants — perennials come back reliably year after year and are a smart long-term investment.
Q: Will these upgrades actually raise the value of my home? Yes. Research consistently finds that strong curb appeal adds anywhere from 5–10% to a home’s appraised value. Even if you’re not selling, these changes make the place more welcoming and more fun to live in — and can reduce maintenance costs by preventing issues like moisture damage from neglected wood trim.
Q: What if my HOA has restrictions on colors or modifications? Always check your HOA guidelines before painting or making structural changes. Most HOAs have an approved color palette for doors and shutters. When in doubt, submit your request in writing — it takes five minutes and saves potential headaches.
Q: Can I do all seven upgrades in one weekend? Technically yes, but it would be a very busy weekend. A more manageable approach is to tackle two or three upgrades per weekend over several weeks. This also divides the cost, which is easier on most budgets.
Wrap-Up — Your Home Deserves to Look Its Best
You don’t need a contractor, a designer, or a huge budget. These seven budget DIY home upgrades show that with smarter choices and focused effort in the right places, you can completely change how your home presents itself to the world.
Try to finish one upgrade this weekend. Paint the front door. Put in a bag of mulch. Get a new doormat. Each small step adds to the last, and before you know it, you’ll be unable to wait to pull into the driveway just to see how great your home looks.
Curb appeal is merely care made visible. And with these upgrades, you can set a whole new standard.