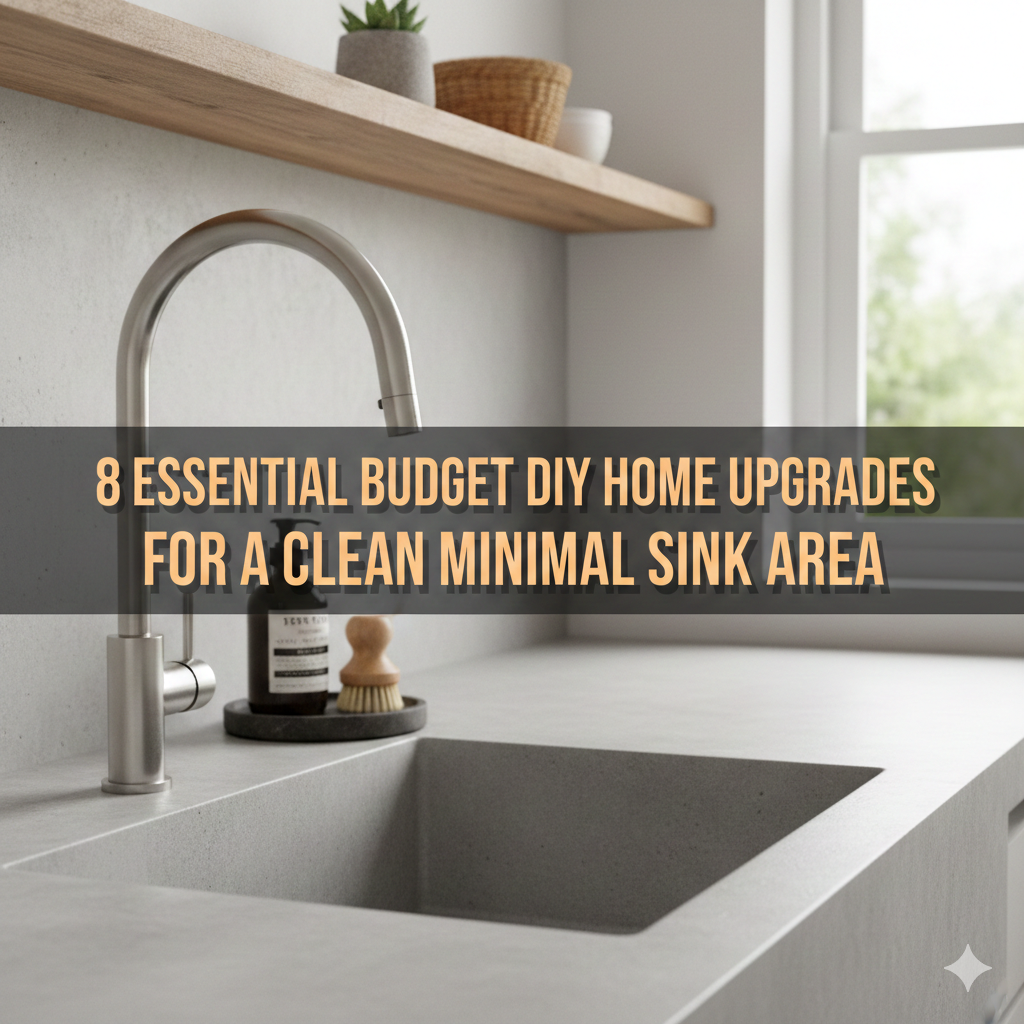
Meta Description: Budget DIY home upgrades for your sink area don’t have to be expensive. Discover 8 creative, affordable ways to create a clean, minimal, and stylish sink space today.
Sink Area Makeover: 8 DIY Upgrades You Can Make on a Budget to Keep It Nice and Clean
There’s something immensely gratifying about a spotless, decluttered sink space. Whether in the kitchen sink or bathroom vanity, a clean, spare setup gives the entire space a more pristine and organized feel.
The best part? You don’t have to break the bank to go there.
With a few crafty budget DIY home upgrades, you can makeover your sink area without bringing in a contractor or emptying your wallet. Most of these projects cost less than $30, use basic tools, and take only one afternoon to complete.
Here are eight practical, affordable upgrades that will help you achieve the sleek, minimal sink area that’ll make you happy to visit every day.
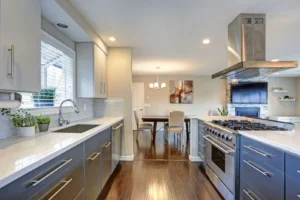
1. Replace Worn-Out Faucets With Sleek Modern Ones
Your faucet is the focal point of any sink area. An antiquated, chunky faucet can make even a clean room look old and weary.
Among the most impactful budget DIY home upgrades you can make is to replace your faucet. A modern matte black or brushed nickel faucet is between $25 and $60 at any hardware store.
What You’ll Need
- Adjustable wrench
- Plumber’s tape
- A new single-handle faucet
- Bucket and towels
How to Do It
Shut off the water supply valves under the sink. Put a bucket underneath to catch any drips. Unscrew the old faucet connections, remove the faucet, and attach the new one following package instructions. Most modern faucets include step-by-step instructions and all the hardware required.
The entire job takes roughly 45 minutes. The difference in looks is immediate and dramatic.
Pro Tip: Go for a single-handle faucet with sharp lines. It’s easier to use and looks much more minimal than two-handle designs.
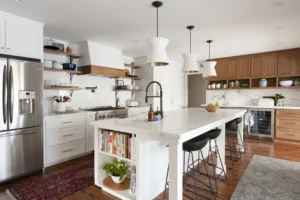
2. Install Floating Open Shelves for Mess-Free Storage
One of the biggest foes to a minimal sink area is countertop clutter. Soap bottles, sponges, toothbrushes, and other oddments accumulate quickly.
You can brilliantly overcome this by installing floating shelves.
By removing things from the counter and placing them on the wall, you immediately create visual space. This is a classic budget DIY home upgrade that costs next to nothing but has huge impact. For more budget-friendly renovation ideas, check out Frugal Home Renovator — a fantastic resource for homeowners who want beautiful results without the big price tag.
Budget Shelf Ideas
| Shelf Type | Estimated Cost | Difficulty Level |
|---|---|---|
| Basic wooden board + brackets | $8–$15 | Easy |
| Pre-made floating shelf kit | $15–$25 | Easy |
| Repurposed wooden crate | $5–$10 | Easy |
| Bamboo shelf with brackets | $12–$20 | Easy |
Tips for Minimal Shelf Styling
- Group items together with matching containers or small baskets
- No more than 3–4 items max per shelf
- Allow a little visible empty space — it’s part of the minimal look
- Keep it to a two-color palette (white and wood tone work great)
Be sure to anchor shelves into wall studs, or use drywall anchors that are rated for the weight you intend to store.

3. Swap Out the Cabinet Hardware for a Quick Facelift
This upgrade costs less than $20 and takes less than half an hour of your time. But most people ignore it entirely.
Brass or worn-out cabinet pulls under your sink make the entire space feel dated. Exchanging them for simple, modern hardware is one of the simplest budget DIY home upgrades on this list.
Best Hardware Styles to Complement a Minimal Sink Area
Matte Black Pulls — Statement-making, modern, and easy to clean. Plays nicely with white or lighter cabinets.
Brushed Nickel Knobs — Smooth and refined. A perfect companion to gray or wood-tone cabinetry.
Flat Bar Handles — Modern and architectural. Perfect for a really minimal, contemporary look.
How to Switch Out Hardware
- Measure the hole spacing on your existing hardware
- Purchase new hardware with matching dimensions
- Remove old components with a screwdriver
- Screw in new pulls or knobs securely
- Done.
No special tools. No mess. Just a totally new look in less than thirty minutes.
4. Add a Simple Backsplash With Peel-and-Stick Tiles
The wall behind your sink takes a pounding. Water splashes, soap residue accumulates, and paint can begin to peel over time.
A clean-looking backsplash protects that wall and immediately kicks up the whole room.
Peel-and-stick tile panels are a game-changer for budget renovators. They’re waterproof, easy to apply, and removable if you later have a change of heart. The price is usually $15 to $40 for enough to cover a standard sink backsplash area.
Step-by-Step Backsplash Installation
Step 1: Give the wall a good clean. Let it dry completely.
Step 2: Measure the area and cut tiles to fit using scissors or a utility knife.
Step 3: Remove the backing and set tiles starting from the center, pressing firmly to ensure a strong bond with the wall.
Step 4: Use a credit card or flat tool to push out any air bubbles.
Step 5: Add caulk along edges for a smooth, water-tight finish.
Top Tile Designs for a Minimalist Aesthetic
- Subway tile (white or off-white)
- Small square mosaic tiles in white and gray
- Marble-effect peel-and-stick panels
- Simple hexagon tiles in soft tones
Be careful with busy patterns or too many colors. Minimal is quiet, unified, and clean.
5. Organize Under the Sink With Cheap Storage Solutions
Open the cabinet under most sinks and you will find a jumble of cleaning products, stray sponges, and long-forgotten items. This hidden mess really influences how you feel about the entire space.
One of the most practical budget DIY home upgrades you can do is organizing under the sink. And it costs very little.
Affordable Under-Sink Organizers
| Product | Average Cost | What It Solves |
|---|---|---|
| Stackable wire shelves | $10–$15 | Doubles vertical storage space |
| Tension rod + spray bottle hangers | $3–$5 | Keeps bottles off the floor |
| Pull-out drawer bins | $12–$20 | Easy access to back items |
| Small plastic bins or baskets | $5–$10 | Groups similar items together |
| Door-mounted organizers | $8–$12 | Uses wasted door space |
How to Organize It Properly
Start by taking everything out. Discard expired products and anything you haven’t touched in more than a year.
Next, sort things by category: cleaning supplies, extra soap, sponges, and so on.
Use labeled bins to keep each category together. Install a tension rod across the middle of the cabinet to hang spray bottles — it keeps them upright and saves floor space inside the cabinet.
A clean, organized under-sink cabinet makes daily routines go faster and with less stress.
6. Invest in Matching Sink Accessories for a Cohesive, Minimal Set
Nothing undermines the minimal look faster than random mismatched accessories.
A pink soap dispenser next to a chrome sponge holder next to a plastic cup for toothbrushes — it’s a visual mess even if everything is technically clean.
The workaround is easy: create a matching set of sink accessories around one material or finish.
The Minimal Sink Accessory Checklist
Here’s what to include and what to leave out:
Keep (and Match):
- Soap dispenser
- Toothbrush holder (if bathroom)
- A small dish or tray for holding accessories
- Soap dish (if using bar soap)
Remove or Hide:
- Extra sponges (store one under the sink)
- Cleaning brushes (keep in a drawer)
- Random bottles (decant into matching dispensers)
Budget Matching Sets
You don’t need to spend much. Dollar stores, IKEA, Amazon, and even thrift stores often sell matching ceramic or acrylic sets for under $15 total.
Choose white, black, clear, or natural colors. They work with just about every type of sink and are never out of style.
7. Give the Area a Fresh Look With New Paint or Removable Wallpaper
Color has such a huge psychological influence. A grimy yellow wall or peeling paint behind your sink makes the whole area look dirty, even when it isn’t.
One of the easiest and least expensive budget DIY home upgrades you can do is put on a fresh coat of paint. A small can of paint for an accent wall costs roughly $8 to $15 and goes a long way.
Which Colors Work Best for a Minimal Sink Area
Crisp White — The traditional option. Creates a bigger, airier space and bounces light beautifully.
Soft Sage Green — Earthy, soothing, and extremely popular right now.
Light Gray — Elegant, and matches any faucet finish.
Warm Off-White (think linen or cream) — Softer than straight-up white yet still minimal and clean.
Removable Wallpaper as an Alternative
If you rent, or simply want to avoid painting, removable wallpaper is a genius option. Today’s peel-and-stick wallpapers have a super-realistic appearance and remove cleanly from walls. According to Better Homes & Gardens, removable wallpaper is one of the top renter-friendly home upgrades trending right now.
Subtle textures such as linen, soft geometric patterns, or simple botanical prints are well suited for a minimal sink area without feeling too busy.
Use it just like peel-and-stick tiles — clean wall, peel, press down, and smooth out bubbles.
8. Add Elegant Lighting to Brighten the Sink Area
Lighting is the most underestimated element of any sink area upgrade. Poor lighting makes everything look dull and uninviting, makes tasks harder to accomplish, and can ruin the aesthetic no matter how clean everything else is.
The good news: these budget DIY home upgrades don’t require an electrician.
No-Wire Lighting Solutions
LED Strip Lights Under Cabinets These are battery-powered or plug-in strips that attach to the underside of your upper cabinet to light up your sink area. They cost $10–$20 and make a big impact on both function and atmosphere.
Battery-Powered Puck Lights Small, round lights that stick anywhere. A great way to add brightness in dark corners above or beside the sink. Often under $10 for a pack of three.
A Small Plug-In Sconce or Mirror Light If your sink is in a bathroom, a simple plug-in wall sconce next to the mirror provides flattering, functional light with no electrical work required.
Lighting Color Temperature Guide
| Temperature | Appearance | Best For |
|---|---|---|
| 2700K–3000K | Warm white | Bathroom relaxation, cozy feel |
| 3500K–4000K | Neutral white | Kitchen sink areas, task lighting |
| 5000K–6500K | Cool/daylight white | Bright, clean, clinical look |
Neutral white (3500K–4000K) is most effective for a sleek, minimal look. It’s bright enough to work under without being harsh or clinical.
Bringing It All Together: A Basic Upgrade Plan
If you’d like to take on these projects without feeling overwhelmed, here’s an easy weekend plan:
Day One: Quick Wins (2–3 Hours)
- Replace cabinet hardware
- Swap mismatched accessories for a matching set
- Organize under the sink
- Add or replace a shelf
Day Two: Bigger Projects (3–4 Hours)
- Install peel-and-stick backsplash
- Paint or add removable wallpaper
- Replace faucet
- Add lighting
Even if you only finish three or four of these budget DIY home upgrades, your sink area will look and feel noticeably different than before.
Cost Breakdown: What You’re Actually Paying
| Upgrade | Estimated Cost |
|---|---|
| Faucet replacement | $25–$60 |
| Floating shelves | $8–$25 |
| Cabinet hardware swap | $10–$20 |
| Peel-and-stick backsplash | $15–$40 |
| Under-sink organizers | $15–$30 |
| Matching accessories | $10–$20 |
| Paint or removable wallpaper | $10–$30 |
| LED lighting | $10–$25 |
| Total Range | $103–$250 |
Even at the high end, that’s a fraction of what a professional renovation would cost — and you have the satisfaction of doing it yourself.
FAQs: Affordable DIY Sink Area Home Upgrades
Q: Are these upgrades difficult to do? No. Each of the eight projects on this list is beginner-friendly. The faucet replacement is the most involved, but it comes with clear instructions and requires no plumbing experience. The rest only need basic tools such as a screwdriver, measuring tape, and scissors.
Q: How long do peel-and-stick tiles last? A well-installed, high-quality peel-and-stick tile can last 5–10 years when applied to a clean, dry surface. Do not use them in areas with constant steam or extreme moisture without sealing all edges.
Q: Can I make these upgrades if I rent my home or apartment? Yes, most of these upgrades are renter-friendly. Peel-and-stick backsplash tiles, removable wallpaper, and LED strip lights leave no permanent damage. Cabinet hardware can be swapped back before you move out if needed. Always consult your lease before drilling holes.
Q: What is the one upgrade to start with? Begin with swapping out the accessories and organizing under the sink. They cost less than $25 combined, take less than an hour, and make an immediate visual difference. They also require zero tools and zero skills.
Q: Will these changes actually increase my home’s value? Cosmetic upgrades such as backsplash tiles, modern faucets, and fresh paint do help buyer perception and can increase home value appreciably. More importantly, they make your home a more enjoyable place to live every day — and that has a value all its own.
Q: How do I keep a minimal sink area looking clean long-term? The trick is to display fewer items. Store extras out of sight. Wipe surfaces daily with a microfiber cloth. Do a weekly quick-clean of accessories. Once the minimal system is set up, maintaining it takes under five minutes a day.
Q: Is matte black hardware hard to keep clean? Matte black is actually a lot more forgiving with water spots than chrome. It stays looking sharp with a simple wipe-down. Steer clear of abrasive cleaners, which can wear away the finish over time.
Wrapping It All Up
A tidy, minimal sink area isn’t about aesthetics alone. It speeds up your daily routines, cuts down on mental clutter, and simply helps make your home a better place to live in.
The eight budget DIY home upgrades covered here demonstrate that transformation doesn’t require a designer price tag or a licensed contractor. For less than $250 — and often much less — you can entirely reinvent how your sink space looks and works.
Try one or two projects this weekend. It’s incredible how quickly the changes compound into something that feels entirely different.
A minimal space isn’t empty. It’s intentional. And intentional always looks better and feels better.