Meta Description: 9 Fast Budget DIY Home Upgrades for Outdoor Entertaining that transform your backyard without breaking the bank. Discover creative, affordable ideas to impress every guest.
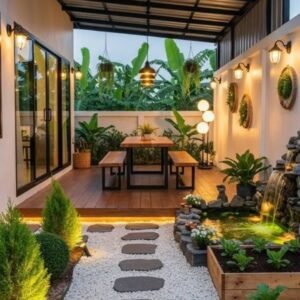
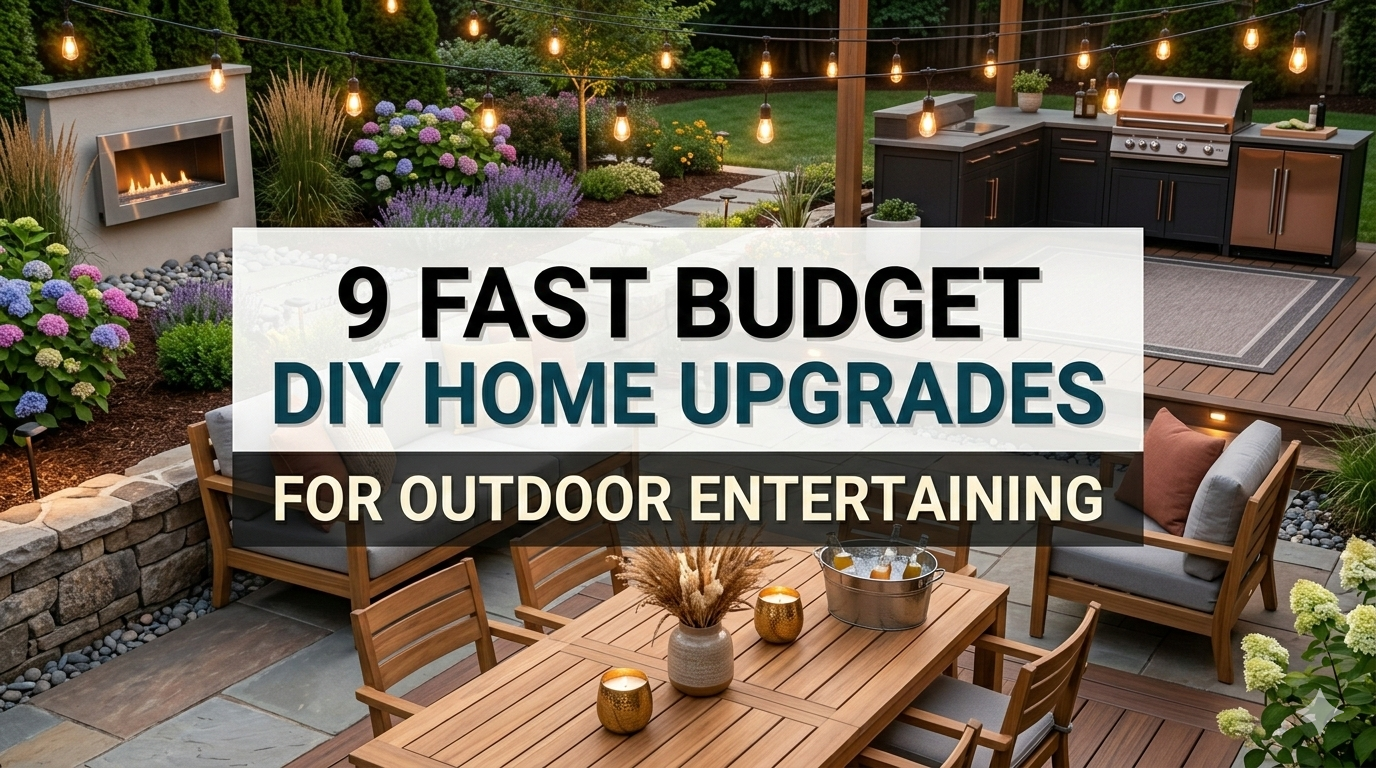
9 Fast Budget DIY Home Upgrades for Outdoor Entertaining
My name is Anil. Can you give any information about this guide? We offer the most results. Faced with how to get in touch, I wrote my address on the back of my shirt.
Prepare
This is the fastest and easiest way to lose money. Spend 20 minutes before your first trip to the hardware store. Here are quick things you can do.
Find out how much space you have. Don’t buy anything until you know your square footage.
Set a Realistic Budget. Even though it is spent wisely, $100 to $300 can go a long way.
Pick your problems (water, bugs, lighting). We take a big step back and focus on the three issues that will give you the most payback in terms of home services. The bulk of the money should go first.
One rule to keep when it comes to buying new things: Check before you Shop. Pick up bargains at thrift stores, yard sales, Facebook Marketplace. Take insight from local bulletin boards on campuses and bulletin boards in bars or taverns for these options as well as garage sales.
Upgrade 1: Build a Pallet Wood Seating Area on a Budget
Why Pallet Furniture Works So Well
Wood pallets are one of the best-kept secrets in budget DIY. Usually offered free at your local hardware store, warehouse, or grocery store, you can turn them into stylish outdoor furniture with a bit of sanding and some outdoor paint or staining.
What You’ll Need
| Item | Estimated Cost |
|---|---|
| Wood Pallets (2–4) | Free – $10 each |
| Sandpaper (medium grit) | $5–$8 |
| Outdoor wood stain or paint | $15–$25 |
| Outdoor cushions | $20–$50 |
| Wood Screws | $5–$10 |
Total estimated cost: $45–$103
What to Do
Stack two pallets together on top of each other and you have the base for a couch. Stack a third upright pallet behind them as a back. Screw this all together. Sand all the rough edges down so that nobody gets splinters. Apply two coats of outdoor stain or paint — but be sure it dries completely before adding cushions.
If you can get the pallets free, for just under a hundred dollars you can make a full sectional seating area — a very cost-effective upgrade on this list.
For more budget-friendly outdoor renovation ideas, check out Frugal Home Renovator — a great resource packed with practical DIY tips for every budget.
Upgrade 2: String Lights That Spark Your Entire Patio
The Power of Outdoor Lighting
Throughout all poorly lit places, lighting is like a single sentence changer of attitudes. It turns a common backyard into something artistic, relaxed, and alluring. String lights are finally super cheap and easy to install. They are solar powered, so installation is an absolute cinch with no wiring necessary.
Cost for Each Type of String Lights
| Lighting Type | Cost Range |
|---|---|
| Basic incandescent string lights | $10–$20 |
| LED string lights | $15–$30 |
| Solar-powered string lights | $15–$35 |
Solar-powered LED string lights are the best way to go. They require no wiring or electricity cost, and they turn themselves on at dusk.
Upgrade 3: Create a DIY Outdoor Bar or Drink Station
Remake Any Corner Into a Gathering Spot
In creating a cool new corner of your home garden where friends would like to visit often, one must have some place for drinks. It keeps guests together in a single area, cuts down on the number of trips back inside, and makes a cool sight no matter how many people are present. Making drink stations yourself costs only a fraction of the price of pre-built outdoor bars.
Create a Bar for Under $75
Use an old dresser. Take out a few drawers, put some outdoor sealant on the sides and top shelves to make it waterproof for serving drinks. Sand and paint to match your outdoor colors.
Stack cinder blocks with wood planks. The wooden planks are laid on top of the framework. After less than half an hour and for around $20, you can have a nice sturdy surface.
Use a potting bench. Potting benches are really just outdoor worktables. They make perfect bar stations and are easy to style.
Add a small chalkboard sign, a big metal bucket for ice, and a few hooks for bottle openers. Done.
Upgrade 4: Position an Outdoor Rug to Define Your Space
Why a Rug Changes Everything
A rug on the ground does everything. Rugs can make anything look better and feel more comfortable, no matter where you put them.
When it comes to outdoor improvements, most people seem to miss this simple fact. An outdoor rug immediately does 3 things — it defines the party area, adds color and texture, and makes a space feel like a real room.
What Kind of Outdoor Rug to Choose
Check labels for “indoor/outdoor” and “weather-resistant” rugs. These are made from polypropylene, which handles moisture, sun, and foot traffic without rotting.
Where to get them cheap:
- IKEA ($30–$60)
- Amazon (search “outdoor rug clearance”)
- Home Goods or TJ Maxx
- Wayfair seasonal sales
A 5×8 ft rug can often be found for $25–$60. Place your seating area on top of it so the furniture legs rest on the rug. This anchors the space and makes it look like something designed by a pro.
Upgrade 5: Build a Fire Pit for Under $60
Gathering Around the Fire Outdoors
A fire pit is perhaps the most desired outdoor entertaining feature of all time. Fire is a magnet for people. It expands the outdoor entertaining season into fall and winter, creates atmosphere, and provides a place for company to gather.
The traditional DIY fire pit is fairly straightforward and can be done in an afternoon.
Basic Materials for a DIY Fire Pit
| Material | Quantity Needed | Estimated Cost |
|---|---|---|
| Retaining wall blocks or fire bricks | 30–40 units | $35–$50 |
| Gravel (for base) | 1–2 bags | $5–$10 |
| Sand | 1 bag | $3–$5 |
Total: $43–$65
How to Build It
Pick a level spot at least 10 feet away from any buildings. Mark a circle that’s about 3 feet in diameter and dig down 4 inches. Fill with gravel for drainage. Lay your initial ring of blocks in a circle. Stack up 2–3 more rings, staggering the joints for stability. No mortar is necessary for a basic setup.
That’s it — you now have a simple but very efficient fire pit.
Safety tip: For every fire you burn, keep a bucket of water or a garden hose within reach. According to the National Fire Protection Association (NFPA), outdoor fires should always be monitored and never left unattended.
Upgrade 6: DIY Planter Boxes for Color and Privacy
Plants Make Every Space Better
When it comes to sprucing up the outdoor living space, nothing does more for it than fresh plants and flowers. They add color and soften those hard edges all around. Planter boxes can also serve as natural fences when you don’t have an actual fence.
Build Your Own Planter Box in 1 Hour
You don’t have to be a master carpenter to make a simple rectangular planter box with cedar fence boards, a few screws, and basic tools.
Here is a list of materials you will need:
- 5–6 cedar fence pickets ($2–$4 each at most hardware stores)
- Wood screws
- Exterior wood glue
- Drill
Start cutting the boards to size. Build a rectangular frame. Drill drainage holes in the bottom. Fill with potting soil and plant.
For minimal effort, buy cheap plastic planters and coat them with spray paint to match your color theme. A can of spray paint costs $5–$8 and can change inexpensive-looking plastic into something that looks custom-made.
Plants That Go Well With Entertaining Spaces
- Tall ornamental grasses (privacy and movement)
- Lavender (looks beautiful, smells amazing, repels mosquitoes)
- Rosemary (good for barbecues too)
- Marigolds (eye-catching colors, insect-repelling)
- Bamboo planted in containers (fast-growing privacy screen)
Upgrade 7: Give New Life to a Wood or Concrete Surface
Don’t Overlook What’s Underfoot
Your patio’s surface is one of the first things your guests see. Cracked, stained, or weathered concrete or wood will bring down the entire look — no matter how nice everything else might be.
The good news: refreshing your surface is easier and cheaper than most people think.
For Concrete Patios
Concrete paint or stain costs about $25–$45 per gallon and covers roughly 200–400 square feet. Before you start, thoroughly clean the surface with a pressure washer (you can rent one for $40–$60 a day). Let it dry. Apply one or two coats of concrete stain.
You can even use painter’s tape to make patterns — stripes, borders, or a fake tile look.
For Wood Decks
Old decks often only need a good cleaning and a fresh coat of deck stain or sealer. Use a deck cleaner ($10–$15) to take off the gray and dirt. Let it dry. Apply outdoor deck stain.
| Surface Type | Product Needed | Average Cost |
|---|---|---|
| Concrete patio | Concrete stain/paint | $25–$45 |
| Wood deck | Deck cleaner + stain | $25–$50 |
| Paver patio | Paver sealer | $20–$35 |
One simple change can transform the entire look of a worn-out, old patio in just one weekend.
Upgrade 8: Build a DIY Outdoor Home Theater
Outdoor Movie Nights Are Memory Makers
This is a classic event for people of all ages. Outdoor movies sure sound like they would be expensive but actually they aren’t — especially if you already own a projector or can borrow one.
Budget Outdoor Movie Setup
The screen: Hang a white bed sheet between two trees, poles, or attach it to a fence. You can also buy a dedicated outdoor projector screen for $30–$70.
The projector: Entry-level portable projectors start at around $50–$80.
The audio: A decent outdoor Bluetooth speaker costs $25–$50.
The seating: Use your pallet furniture, fold-out chairs, blankets, or floor cushions.
Total setup cost (if buying everything new): $105–$220
If you already have a projector, the setup can cost as little as $30–$50.
Upgrade 9: Build a DIY Outdoor Privacy Screen
Create Your Own Cozy Backyard Retreat
Nothing ruins an outdoor party faster than feeling like your neighbors are watching everything. Privacy makes guests feel relaxed and comfortable.
Three Budget Privacy Screen Ideas
Option A – Lattice panels with climbing plants. Buy lattice panels at a hardware store ($15–$25 each). Attach them to a simple 2×4 wood frame. Plant fast-growing climbers at the base.
Option B – Bamboo roll fencing. Roll bamboo fencing is sold at most home improvement stores for $20–$40 per roll. It’s easy to attach to an existing fence or a simple frame.
Option C – Hanging outdoor curtains. Install a simple tension rod or wire between two poles and hang outdoor-rated curtains. Outdoor curtains cost $20–$45 per panel.
| Privacy Screen Option | Materials Cost | Difficulty Level |
|---|---|---|
| Lattice + climbing plants | $30–$60 | Medium |
| Bamboo roll fencing | $20–$40 | Easy |
| Outdoor curtain panels | $40–$90 | Easy |
Each of these options can provide a very different sensation to your outdoor space and yet still be economical.
How These Upgrades Work Together
Through the power of combining these upgrades, the magic really works. Here is how these elements layer together to create a complete outdoor entertaining experience.
Zone 1 – The Seating Area: Pallet furniture + outdoor rug + string lights overhead
Zone 2 – The Gathering Area: Fire pit surrounded by fold-out chairs or log seating
Zone 3 – The Service Area: DIY bar/drink station + planter boxes nearby for decoration
Zone 4 – The Entertainment Zone: Outdoor movie setup at one end of the yard
Zone 5 – The Border: Privacy screens + planter boxes along edges
Just do 3–4 of these upgrades and you will find your outdoor living space completely transformed. No need to do all nine at once — start with what matters to you most and build from there.
Budget Breakdown: What You Might Spend Overall
| Upgrade | Low-End Cost | High-End Cost |
|---|---|---|
| Pallet seating area | $45 | $103 |
| String lights | $15 | $35 |
| DIY bar/drink station | $0 | $75 |
| Outdoor rug | $25 | $60 |
| Fire pit | $43 | $65 |
| Planter boxes | $20 | $60 |
| Surface refresh | $25 | $50 |
| Outdoor movie zone | $30 | $220 |
| Privacy screen | $20 | $90 |
| TOTAL | $223 | $758 |
Even at the high end, under $800 turns a bland outdoor space into a full entertaining destination. At the low end, $223 is genuinely transformative.
How to Extend Your DIY Budget Even Further
Buy off-season. Outdoor furniture, string lights, and rugs go on deep clearance in September and October. Stock up for next year.
Use paint creatively. Spray paint is the most inexpensive way to create a sense of cohesiveness from old, cheap, or mismatched items. Pick 2–3 colors and stick with them.
Shop secondhand first. Before dropping any money on something new, simply spend 10 minutes scouring Facebook Marketplace or Craigslist. Recycled pieces of garden furnishings can be bought at a substantial discount — or given away free altogether.
Borrow tools. Most of these projects require only simple tools. Check with your neighbors or friends before you go out to rent or buy them.
Do one upgrade per weekend. Splitting the work out makes it bearable and means you won’t be hit by one big bill all at once.
FAQs About Budget DIY Home Upgrades for Outdoor Entertaining
Q: How much should I realistically spend on a basic outdoor entertaining setup? A: For a good, simple setup with seating, lighting, and a rug, you can get started for $100–$200. Add a fire pit and a privacy screen and you’re still probably under $400.
Q: Do I need any power tools for these projects? A: Most of these projects only require simple tools — a drill, sandpaper, paintbrush, and saw for cutting wood. A few (such as string lights, outdoor rugs, and bamboo fencing) need no tools at all.
Q: Are pallet wood furniture projects safe and durable? A: Yes, as long as you use heat-treated pallets (stamped “HT”) rather than chemically treated ones (stamped “MB”). Sand every surface smooth, seal with outdoor stain, and they will hold up well for many years.
Q: How can I make my outdoor space bug-free for entertaining? A: Plant lavender, marigolds, and rosemary close by — all natural mosquito repellents. Use citronella candles or torches around the perimeter. A small fan near your seating area will also keep bugs away.
Q: Can I do these upgrades as a house renter? A: A lot of these projects are totally renter-friendly. String lights, outdoor rugs, planter boxes, furniture, and theater setups are all temporary changes that don’t require permanent fixtures. For fire pits and fencing, get your landlord’s approval first.
Q: What is the single most impactful upgrade on a very tight budget? A: String lights. If you can only do one upgrade, do lighting. They add an immediate touch that will impress anyone who visits.
Q: How can I protect my DIY outdoor furniture in winter? A: Cover your furniture with weatherproof covers or move the pieces into a garage or shed during harsh winters. Give all wood parts a fresh coat of outdoor stain or sealer each spring to radically extend their usable life.
Putting It All Together
Transforming your outdoor space doesn’t take a big budget, a contractor, or months of planning. These 9 quick budget DIY home upgrades for outdoor entertaining demonstrate that creativity and effort trump money every time.
Start small and work at your own speed. Utilize one or two upgrades from this list during the coming weekend. Enhance the look and feel of your outdoor area. Then take it from there.
The best outdoor entertaining space isn’t the most expensive one. The one that gets used, is comfortable, and brings people together is totally within your grasp — no matter what your budget looks like.
Pick up some string lights and get to it now.