Meta Description: Budget DIY home upgrades for small homes don’t have to be complicated. Discover 6 clever, affordable ideas to maximize space, style, and function in your home.
DIY Home Upgrades: 6 Budget-Friendly Ideas for Small Homes
There are many advantages to living in a small home. Less cleaning. Lower bills. A homely feel that large homes can sometimes miss.
But let’s get real — small spaces have their own set of very real challenges. Clutter builds up fast. Rooms feel cramped. And it can be difficult to make your home feel like yours without a big budget.
The good news is, you don’t need a big budget or an expensive contractor to make the space in your home feel brand new. A touch of creativity and a weekend’s worth of labor can make your small home appear larger, seem fresher and function better.
We’re walking you through 6 budget DIY home upgrades for small homes — all practical, affordable and manageable for beginners in this guide. These ideas will maximize every square foot regardless of whether you rent or own.
Here’s Why Small Homes Deserve Smart Upgrades
Small homes are not a consolation prize. Millions of people make that choice deliberately — for reasons of economics, sustainability or just because quality matters more than quantity.
But “small” doesn’t have to mean “cramped” or “boring.” With the right upgrades, you can completely transform how a space feels and functions.
The trick is to work with your space, not against it. That means choosing upgrades that:
- Add storage without adding bulk
- Make rooms feel bigger without knocking down walls
- Display your personality without the clutter of filled shelves
And the best part? Many of these modifications cost less than going to dinner.
What to Remember Before Getting Started
Take a few minutes to plan before picking up a paintbrush or a drill. Preparing a bit ahead of time will avoid headaches later on.
Set a realistic budget. Even things you do on a budget can lead you to the poorhouse if you’re not careful. Set a cap before you go shopping.
Measure everything. Twice. There is no room for mistakes in small spaces. One inch too wide of a shelf can wreck the entire effect.
Begin with the largest pain points. What irritates you the most about your home currently? Start there. You’ll derive the most satisfaction — and motivation — from tackling your biggest problem first.
Buy quality where it counts. In many cases, inexpensive tools and supplies ultimately end up being more expensive. Invest a bit more in paint, hardware and adhesive. Spend less on decorative items that you can replace later.

Upgrade #1: Create a Pegboard Wall for Instant Organization
Why Pegboards Are a Small Home’s Best Friend
Pegboards are an eternally classic — and for good reason. They can turn a blank wall into a complete, customizable storage system — without occupying any floor space at all.
You’ve likely spotted them in garages or craft rooms. But they are equally effective in kitchens, home offices, entryways and even bedrooms.
The premise is simple: hang a sizable pegboard panel on the wall and then use hooks, shelving and bins to hang or store everything you need. Tools, pots and pans, office supplies, jewelry — you name it.
How to Do It on a Budget
Most hardware stores sell a 4×8-foot pegboard panel for about $20–$30. Add a pack of hooks (typically $5–$15), some paint if you’re inclined to spruce it up and basic mounting hardware — total cost is under $60 for the equivalent of an entire cabinet’s worth of work.
Here’s a simple breakdown:
| Item | Estimated Cost |
|---|---|
| Pegboard panel (4×8 ft) | $20–$30 |
| Pegboard hooks & accessories | $5–$15 |
| Spray paint for decoration (optional) | $6–$10 |
| Mounting screws and spacers | $5–$8 |
| Total | $36–$63 |
Tips for Making It Look Great
- Before mounting it, paint the pegboard a bright color. It immediately makes it look intentional and stylish.
- Use coordinating hooks for a professional and uniform look.
- Group items by category. It makes everything organized and easy to find.
- Install little shelves for things that can’t hang, like jars or tiny plants.
A pegboard wall takes about 2–3 hours to install and requires little more than basic tools — a drill, a level, and a stud finder.
Upgrade #2: Transform Any Room With Peel-and-Stick Wallpaper
The Simplest Way to Infuse Big Personality
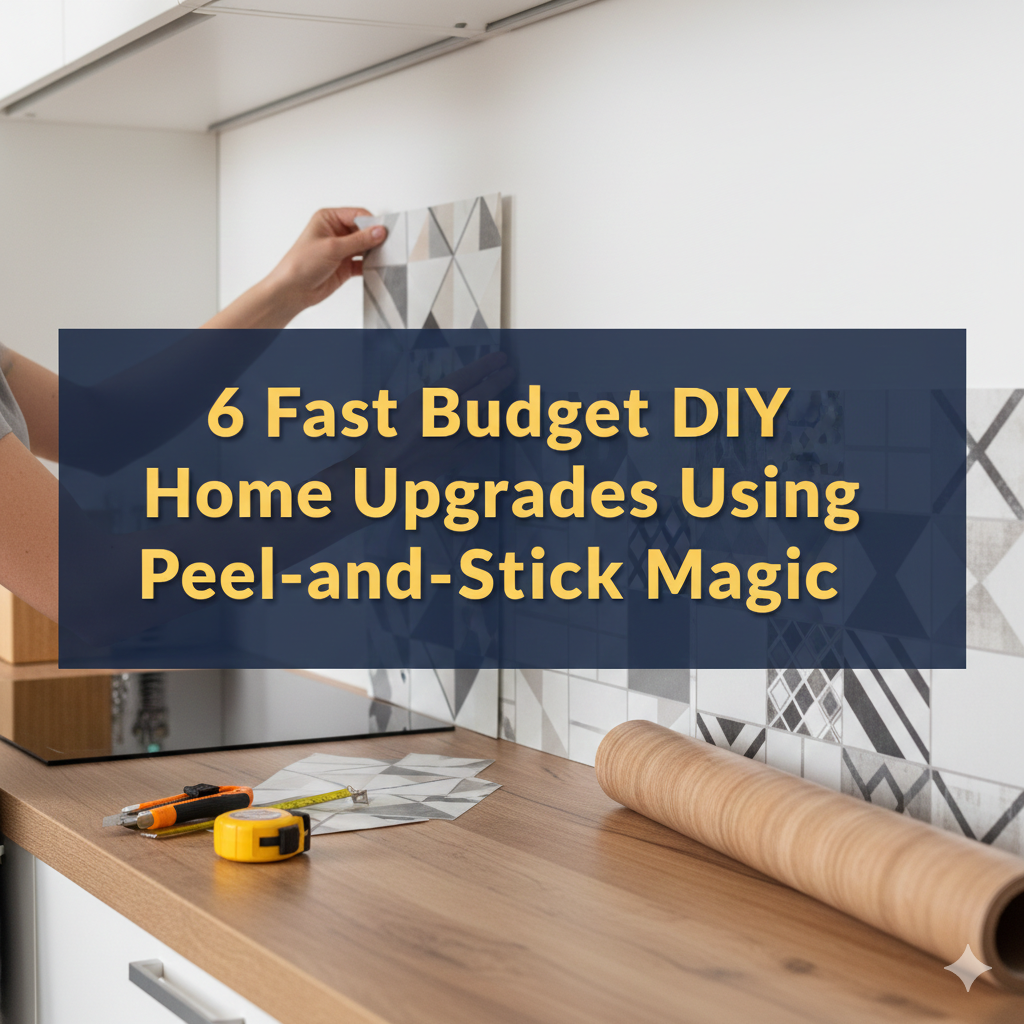
There is probably no quicker way to make a small room feel entirely different than by adding an accent wall. But traditional wallpaper is messy, expensive and permanent. That’s where peel-and-stick wallpaper comes in and saves the day.
It is precisely what it sounds like. You remove the backing and stick it to your wall. No paste. No mess. No professional installer needed.
And when you’re ready for something new — or if you’re moving — it peels off easily, without ruining the wall behind. Which makes it ideal for renters as well.
How to Use It in a Small Home
- Behind the bed as a bedroom headboard alternative
- Inside a bookshelf for depth and color
- In a small bathroom for a spa feel
- On a kitchen backsplash for an inexpensive, speedy facelift
- On a staircase wall to create visual interest in a narrow space
Budget Breakdown
Peel-and-stick wallpaper costs between $1.50 and $4 a square foot, depending on the brand and pattern. For a typical accent wall (around 50 square feet), it’s going to cost you $75–$200 in total.
It’s a fraction of what traditional wallpaper or painting would cost — especially if you consider labor.
Pro tip: Measure your wall properly and order an extra 10–15% for pattern matching and mistakes. Far easier than trying to order more later and hoping the dye lot is a match.
Upgrade #3: Add Floating Shelves to Free Up Floor Space
Think Vertical, Not Horizontal
In a small home, floor space is gold. Every piece of furniture you put on the floor is floor space you lose. This is why thinking vertically is one of the best things you can do.
Floating shelves are a popular budget DIY upgrade for good reason. They attach directly to the wall with no visible brackets, giving a clean, modern appearance. And they work in every room.
Living room? Display books and plants. Kitchen? Store spices and small appliances. Bathroom? Organize towels and toiletries. Bedroom? Swap a bulky nightstand for a wall-mounted shelf.
How to Build or Buy Budget Floating Shelves
You have two options:
Option 1: Purchase pre-made floating shelves. IKEA’s LACK shelves are about $8–$12 each. They’re lightweight, easy to mount and come in various colors and sizes.
Option 2: Build your own. A 6-foot pine board is around $10–$15. Trim it to fit, sand it down, stain or paint it and mount it with hidden brackets. Total cost: $20–$35 or so per shelf — and it’ll look far more custom.
Floating Shelf Quick-Install Guide
- Use a stud finder to locate the studs in your wall.
- Measure and mark where you’d like to position the shelf using a pencil and level.
- Drill pilot holes into the studs.
- Mount the hidden brackets into the studs.
- Place the shelf onto the brackets.
- Done.
Once you get the hang of it, the whole process takes 20–30 minutes per shelf.
One important note: Always mount into studs for heavy items. Where there isn’t a stud where you need one, use sturdy wall anchors rated for the weight you intend to hang.
Upgrade #4: Refresh Cabinet Hardware for a Quick Kitchen or Bathroom Facelift
The Upgrade No One Talks About Enough
Here’s a little-known trick that interior designers use all the time: you don’t have to replace your cabinets for them to look brand new.
Just swap the hardware.
Cabinet pulls and knobs are like jewelry for your kitchen or bathroom. The right ones can transform the mood of a room — from dated to modern, from blah to beautiful — in a single afternoon.
How Big Is the Difference?
It’s honestly shocking. Old brass knobs on a cabinet can make it look decades out of date. Replace them with sleek matte black pulls, and the same cabinet resembles a high-end renovation.
This upgrade is most effective in kitchens and bathrooms, where cabinetry commands attention. But it also applies to dressers, media consoles and any other furniture that uses knobs or pulls.
Cost Comparison
| Hardware Style | Price Per Piece | Cost for 20 Cabinets |
|---|---|---|
| Basic replacement knobs | $1–$3 | $20–$60 |
| Mid-range pulls | $3–$8 | $60–$160 |
| High-end designer pulls | $10–$30+ | $200–$600+ |
For a full kitchen or bathroom refresh, mid-range pulls generally run $60–$160 total — and you can complete the whole swap in 1–2 hours with just a screwdriver.
Tips for Choosing the Right Hardware
- Match your fixtures. If your faucet is brushed nickel, choose brushed nickel pulls.
- Measure your existing holes before buying. Most pulls use standard 3-inch or 3.75-inch hole spacing.
- Use the same finish throughout the room for a consistent look.
- Don’t shy away from bold choices. Black, brass and oil-rubbed bronze are all on trend and work well in small spaces.
Upgrade #5: Build a Dual-Function Command Center at Your Entryway
How to Deal With Small Home Entryways
In a small home, the entryway sets the tone for everything else. It’s the first thing you notice when you walk in — and the first thing guests see, as well.
But the entryway is also a dumping ground in most small homes. Keys get lost. Mail piles up. Bags end up on the floor. Shoes multiply overnight.
A DIY command center fixes all of this in one fell swoop. It’s essentially one section of the wall dedicated to handling all of the daily chaos in one neat little place.
If you’re looking for more budget-friendly renovation ideas beyond just the entryway, Frugal Home Renovator is a fantastic resource packed with practical tips for making the most of every dollar you spend on your home.
What Goes Into a Command Center
A good command center includes:
- Hooks for keys, bags and jackets
- A small shelf or tray for mail, sunglasses and other daily-use items
- A corkboard or magnetic board to pin notes, schedules and reminders
- A phone and device charging station (optional)
- Shoe storage underneath — a simple bench with cubbies works great
You can create this whole setup using pegboard, IKEA shelves and a few accessories for less than $100.
Step-by-Step DIY Command Center Plan
- Select a wall close to your front door — preferably not in the main path of traffic.
- Hang a pegboard panel or 2–3 floating shelves at varying heights.
- Install eye-level hooks for bags and coats. Add smaller hooks lower down for keys.
- Put a small corkboard or whiteboard up for notes.
- Add a small bench or shoe rack underneath.
- Place a small tray or bowl on the lowest shelf for loose items.
The whole thing can be assembled in a weekend and will make your day-to-day routine so much smoother.
Upgrade #6: Paint a Room Strategically to Make It Feel Larger
Color Is More Influential Than You Realize
Paint is one of the most affordable upgrades you can make — and its impact is huge. A gallon of good paint costs $25–$50 and can radically alter the mood of a room.
But in a small home, it’s not only what color you choose. It’s how you use it.
According to Better Homes & Gardens, the right paint colors and techniques can visually expand even the tightest spaces — making paint one of the most powerful tools a small-home owner has.
Tricks That Help Small Spaces Feel Roomier
Go lighter on the walls. Light colors reflect more light, giving a room a more open feeling. Soft whites, pale grays and warm creams are all great choices.
Try a monochromatic approach. Paint the walls, trim and ceiling the same color (or very similar shades). It eliminates visual breaks and creates the impression of one continuous, larger space.
Paint the ceiling the same color as the walls. By default, most people paint ceilings white. But in a small room, matching the ceiling to the walls draws the eye upward and makes the room feel taller.
Use a darker color on one accent wall. This creates depth. The darker wall seems to “recede,” making the room feel longer or wider than it actually is.
Paint stripes horizontally. Horizontal stripes on a wall make a room feel wider. Vertical stripes give an illusion of height.
What a Paint Job Costs
| Room Size | Paint Required | Approximate Cost |
|---|---|---|
| Small bathroom | 1 gallon | $25–$50 |
| Small bedroom | 1–2 gallons | $25–$100 |
| Living room | 2–3 gallons | $50–$150 |
| Full apartment (DIY) | 4–6 gallons | $100–$300 |
Most small room paint jobs can be completed in a single weekend without any prior experience. All that’s required is a roller, a brush for corners, painter’s tape and a drop cloth.
How These 6 Upgrades Work Together
Each of these upgrades is powerful enough on its own. But when you put them together, the impact is stunning.
Here’s a straightforward visual breakdown of what each upgrade addresses:
| Upgrade | Main Benefit | Avg. Cost | Time to Complete |
|---|---|---|---|
| Pegboard wall | Storage & organization | $36–$63 | 2–3 hours |
| Peel-and-stick wallpaper | Visual interest & personality | $75–$200 | 3–5 hours |
| Floating shelves | Vertical storage | $20–$60/shelf | 30 min/shelf |
| Cabinet hardware swap | Instant facelift | $60–$160 | 1–2 hours |
| DIY command center | Daily organization | $50–$100 | 4–6 hours |
| Strategic paint | Makes rooms feel bigger | $25–$150 | 1–2 days |
You don’t need to do all six at once. Actually, it’s best to take your time. Choose the upgrade that solves your biggest problem first, and work your way down the list.
FAQs About Budget DIY Home Upgrades for Small Homes
Q: What’s a ballpark figure for budgeting these upgrades? A: Doing all six, you can expect to pay anywhere from $266 to $733 overall — depending on the size of your rooms and the materials you select. Spread over several months, that’s totally doable.
Q: Are these upgrades renter-friendly? A: Most of them are! Peel-and-stick wallpaper, pegboard walls (with proper anchors), floating shelves and the command center can all be removed without damaging walls. Always check your lease before drilling into walls.
Q: Would I need any special tools? A: Most of these projects require just a drill, a level, a stud finder, a tape measure and some basic hand tools. Most hardware stores rent tools if you aren’t ready to purchase.
Q: What home upgrade adds the most value? A: If pure resale or rental value is your goal, strategic painting provides the best return on investment. Cabinet hardware upgrades for kitchens and bathrooms come in a close second.
Q: Can I do these upgrades if I’m not handy at all? A: Yes! The peel-and-stick wallpaper and cabinet hardware swap require zero experience. The others have a relatively small learning curve, and there are fantastic video tutorials online for each one.
Q: How can I ensure my floating shelves don’t fall? A: Always mount into wall studs or use heavy-duty anchors rated for more weight than you intend to hold. Follow the weight limits specified by the bracket manufacturer.
Wrapping It All Up
You don’t need a big home — or even a big budget — to have a home you love.
These 6 budget DIY home upgrades for small homes show how a little creativity and some weekend effort can completely change the way your space looks and feels.
Whether that means starting with a fresh coat of paint, building a pegboard wall or doing the easiest upgrade first — swapping out cabinet hardware — every improvement you make is a step toward a home that works better for your life.
The best part? All of these projects are entirely do-it-yourself. No contractor. No designer. No giant bill at the end.
Just you, your tools, and a space ready to become something you can truly be proud of.
Pick one upgrade. Start this weekend. And see how quickly a small home can start to feel like everything you need.