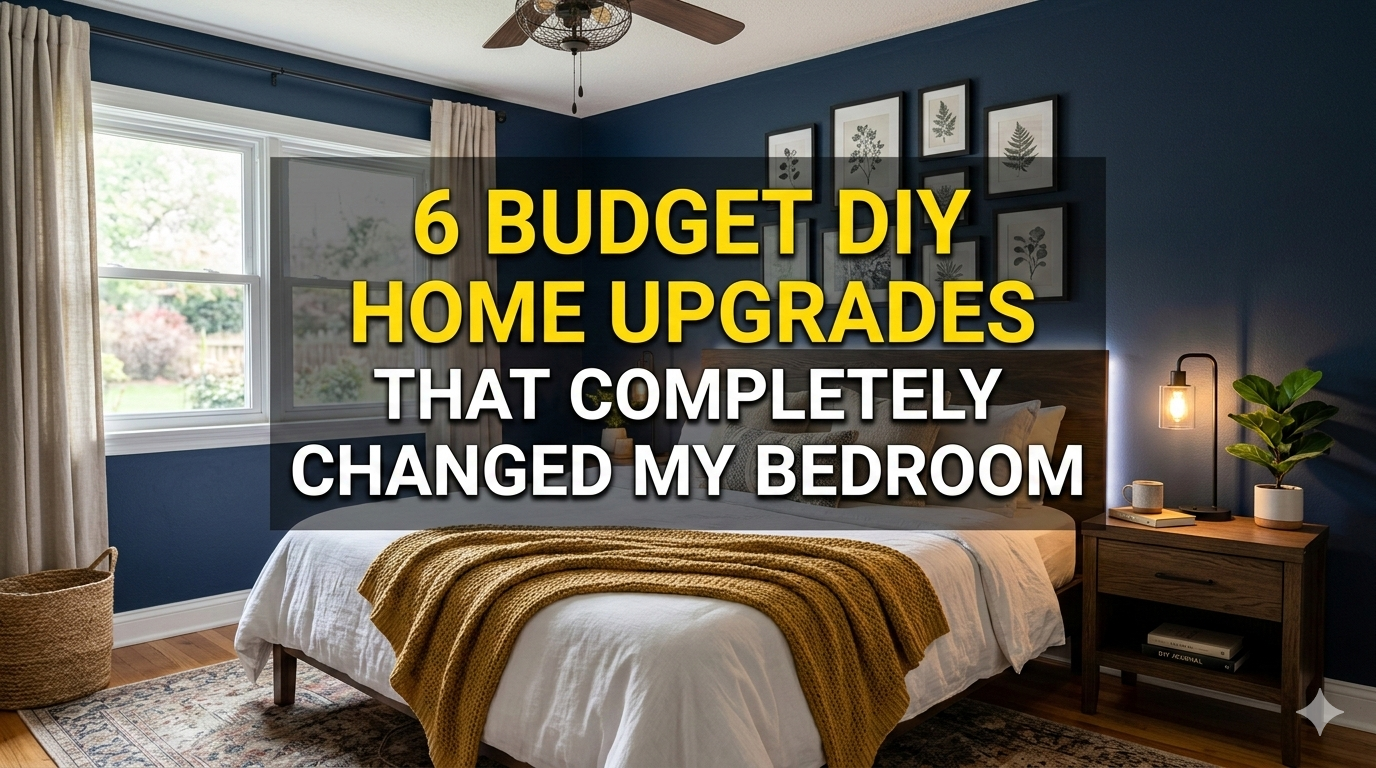
Meta Description: 6 Budget DIY Home Upgrades That Completely Changed My Bedroom — simple, cheap adjustments transformed my bedroom from drab to dreamy personal retreat.
6 Budget DIY Changes That Transformed My Bedroom
There’s something so quietly frustrating about getting up every single day and walking into your bedroom and feeling nothing.
No warmth. No personality. Just four walls, a bed, and a bunch of stuff that never finds its way home.
That was me about a year ago. My bedroom was like a storage unit I also sometimes slept in. I wasn’t ready to spend thousands of dollars on a full renovation, but I also could not continue living in a space that drained my energy as soon as I entered.
So I started small. Really small.
Six budget DIY home upgrades later, my bedroom looks plucked from a Pinterest board — and the damage? Under $200.
In this article, I’m going to lay out every single upgrade I’ve made, what I did, how much it cost, and the actual difference it made. Rent or own, have a weekend or just a few hours — these ideas are doable for nearly anyone.
Let’s get into it.
How Your Bedroom Environment Has More Impact Than You Think
Before we get into the upgrades, let’s discuss why this is even important.
Your bedroom isn’t just for snoozing. It influences your mood, the quality of your sleep, and how you feel when you wake up in the morning. Research consistently shows that cluttered or otherwise poorly designed environments lead to higher stress and poorer sleep.
A space that feels calm, intentional, and personal? It can truly transform your approach to beginning and ending each day.
The good news is you don’t need a huge budget to have an outsized impact. You need the correct upgrades in the right locations.
The 6 Budget DIY Home Upgrades at a Glance
| Upgrade | Approx. Cost | Time | Difficulty Level |
|---|---|---|---|
| Peel-and-Stick Accent Wall | $30–$60 | 2–4 hours | Easy |
| DIY Fabric Headboard | $25–$45 | 2–3 hours | Easy–Medium |
| Thrifted Nightstand Makeover | $10–$30 | 1–2 hours | Very Easy |
| LED Lighting + Curtain Glow | $15–$25 | 1 hour | Super Easy |
| Floating Shelves with Styling | $20–$40 | 2–3 hours | Easy–Medium |
| Closet Organization Overhaul | $20–$50 | 3–5 hours | Medium |
Total estimated cost: $120–$250
Now let’s dive deep on each one.
Upgrade #1: The Peel-and-Stick Accent Wall That Made Everyone Stop
Why One Wall Changes Everything
When people enter a room, their eyes instinctively seek out a focal point. Without it, the room is flat and forgettable.
An accent wall solves this instantly.
I picked the wall right behind my bed — the one you automatically stare at when entering the room. I used peel-and-stick wallpaper in a warm terracotta geometric print. No paint, no fuss, no landlord drama.
How I Did It
It was a simpler process than I thought it would be.
First, I cleaned the wall with a damp cloth and allowed it to dry completely. Then I measured the wall height and cut the panels just longer than needed. Beginning at the top center, I peeled back the backing, pressed the panel down flat, and ran a credit card over any bubbles.
The entire wall took roughly three hours, breaks included.
What It Cost
I purchased three rolls of peel-and-stick wallpaper from Amazon for about $42. That was enough for my 8×10 accent wall with some leftover.
The Result
Instant transformation. The wall went from builder-beige blah to truly beautiful. It became the backdrop for my bed, my mirror selfies, and honestly — the whole vibe of my room.
Pro Tip: Neutral tones — or earthy patterns — will help keep the look from becoming dated. Bold neon prints may feel fun now but can get tired quickly.
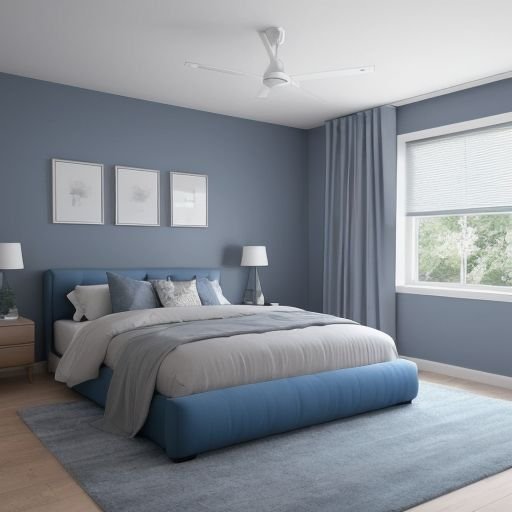
Upgrade #2: A DIY Fabric Headboard That Looks Expensive But Isn’t
The Problem With No Headboard
A headless bed is an incomplete bedroom. It’s one of those things you don’t notice until you change it, and then suddenly can’t not see.
I didn’t want to pay $200+ for a headboard from the store. So I made one for under $40.
Materials I Used
Here’s what you need:
- One plywood sheet (cut to your bed width, near 60 inches for a full/queen)
- 2-inch foam padding
- 1.5 yards of fabric (I used a dusty linen texture)
- A staple gun
- Command strips or a French cleat for hanging
Step-by-Step Process
Trim your foam to be the same size as your sheet of plywood. Lay your fabric down on the floor right-side facing down, place the foam on top of that, and the plywood on top of that. Wrap the fabric tightly around the back edges and staple every 2–3 inches. Fold the corners as if you were wrapping a gift — tight and neat.
Then hang it on the wall about 6 inches above your mattress with heavy-duty command strips or a French cleat if you want something more permanent.
That’s it. Seriously.
The Transformation
The fabric headboard made my bed look intentional and well styled. With matching pillowcases and a throw blanket, the entire sleeping area suddenly felt like a hotel room — in the best way possible.
Cost Breakdown:
| Item | Cost |
|---|---|
| Plywood (cut to size at hardware store) | $12 |
| Foam padding | $10 |
| Fabric (from a local craft store) | $14 |
| Staple gun (borrowed) | $0 |
| Total | $36 |
Upgrade #3: The Nightstand Makeover No One Saw Coming
Stop Ignoring Your Nightstands
Nightstands are surface furniture that people on the whole tend to write off. A scratched, mismatched nightstand next to a beautifully made bed is like wearing a nice outfit with dirty shoes.
I scored a wooden nightstand at a thrift store for $8. Solid wood, just ugly.
The Makeover Process
A light sanding with 120-grit sandpaper removed the old finish. Then I put a coat of white chalk paint on, waited two hours, and applied another coat. Once that dried, I waxed the entire surface using some dark wax, then wiped it off — that gave it a subtle aged look with an intentional weathered vibe.
Lastly, I replaced the old brass hardware with matte black drawer pulls from Amazon. Three pulls for $7.
The Total Cost
| Item | Cost |
|---|---|
| Thrifted nightstand | $8 |
| Chalk paint (small sample pot) | $6 |
| Dark wax | $5 |
| New drawer pulls | $7 |
| Total | $26 |
Why This Upgrade Hits Different
Refinishing a thrifted piece is immensely gratifying. You’re not just saving money — you’re giving something discarded a new life. And the end result is a genuinely custom look that no flat-pack furniture store can give you.
If you love the idea of stretching every dollar on home projects, Frugal Home Renovator is a fantastic resource packed with budget-friendly renovation ideas and real-world DIY inspiration.
Upgrade #4: LED Strip Lighting and Curtain Glow — The Mood Maker
Lighting Is Everything
This is the upgrade that most people sleep on (pun intended) — and also the one that gets mentioned the most when folks come to visit.
Overhead lighting — particularly the harsh, single-bulb variety — is the enemy of a cozy bedroom. It flattens everything. Good layered lighting, in contrast, gives a softness and warmth to a space that draws you in.
I did two things here.
Part 1: LED Strip Lights Behind the Bed Frame
I mounted a warm white LED strip along the back of my bed frame, tucked between the frame and the wall. With the main light off, it casts a soft halo glow behind the bed. It’s subtle, warm, and looks much more intentional.
Cost: $14 for a 16-foot roll of warm LED strips on Amazon.
Part 2: From Short to Long — The Curtain Upgrade
My previous curtains were short, flimsy, and sad. I replaced them with floor-to-ceiling white linen drapes — hung about 4 inches from the ceiling instead of at the window frame. This trick makes the ceiling seem taller and the windows seem larger.
The drapes cost $18 from IKEA. I already had the curtain rod hardware.
Total cost for this upgrade: ~$32
The Visual Impact
The difference between “before” and “after” the lighting upgrade is genuinely shocking. The room transitioned from dorm-room to boutique hotel suite — simply by changing where the light comes from and how the curtains hang.
According to the Sleep Foundation, warm-toned, dimmable lighting in the bedroom significantly supports better sleep quality — which makes this one of the most functional upgrades on the list, not just a visual one.
Quick Lighting Tips:
- Always go for warm white LEDs (2700K–3000K) in bedrooms — cool white feels clinical
- Hang curtains as high as possible, always floor-length
- Layer your light sources: overhead, bedside lamp, and ambient (like LEDs)
Upgrade #5: Floating Shelves Done Right — Function Meets Style
Empty Walls Are Wasted Walls
Prior to this upgrade, my bedroom walls were completely bare. No art, no shelves, nothing. It gave the room a blank waiting-room feel.
I added two floating shelves on the wall opposite my bed — not solely for storage, but as a styled display area.
Choosing the Right Shelves
I picked up two 24-inch pine floating shelves from a home improvement store for around $10 each. They came with concealed brackets and all the necessary hardware.
The Styling Formula
Here’s the simple formula I used for styling each shelf:
One tall item + one medium item + one small item + one natural element
For instance: a small framed print + a candle + a mini plant + a crystal or stone. This adds visual variety without looking cluttered.
Installation Tips
Use a stud finder before drilling. If you can’t hit a stud, use drywall anchors rated for at least 20 lbs. Level carefully — a crooked shelf is more noticeable than you might realize.
Cost Breakdown
| Item | Cost |
|---|---|
| 2 pine floating shelves | $20 |
| Decorative items (thrifted/on hand) | $15 |
| Total | $35 |
The Difference It Made
The shelves brought character to an otherwise totally lifeless wall. They also provided somewhere to display little things I love — photos, plants, books — and helped the room feel lived-in in the best way.
Upgrade #6: The Closet Organization Revolution That Saved My Mornings
Clutter Kills the Vibe
You can have the most beautifully designed bedroom on the planet, but if you open the closet door and chaos comes crashing out, the entire vibe is shot.
No other upgrade changed my mornings quite like this one.
What I Did
My closet had a single sad hanging rod and nothing else. I added:
- A second hanging rod (for shorter items like shirts and jackets)
- Two stackable clear bins on the top shelf
- An over-the-door organizer for shoes and accessories
- Matching velvet hangers to replace my mismatched plastic ones
The Matching Hanger Rule
This may sound small, but switching to matching velvet hangers is one of the most effective things you can do. When everything hangs on the same kind of hanger, the closet instantly looks far more organized — even if nothing else changes.
A 50-count pack of velvet hangers costs about $12 on Amazon.
Full Cost Breakdown
| Item | Cost |
|---|---|
| Second hanging rod | $8 |
| Clear stackable bins (2) | $14 |
| Over-the-door organizer | $12 |
| 50 velvet hangers | $12 |
| Total | $46 |
The Morning Difference
Every morning I used to spend 10 minutes sifting through a heap of clothes. Now I open the closet and can see everything — sorted and easy to grab. The stress reduction that came from this one simple change was immediate and real.
The Total Transformation: Before vs. After
| Area | Before | After |
|---|---|---|
| Walls | Plain beige, bare | Styled accent wall with floating shelves and decor |
| Bed Area | No headboard, flat lighting | Fabric headboard, warm LED glow |
| Furniture | Mismatched, worn | Refinished, cohesive look |
| Windows | Short, thin curtains | Floor-length linen panels |
| Closet | Chaotic, one rod | Organized with matching hangers and bins |
| Overall Feel | Dorm room | Boutique hotel |
Total spent: approximately $175
Savvy Shopping Tips to Minimize Costs
You shouldn’t pay full price for any of this. Here’s where I sourced most of my materials:
Thrift stores and Facebook Marketplace are goldmines for furniture pieces that just need a little love. I’ve scored solid wood nightstands, shelves, and frames for a fraction of retail.
Amazon basics and IKEA are great for functional items like LED strips, curtain panels, and organizational tools.
Craft stores almost always have 40–50% off coupons available digitally. Never waste money on chalk paint or fabric at full price.
Dollar Tree and Target’s Dollar Spot stock small décor items regularly — candles, small frames, and styling pieces that look great on shelves.
Frequently Asked Questions About Budget DIY Bedroom Upgrades
Q: Are there any special skills required to do these upgrades?
Most of these projects require no special skills. All six upgrades can be done if you are able to use a measuring tape, a staple gun, and follow simple instructions. The headboard and shelves take a little more patience, but nothing that would be impossible for a beginner who watches a YouTube tutorial first.
Q: Are these upgrades renter-friendly?
Most of them are. Peel-and-stick wallpaper removes cleanly from most painted walls. Command strips hold well and come off without damaging the wall. The curtain and LED upgrades are completely removable. The only upgrade that requires drilling is the floating shelves — don’t attempt that one without checking your lease first.
Q: How long does each upgrade take on a weekend?
You can realistically complete all six upgrades over a single weekend. Begin with the closet and accent wall on Saturday, and finish the headboard, nightstand, shelves, and lighting on Sunday. Total active work time should be between 12–16 hours.
Q: What if I don’t like the result of one of these upgrades?
Peel-and-stick wallpaper is fully reversible. Paint can be repainted. Shelves can be removed. None of these changes are permanent commitments. That’s one of the great things about DIY home upgrades — you can always backtrack, redo, or pivot.
Q: Where’s a good place to find inspiration for bedroom styling?
Pinterest and Instagram are still your best bets for bedroom décor inspiration. Searching terms like “cozy bedroom aesthetic,” “budget bedroom makeover,” or “DIY bedroom upgrade” will give you hundreds of ideas within minutes. Save what inspires you and figure out how to recreate it.
Q: Will these upgrades work in a small bedroom?
Absolutely. Many of these upgrades — particularly high-hung curtains, floor-to-ceiling curtain panels, and light layering — actively make tight spaces appear larger. Floating shelves are also an excellent space-saving storage solution for compact rooms.
Wrapping It All Up
Six upgrades. Under $200. One completely transformed bedroom.
What I hope you take away from this isn’t just the specific projects — it’s the mindset behind them. Creating a bedroom that feels good doesn’t require a big budget or professional help. It takes intention, some patience, and a willingness to experiment.
Start with one upgrade. Just one. See how it feels. Then add another. Before long, you’ll be walking into your bedroom and actually smiling — and that shift in how your space makes you feel? It’s completely worth it.
Your bedroom should be a retreat, not an afterthought. These 6 budget DIY home upgrades are proof that even the smallest changes, made with a little intention, can completely shift the vibe of your most personal space.
Now go grab that staple gun.