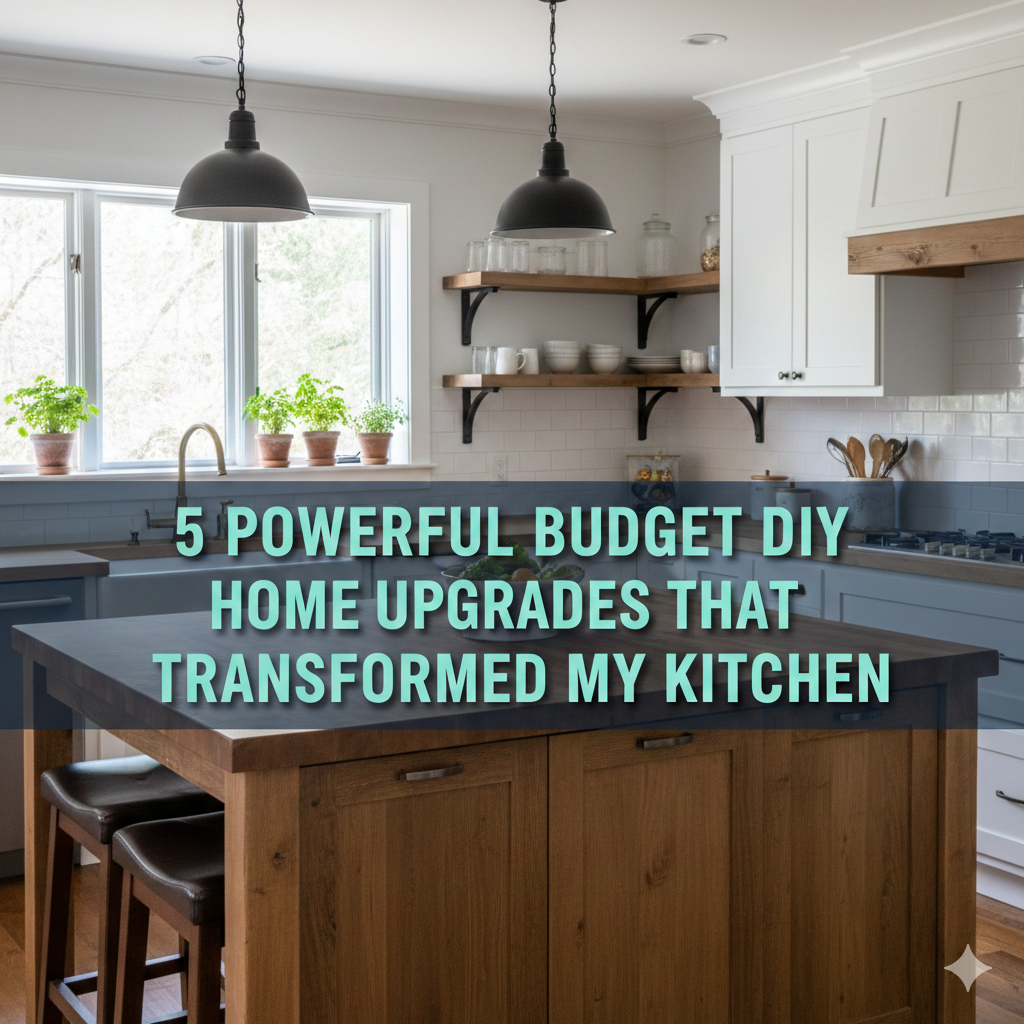
5 DIY Home Upgrades I Wish I Did Sooner (Budget-Friendly)
It’s the moment every homeowner knows. You go into a friend’s home and it just feels different. Nicer. More put together. And then you look around your own space and think — what’s missing?
Most of the time it’s not a complete renovation. It is not a $20,000 kitchen remodel or a contractor for three weeks. It is a few small, clever additions that quietly change the way a space looks and feels.
The best part? Most of them cost under $100.
For years, I assumed home upgrades required big budgets and big hassle. I was wrong. These five low-budget DIY home upgrades transformed my perspective on my space — and frankly I wish I had done them sooner. If you’re ready to stop staring at the same stale walls and actually fall in love with where you live, read on.
Why Budget DIY Home Upgrades Are Worth Your Time
Before we jump into the projects, let’s discuss why this stuff matters in the first place.
Not all home upgrades are about making your space more beautiful. They influence your mood, your productivity and even the value of your home if you put it on the market. In fact, real estate experts say minor cosmetic upgrades can add thousands of dollars to a home’s perceived value — even if the actual cost was only a few weekends and a trip to the hardware store.
DIY also puts you in control. You pick the style. You set the pace. And you have the satisfaction of saying, “I made that” while pointing to something in your home.
These upgrades are beginner-friendly. No special skills required. No expensive tools. Just a bit of time, patience and the desire to experiment.
Upgrade #1 — Replace Your Cabinet Hardware (The Room’s Quickest Makeover)
Why This One Change Is So Impactful
Cabinet hardware is one of those things you stop noticing after a while. The brass knobs that came with the kitchen in 2005 simply fade into the background. But as soon as you replace them? The whole room wakes up.
New handles and knobs are the quickest, cheapest way to make a kitchen or bathroom feel more modern without having to touch a single cabinet door. It’s purely cosmetic — and the visual difference is enormous.
What It Costs
| Item | Estimated Cost |
|---|---|
| Cabinet knobs (10-pack) | $15 – $30 |
| Bar pulls / handles (10-pack) | $20 – $45 |
| Screwdriver (if you don’t own one) | $5 – $10 |
| Total | $40 – $85 |
How to Do It
Start by counting your cabinets and drawers. If you’re replacing existing hardware, measure the hole spacing before purchasing new pieces — most standard pulls are drilled 3 inches or 3.75 inches apart. When uncertain, buy a few extra.
Unscrew the old hardware with a screwdriver. Align your new piece, feed the screw through from behind the cabinet and tighten. That’s it. You’ll spend longer selecting the finish than installing it.
Best Finish Picks Right Now
Matte black is the modern, bold choice. Brushed gold adds warmth. Brushed nickel is classic and pairs with just about everything. If you want a finish that doesn’t show every fingerprint, steer clear of bright chrome.
Upgrade #2 — Paint an Accent Wall (The Room Transformer You’re Still Overlooking)
Stop Thinking It’s Too Hard
Many people skip painting because it seems messy, time-intensive or risky. What if they choose the wrong color? What if it looks bad? But here’s the thing — an accent wall is a low-commitment endeavor. If you hate it, you just paint over it. Simple.
An accent wall brings depth, personality and a focal point to any space. It gives your room a feeling of purpose rather than something generic. And one gallon of paint covers roughly 400 square feet, so the average accent wall costs less than $30 in paint alone.
What It Costs
| Item | Estimated Cost |
|---|---|
| One gallon of paint | $25 – $45 |
| Painter’s tape | $5 – $10 |
| Roller + tray kit | $10 – $15 |
| Small brush (for edges) | $4 – $8 |
| Total | $44 – $78 |
Picking the Right Wall
Pick the wall your eye gravitates to as you walk into the room. This is typically the wall behind a bed’s headboard, opposite the front door in a living room, or behind a couch. That’s your accent wall.
Choose a wall with as few windows or doors as possible — you want a clean, unbroken surface.
Color Tips That Actually Work
Dark, moody tones like forest green, navy blue, terracotta and charcoal look amazing as accent walls. They feel rich without being overkill. Pair them with light or neutral furniture for contrast.
If you’re hesitant about going dark, try a warm off-white or sage green. These shades add personality without being too loud.
Step-by-Step Process
Start with a clean wall — dust and grease prevent paint from adhering well. Apply painter’s tape along the ceiling, baseboards and adjacent walls. Use your small brush to “cut in” along the edges first. Then use your roller in a W pattern to fill the middle for even coverage. Two coats is nearly always better than one.
Allow the first coat to dry thoroughly — typically two hours — before applying a second.
Upgrade #3 — Apply Peel-and-Stick Backsplash Tiles (The Kitchen Glow-Up That Takes an Afternoon)
Why This Upgrade Gets Underestimated
Peel-and-stick backsplash tiles are often dismissed as “fake” or “cheap-looking.” But today’s options are vastly improved. The right tile, installed well, is almost impossible to tell apart from the real thing within a few feet.
More importantly, they’re renter-friendly — removable, requiring zero grout, zero wet saw and zero tile experience. They’re truly one of the most satisfying budget DIY home upgrades you can tackle on a Saturday. For more inspiration on affordable renovation ideas, check out Frugal Home Renovator — a great resource for budget-conscious homeowners.
What It Costs
| Item | Approximate Cost |
|---|---|
| Peel-and-stick tile sheets (30 sq ft) | $40 – $80 |
| Measuring tape | $5 – $10 |
| Utility knife + cutting mat | $10 – $20 |
| Level | $8 – $15 |
| Total | $63 – $125 |
Where to Use Peel-and-Stick Tiles
The most popular choice: the kitchen backsplash behind the stove or sink — and for good reason. It’s a high-visibility space that takes the brunt of grease and steam, so any improvement here makes a big difference.
Other great spots include bathroom walls above the vanity, inside a bookshelf for a bold pop of color, or even a laundry room wall.
How to Achieve a Clean, Professional Look
Preparation is everything. Degrease the surface thoroughly — any grease or residue will cause tiles to peel later. Start with the wall completely dry.
Work outward from the center of the wall. This keeps your pattern balanced. Always use a level — even minor tilt becomes more pronounced as you work upward. Press each tile firmly with a roller or credit card to eliminate air bubbles.
For edges and corners, score the tiles with a utility knife and a straight edge, then snap them cleanly. Take your time here. It’s rough cuts that make DIY tile look “cheap.”
Upgrade #4 — Swap Out Your Light Fixtures (The Glow-Up That Changes Everything)
The Problem With Builder-Grade Lighting
The same near-identical generic lighting appears in nearly every home built over the last 30 years. Flush-mount dome fixtures. Plain chrome bathroom bars. Boob lights. They function fine, but they have no personality — and they date your space badly.
Replacing a light fixture is one of the most impactful changes you can make to a room. The right fixture can instantly transform a space’s mood, its perceived ceiling height and its overall feel.
And the good news? It’s not as scary as it sounds. Swapping out a fixture is straightforward DIY work as long as you take the proper safety precautions.
What It Costs
| Item | Estimated Cost |
|---|---|
| New ceiling light fixture | $30 – $120 |
| New bathroom vanity bar | $40 – $100 |
| Wire nuts (usually included) | $0 – $5 |
| Voltage tester (safety tool) | $10 – $20 |
| Total | $40 – $145 |
Safety First — Always
Switch off the circuit breaker for that room before you start. Don’t just flip the wall switch — that only disconnects power to the fixture, not the whole circuit. Use a voltage tester to confirm no power is running through the wires before you touch anything. This $10 tool is non-negotiable.
How to Swap Out a Plain Ceiling Fixture
Turn off the breaker. Remove the cover from the old fixture and unscrew it from the ceiling box. You’ll see three wires: black (hot), white (neutral) and green or bare copper (ground). Take a photo before disconnecting anything — your future self will thank you.
Unscrew the wire nuts to detach the old fixture’s wires. Connect your new fixture the same way: black to black, white to white and ground to ground. Fasten the mounting bracket, attach the fixture and restore power to test.
A first-time replacement generally takes 30–45 minutes. For a visual walkthrough of the process, this step-by-step guide from This Old House is a helpful reference.
Styles Worth Considering
Rattan and woven pendant lights bring warmth and texture. Black iron fixtures offer an industrial, modern touch. Drum shades soften a room. If there’s no overhead light in your dining area, a plug-in pendant hung on a hook delivers the look with zero wiring required.
Upgrade #5 — Install Floating Shelves (Functional, Beautiful & Much Easier Than You Think)
Storage That Also Looks Good
Most homes lack adequate storage. But most people also don’t want to pack every wall with bulky cabinets. Floating shelves solve both problems. They provide storage and display space while keeping walls feeling open and airy.
Done correctly, floating shelves look as though they were professionally installed. Done incorrectly, they tilt, sag or pull out of the wall within a year. The difference comes down entirely to how you mount them.
What It Costs
| Item | Estimated Cost |
|---|---|
| Floating shelf (set of 2–3) | $20 – $60 |
| Wall anchors + screws (if needed) | $5 – $10 |
| Level | $8 – $15 |
| Stud finder | $10 – $25 |
| Total | $43 – $110 |
The Right Way to Install Shelves
Find your studs first. Studs are the vertical wooden beams behind your drywall, typically spaced 16 inches apart. A stud finder ($10–$25 at any hardware store) makes this easy. Drilling into a stud gives you an anchor with real holding power. Drywall alone holds very little.
Lightly mark your stud locations with a pencil. Place a level against the wall where your shelf will go and draw a straight, level line. Pre-drill holes into the studs before driving your screws — this prevents the wood from splitting and makes for a cleaner result.
If your stud placement doesn’t align with the shelf brackets, use heavy-duty drywall anchors. These expand behind the drywall and can hold 50+ pounds each. Avoid the cheap plastic ones that often come in the box — they’ll pull out of the wall easily. Use toggle bolts or snap toggles for real holding power.
Where Floating Shelves Have the Biggest Impact
A staggered set of three shelves in the corner of a living room creates an intentional, custom display area. A single shelf above the toilet in a bathroom turns dead wall space into usable storage. In a kitchen, open shelves on either side of a window offer an alternative to upper cabinets — and make the space feel bigger and more personal.
Styling Your Shelves (The Part Everyone Skips)
Installing the shelves is only half the work. How you style them determines whether the result looks magazine-worthy or cluttered.
Stick to the rule of odd numbers — three of anything looks better than two or four. Mix heights and textures. A tall plant next to a short stack of books next to a candle works beautifully. Don’t place everything at the same height. Leave space between objects. Less is almost always more.
Quick Comparison: All 5 Upgrades at a Glance
| Upgrade | Difficulty | Time Required | Avg. Cost | Visual Impact |
|---|---|---|---|---|
| Cabinet Hardware | Very easy | 1–2 hours | $25–$75 | High |
| Accent Wall | Easy | 4–6 hours | $44–$78 | Very high |
| Peel-and-Stick Backsplash | Easy–medium | 3–5 hours | $63–$125 | High |
| Light Fixture Swap | Medium | 1–2 hours | $40–$145 | Very high |
| Floating Shelves | Easy–medium | 2–4 hours | $43–$110 | High |
Common Budget DIY Mistakes to Avoid
No matter how simple a project seems, skipping the fundamentals will cost you. Here’s what trips people up most often.
Not prepping surfaces. Paint peels. Tiles fall off. Screws strip. Nearly all of these issues originate from skipping surface prep. Clean everything before you start.
Buying too much or too little material. Measure twice, buy once — and add 10% for mistakes. Running out mid-project and waiting on a second store run kills momentum.
Skipping the level. Crooked shelves and tiles are immediately obvious. Use a level every time. It adds 30 seconds and saves a world of regret.
Rushing the dry time. Whether it’s paint, adhesive or caulk — allow the full recommended drying time before moving on. That patience will save you hours of fixing later.
FAQ About Budget DIY Home Upgrades
How much should I budget for beginner DIY home upgrades? Most projects in this guide run between $25 and $150 per upgrade. If you’re starting with zero tools, budget around $300–$500 to tackle all five upgrades. Once you have the basic tools, future projects become much cheaper.
Do I need experience to attempt these upgrades? No. Each of these upgrades is completely beginner-friendly. Swapping out a light fixture requires some basic electrical work, but it’s very manageable for a first-timer as long as you turn the breaker off and use a voltage tester.
Will peel-and-stick tile damage my walls when removed? Most peel-and-stick tiles can be removed cleanly when peeled slowly at a low angle in a warm environment. They’re generally considered renter-friendly, though some adhesives can be a little messy on removal. If you’re concerned, test a small spot first.
What’s the most impactful upgrade on this list? The accent wall and the light fixture swap are tied for biggest visual impact per dollar. If you can only choose one, go with the accent wall — it’s the most forgiving and most customizable.
Will these upgrades increase my home’s resale value? Yes, though modestly. Updated fixtures, fresh paint and modern hardware all contribute to a home looking well-maintained and move-in ready — which buyers appreciate. They won’t add tens of thousands in value, but they definitely strengthen the first impression, which is huge in real estate.
How do I find studs without a stud finder? Knock on the wall and listen for a solid thud rather than a hollow sound. You can also look for slight dimples or raised spots on your drywall — these often appear where nails or screws were used during installation. A strong magnet can even detect the screws inside studs. That said, a $10–$15 stud finder is a worthwhile investment.
The Bigger Picture: Small Changes, Real Results
Here’s what no one tells you about budget DIY home upgrades: the point isn’t perfection. The point is progress.
You don’t have to transform your entire home in one weekend. Pick one project. Do it well. Step back and admire your work. Let that quiet sense of satisfaction settle in — that’s the whole point.
Each of these five upgrades is a building block. Cabinet hardware builds your confidence. The accent wall develops your eye for color. The backsplash teaches patience and prep. The light fixture shows you that electrical work doesn’t have to be scary. The shelves reinforce that measuring and leveling are skills that pay off forever.
Start small. Build momentum. And don’t wait for the “right time” — you live in your home every day. It should feel like it belongs to you.
You’ve got everything you need. All that’s left is to begin.