Meta Description: 4 Budget DIY Home Upgrades That Made My Yard Look Huge — discover the simple, affordable tricks I used to transform a cramped outdoor space into something amazing.
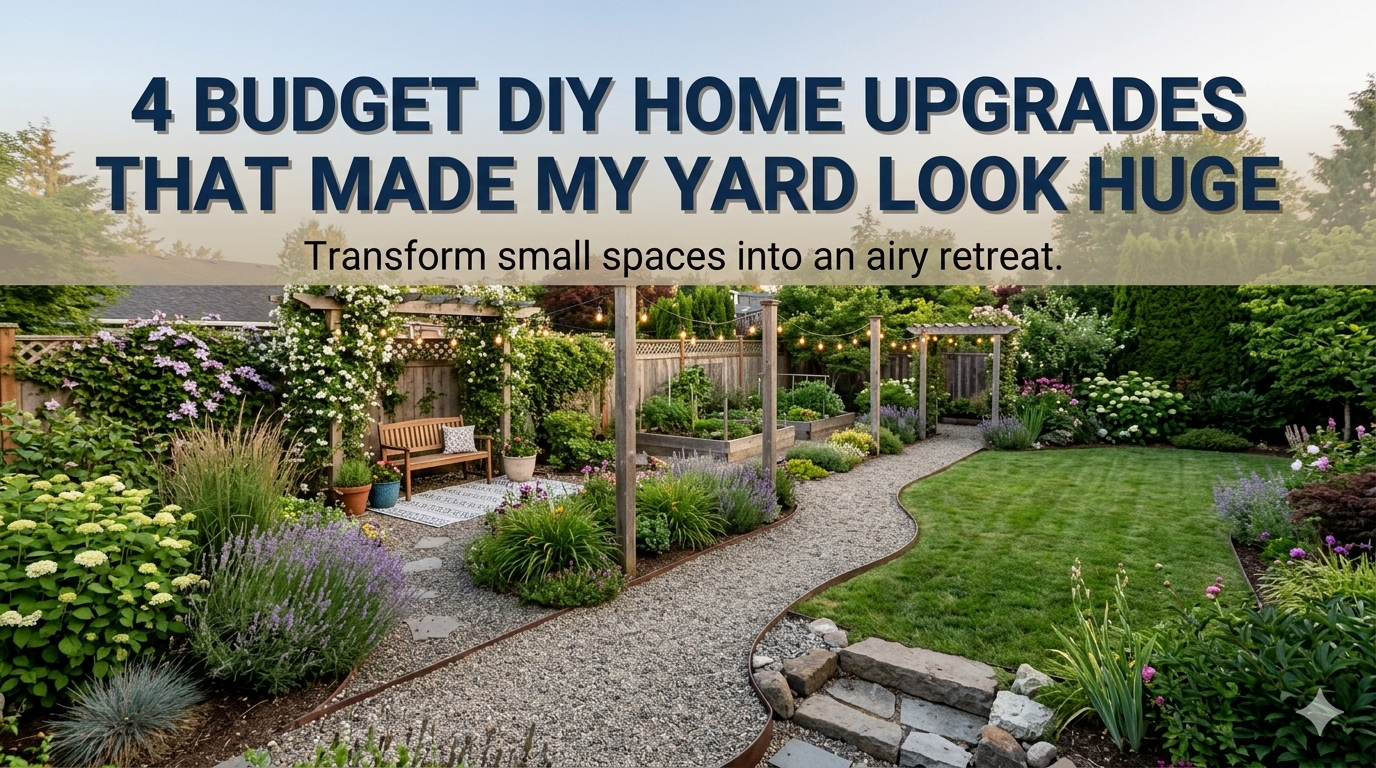
4 Budget DIY Home Upgrades That Made My Yard Look Huge
My backyard used to feel like a postage stamp.
Every time I stepped outside, I felt boxed in. The grass was patchy, the fence felt like it was closing in on me, and there was no real flow to anything. It just looked small, sad, and forgotten.
But here’s the thing — I didn’t have thousands of dollars to throw at a landscaper. I had a weekend, a tight budget, and a serious need to make my outdoor space feel bigger.
So I started experimenting.
Over a few months, I tried different DIY upgrades that didn’t cost a fortune. Some flopped. But four of them? They genuinely transformed how my yard looked and felt. Friends started asking if I had knocked down a fence or added square footage. I hadn’t. I just worked smarter.
In this article, I’m breaking down exactly what I did, how I did it, and what it cost. Whether you’ve got a tiny backyard, a narrow side yard, or just a space that feels cramped, these ideas will help.
Let’s get into it.
Why Small Yards Feel Even Smaller (And How to Fix That)
Before jumping into the upgrades, it helps to understand why yards feel small in the first place.
Most of the time, it’s not actually about square footage. It’s about visual cues. Our brains read a space as “small” when there’s clutter, no clear paths, no layers of depth, and nothing drawing the eye outward.
Think about it like a room inside your house. A room with furniture shoved against every wall, no rugs, and bad lighting feels cramped. The same room with intentional furniture placement, a good rug, and a lamp in the corner feels open and airy.
The yard works the same way.
By changing a few visual elements — the lines, the layers, the lighting, and the edges — you can trick the eye into seeing more space than is actually there. That’s exactly what these four upgrades do.
Upgrade #1 — Lay a Diagonal Path to Stretch the Eye
Why Diagonal Lines Work Like Magic
Here’s something most people don’t realize: the direction of lines in your yard affects how large it looks.
Straight paths that run parallel to your fence or house make the yard feel shorter. They cut the space into blocks. But diagonal lines? They force the eye to travel across the longest possible distance in the yard — corner to corner — which makes everything feel wider and deeper.
This is the same trick interior designers use with diagonal hardwood floors in small rooms. It works outdoors just as well.
How I Built Mine for Under $80
I didn’t use fancy pavers or hire anyone. I grabbed a bag of pea gravel, some basic edging stakes, and a few flat stepping stones from a local hardware store.
Here’s roughly what the project cost me:
| Material | Quantity | Approx. Cost |
|---|---|---|
| Flat stepping stones (12×12) | 12 pieces | $30 |
| Pea gravel (50 lb bag) | 2 bags | $18 |
| Plastic lawn edging | 1 pack | $14 |
| Landscape fabric | 1 roll | $12 |
| Total | ~$74 |
I mapped out a gentle diagonal line from my back door toward the far corner of the yard. I laid down the landscape fabric first to stop weeds, then bordered it with the edging stakes, filled it with gravel, and dropped the stepping stones evenly spaced along the path.
The whole thing took about four hours.
The Result
The path immediately pulled the eye toward the back corner. The yard didn’t get any bigger. But it suddenly felt like there was a destination — somewhere to walk toward. That sense of journey made the space feel longer.
Pro tip: Don’t make the path go perfectly straight to the corner. Give it a very slight curve. Curved paths feel more natural and add even more visual depth.
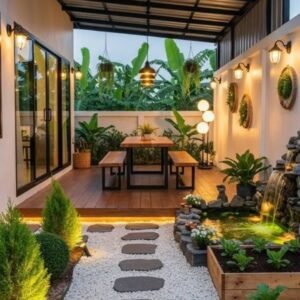
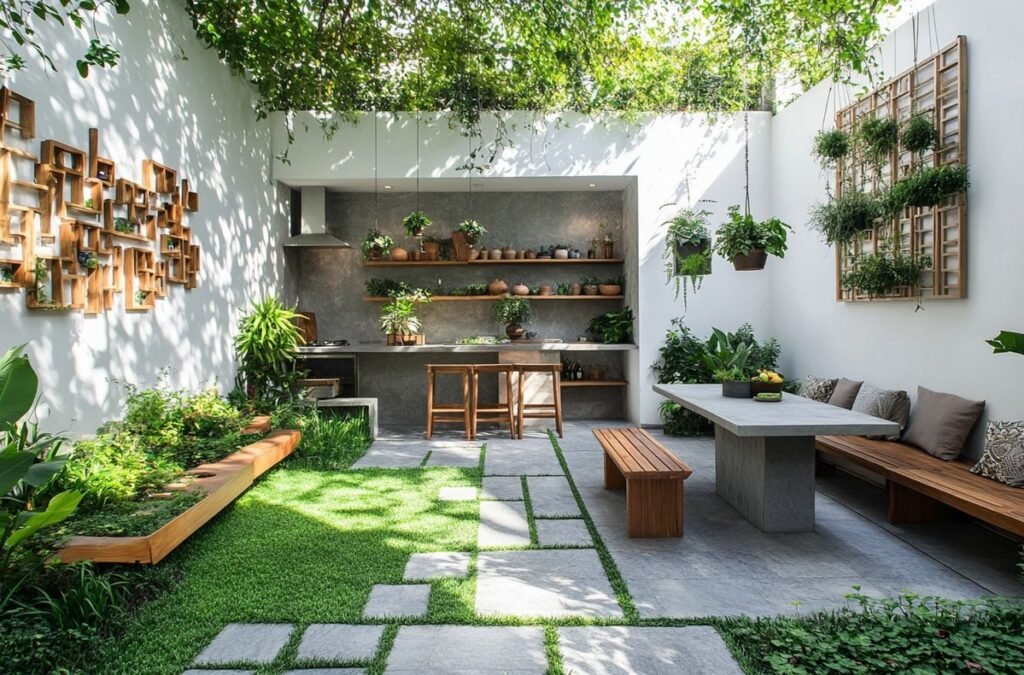
Upgrade #2 — Build a Vertical Garden Wall on a Dead Fence
Stop Wasting Vertical Space
Most people look down when they think about yard space. They think about square footage — how much ground they have. But if your yard is small, the ground isn’t where your opportunity is. Your opportunity is going up.
A blank wooden fence is wasted potential. It’s a wall that does nothing but define a boundary. But turn that fence into a vertical garden, and suddenly it becomes a living, layered backdrop that adds tremendous depth to the yard.
Vertical elements make you look up. And when your eyes move upward, the whole space feels taller and more expansive.
What I Used and What It Cost
I built a simple vertical planter system using wooden pallets and small hanging planters. You can find free pallets from hardware stores, garden centers, or furniture shops — many of them give them away.
Here’s my rough breakdown:
| Item | Cost |
|---|---|
| Wooden pallets (reclaimed) | Free |
| Small plastic hanging pots (set of 10) | $18 |
| Exterior wood paint (1 quart, white) | $12 |
| Potting mix (2 cubic ft) | $10 |
| Trailing plants (ivy, sweet potato vine) | $16 |
| Total | ~$56 |
I painted the pallets bright white before mounting them. This was a game-changer. White reflects light, which visually pushes the fence back and makes it feel farther away.
I then filled the hanging pots with trailing plants — things like ivy, creeping jenny, and sweet potato vine. These spill downward and create soft, cascading layers of green.
Why It Works So Well
The vertical garden does three things at once:
First, it adds height, which expands the visual field upward. Second, the layers of foliage create depth — your eye has to travel through several planes of green before hitting the fence. Third, the white-painted background acts like a mirror for natural light, brightening the whole area and making it feel more open.
Quick note on plant choices: Go for trailing or climbing plants rather than bushy ones. Trailing plants hang down and create flowing lines. Bushy plants just look cluttered, which is the opposite of what you want.
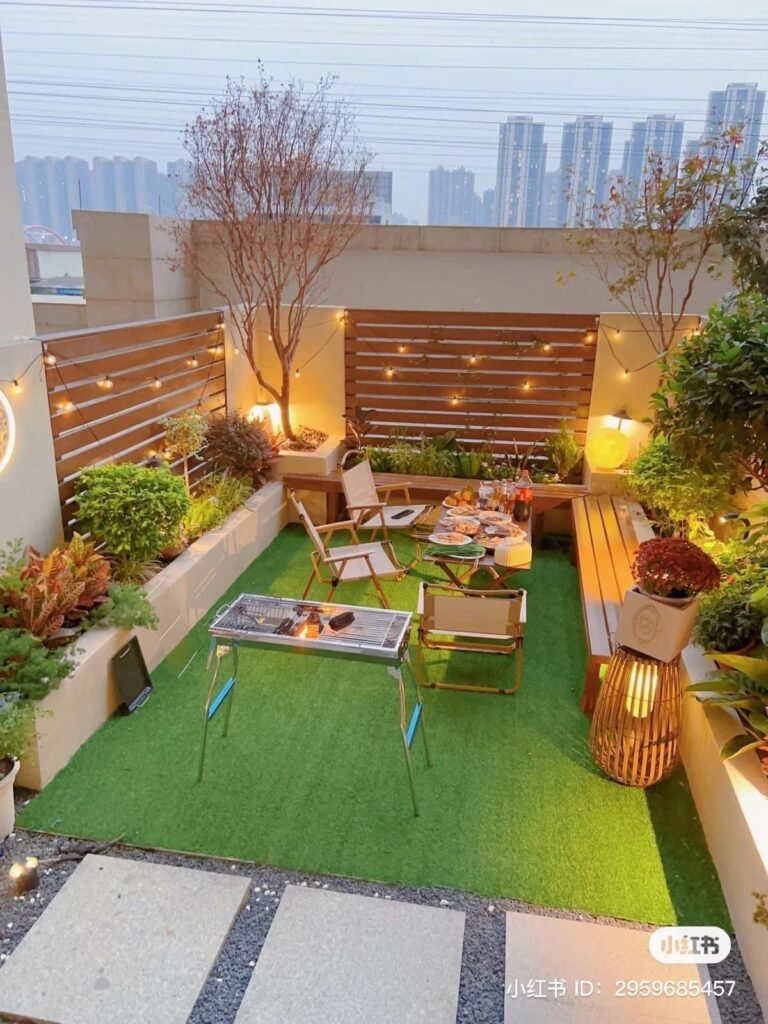
Upgrade #3 — Install Solar String Lights Along the Perimeter
Light Changes Everything
This one surprised me the most.
I added solar string lights along the top of my fence and through a couple of small bushes near the back of the yard. I did it mainly because it looked pretty. But the effect on how large the yard felt — especially in the evenings — was dramatic.
Here’s why it works: when you light the far edges and corners of a space, you draw attention outward. Your eye follows the light. And when your eye travels all the way to the back corner, your brain registers the full size of the space. Without lighting, the back of the yard just fades into shadow, and the whole area looks smaller than it is.
Think of it like stage lighting. A theater stage looks tiny with just house lights. But add dramatic lighting that hits every corner of the stage, and suddenly the space feels huge.
What the Setup Looked Like
I used three sets of solar string lights — each about 33 feet long. I ran them along the top rail of the fence around the back perimeter and used small clips to hold them in place.
| Item | Cost |
|---|---|
| Solar string lights x3 (33ft each) | $45 |
| Outdoor clips/hooks (pack of 50) | $8 |
| Total | ~$53 |
No wiring, no electrician, no digging. The solar panels clip right onto the top of the fence and charge during the day. By evening, the lights come on automatically.
Daytime vs. Nighttime Effect
Here’s something interesting — the lights actually help during the day too. Even when they’re not lit up, the string of lights along the fence line creates a visual border that outlines the full perimeter of the yard. It frames the space clearly, which helps the brain perceive the full size of the area.
| Time of Day | Visual Effect |
|---|---|
| Daytime | Defines and frames the yard’s perimeter |
| Twilight | Soft glow draws the eye outward |
| Nighttime | Creates depth and expands visual boundary |
Pro tip: Warm white lights (2700K–3000K) feel cozier and more natural. Cool white lights can look harsh outdoors. Stick with warm tones.
Upgrade #4 — Edge the Lawn Crispy Clean and Add a Mulch Border
The Most Underrated Trick in Landscaping
This one costs almost nothing and takes about two hours. But the difference is shocking.
Crisp, clean lawn edges do something powerful — they add definition. And definition makes a space look intentional, polished, and larger. A yard with blurry, overgrown edges where the grass blurs into the garden bed and the path looks like a mess. A yard with sharp, clean edges looks like it was designed by a professional.
It’s the outdoor equivalent of making your bed. Same room. Same furniture. But suddenly it looks twice as put-together.
What “Edging” Means
Edging is just cutting a clean, sharp line between your grass and whatever is next to it — a path, a flower bed, a fence line, or a patio.
You can use a manual half-moon edger (about $20) or a simple spade. Run it along every border where grass meets something else. Then pull out the loose grass and debris.
After edging, I added a 2–3 inch layer of dark brown mulch to all the garden beds along the fence. Dark mulch creates strong contrast against green grass and light-colored plants. That contrast is what gives the yard its visual “pop” and makes each area look distinct and well-planned.
Full Cost Breakdown
| Item | Cost |
|---|---|
| Manual half-moon edger | $20 |
| Dark brown mulch (2 cubic ft bags x4) | $28 |
| Total | ~$48 |
This is the cheapest upgrade of the four, and honestly, it might be the one that made the biggest difference per dollar spent.
Why Clean Edges Make Spaces Look Bigger
When your yard has clearly defined zones — a grass area, a garden bed, a path — the brain reads each zone as a separate “room.” And a yard with multiple rooms feels more complex, layered, and spacious than one that’s just a flat, undefined patch of green.
It’s a psychological trick. You’re not adding space. You’re adding structure. And structure reads as size.
All Four Upgrades Together: The Combined Effect
Here’s what makes these four upgrades so powerful when combined:
Each one targets a different visual element of the yard:
| Upgrade | What It Targets | Visual Effect |
|---|---|---|
| Diagonal path | Ground-level lines | Stretches depth and draws eye to far corner |
| Vertical garden wall | Height and layering | Adds dimension and reflects light |
| Solar string lights | Perimeter lighting | Illuminates and defines full boundaries |
| Clean edges + mulch | Structure and contrast | Creates distinct zones, adds polish |
Together, they hit every angle — ground, height, light, and definition. The result is a yard that feels layered, designed, and spacious.
Total spent across all four upgrades: approximately $231.
That’s it. For around $230, my yard went from feeling like a sad patch of grass to a space I actually want to spend time in.
Tips Before You Start Any of These Projects
A few things I wish I’d known before diving in:
Start with edging. It’s the cheapest and fastest upgrade. Do it first, and you’ll immediately see improvement. It also helps you plan where to put the path and mulch beds.
Buy plants from local garden swaps or Facebook Marketplace. You can often get trailing plants, ground cover, and small shrubs for free or next to nothing from gardeners who are dividing their stock.
Don’t overcrowd. The biggest mistake people make in small yards is adding too much. More stuff doesn’t make it feel bigger — it makes it feel busier. Keep it simple, defined, and intentional.
Work with your yard’s shape. If your yard is long and narrow, run the diagonal path across the width, not the length. If it’s wide and shallow, use tall vertical plants to add height. Play to your yard’s proportions.
Budget Summary: All Four Upgrades at a Glance
| Upgrade | Estimated Cost |
|---|---|
| Diagonal gravel path | $74 |
| Vertical garden wall | $56 |
| Solar string lights | $53 |
| Clean edges + mulch border | $48 |
| Grand Total | ~$231 |
FAQs
Q: Do these upgrades work for really tiny yards, like under 200 square feet? Absolutely. In fact, the smaller the yard, the more impactful these tricks are. Visual depth tricks work best when you’re trying to compensate for limited actual space.
Q: How long do solar string lights last? Most quality solar string lights last 2–4 years with proper care. Keep the solar panels clean and store the lights indoors during harsh winters to extend their life.
Q: Do I need any special skills for the diagonal path? No. If you can dig a shallow trench, lay landscape fabric, and set down stones, you can do this. No cutting, no leveling equipment, no special skills needed.
Q: What if my fence is in bad shape — is the vertical garden still worth it? Yes, and it’s even more useful. The vertical garden actually hides fence imperfections behind greenery. Paint it first with exterior paint to protect it, then mount your planters.
Q: How often does the mulch need to be replaced? Dark mulch typically fades and breaks down over one to two seasons. Add a fresh layer each spring to keep the contrast strong and the beds looking sharp.
Q: Can I do all four upgrades in one weekend? With help, yes. Solo, you’ll probably want two weekends — one for the path and edging, another for the vertical garden and lights. Don’t rush the path; getting the diagonal line right takes a bit of patience.
Q: Will these ideas work in a front yard too? Definitely. The diagonal path and clean edges work especially well in front yards. The vertical garden works great on a side fence or garage wall. Solar lights along the front perimeter look stunning at night.
The Bottom Line
A small yard doesn’t have to feel small.
The four upgrades I shared — a diagonal gravel path, a vertical garden wall, solar perimeter lighting, and crisp edged beds with dark mulch — cost me about $231 in total. They took a few weekends. And they completely changed how my yard looks and feels.
None of it required professional help. No permits. No heavy equipment. Just smart, intentional changes that work with how the human eye reads space.
The biggest lesson I took away from all of this: your yard doesn’t need to be bigger — it needs to be better organized. Give your outdoor space clear lines, some height, good lighting, and defined zones, and it will feel twice as large.
Pick one upgrade to start with this weekend. I’d bet money that once you see the difference, you’ll be back out there the following weekend finishing the rest.